How to Eliminate a Halo in Photoshop

I learned this technique from a landscape photographer who is a true expert in post-processing. Although this is an easy technique to explain and master, it is extremely useful.

The Problem: Halo’s on the Horizon

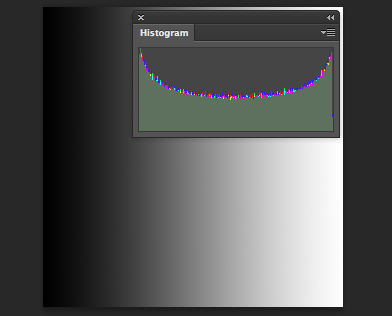
It is fairly common in landscape photography to post-process the sky differently than the foreground. For example, many landscape photographers like their skies darkened. It is also common to add sharpening to an image, which gets applied to edges. Both of these techniques, and especially when used together, can cause “halo’s”… or light lines that run along a transition zone, such as a horizon line or along the top of a mountain. I see these halo’s all the time. They look bad, especially if you enlarge your image, such as for print.

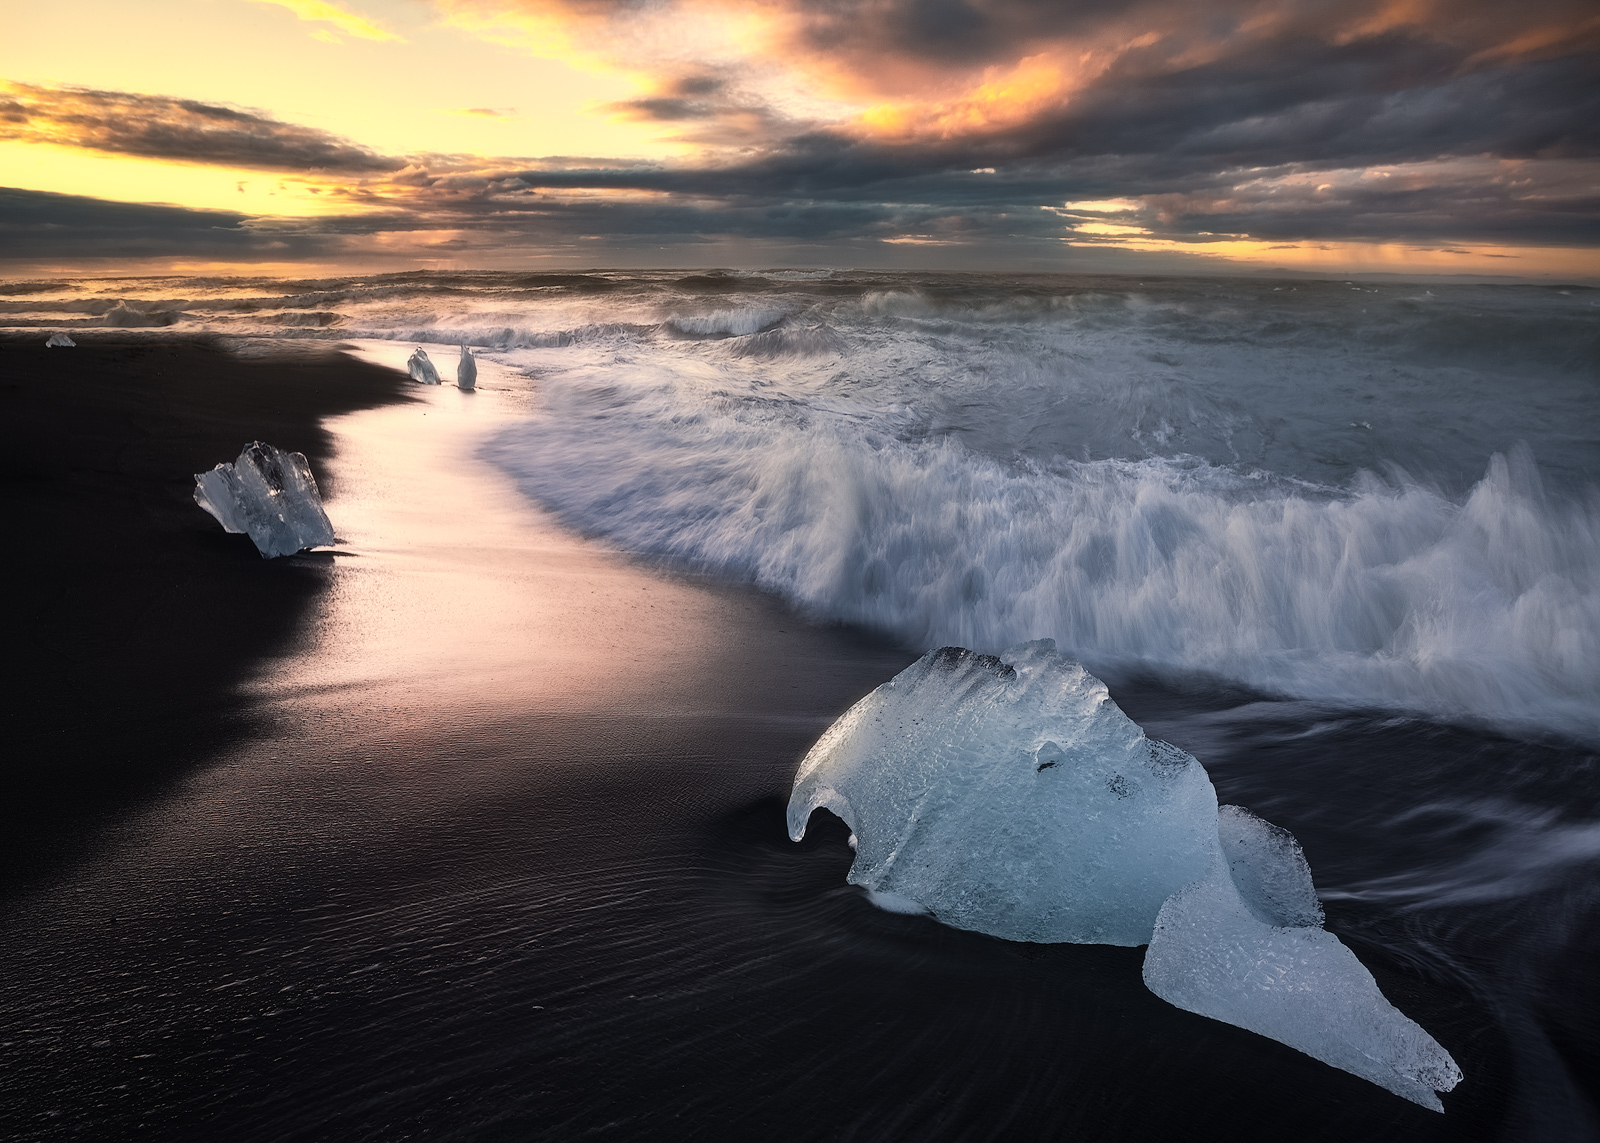
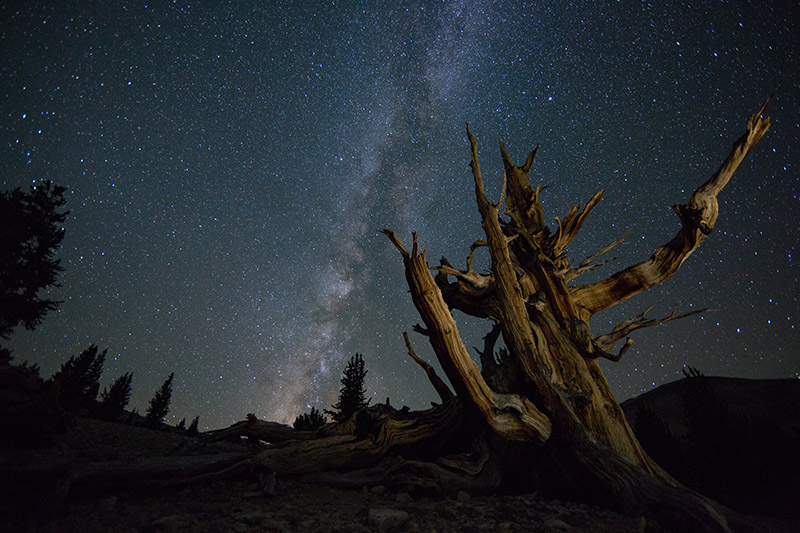
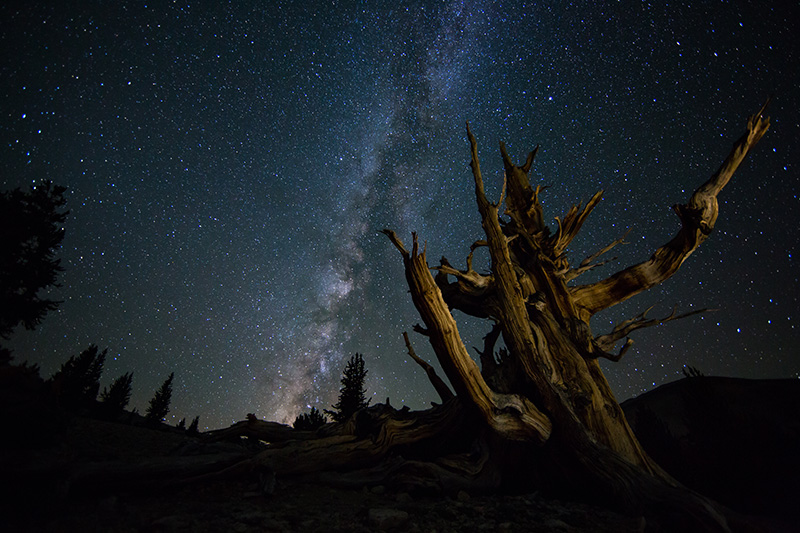
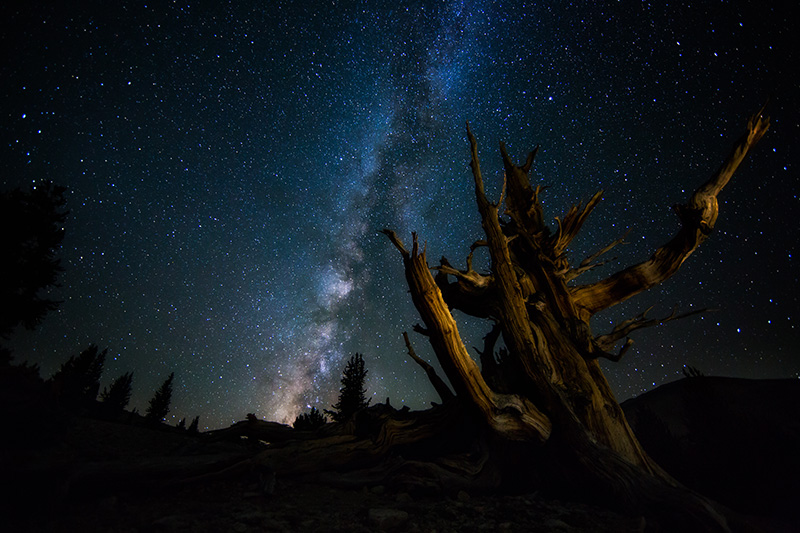
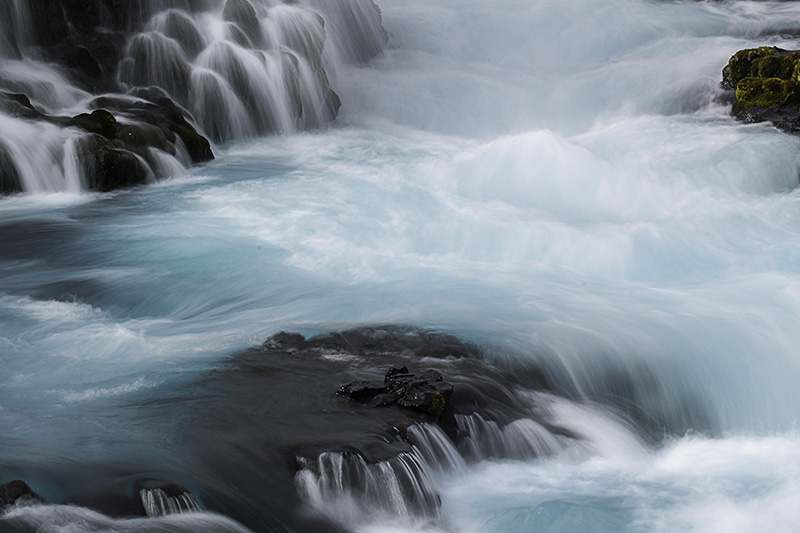
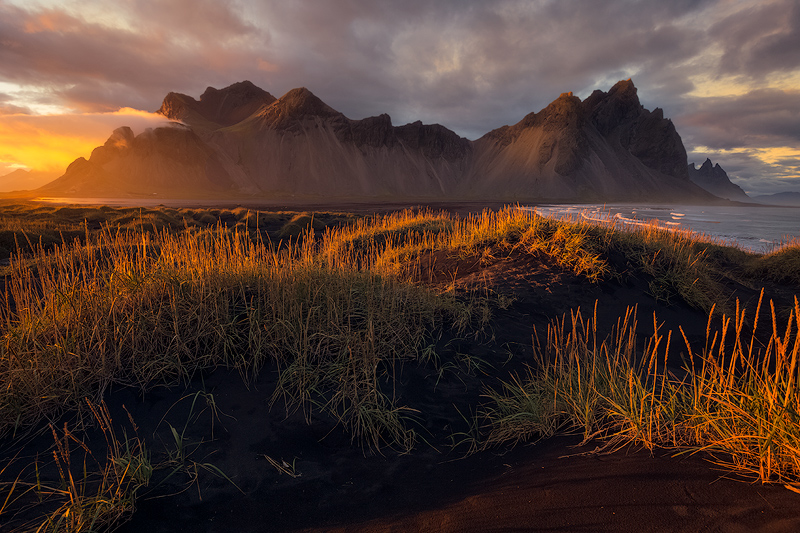
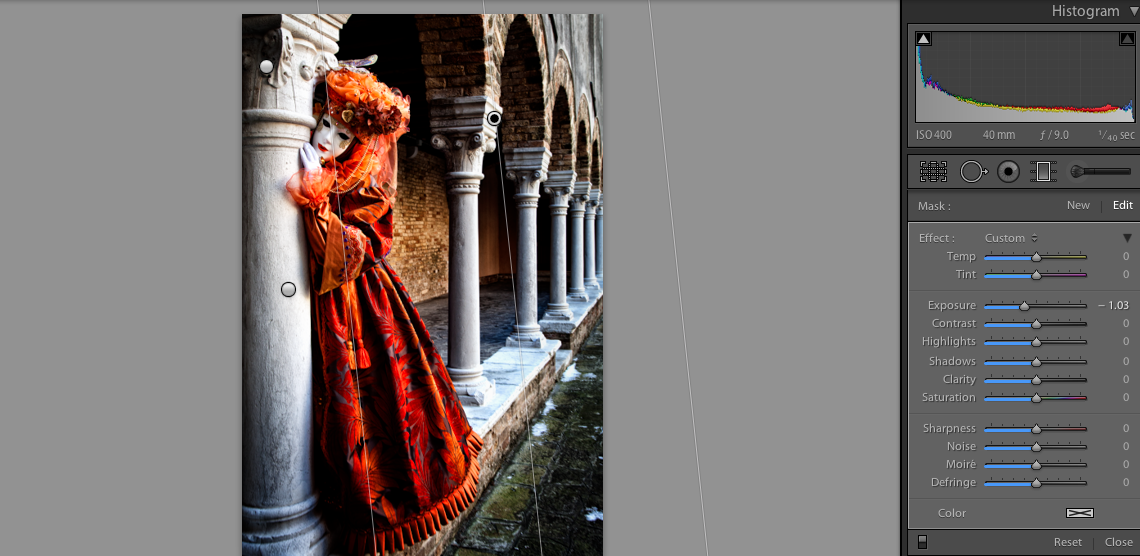
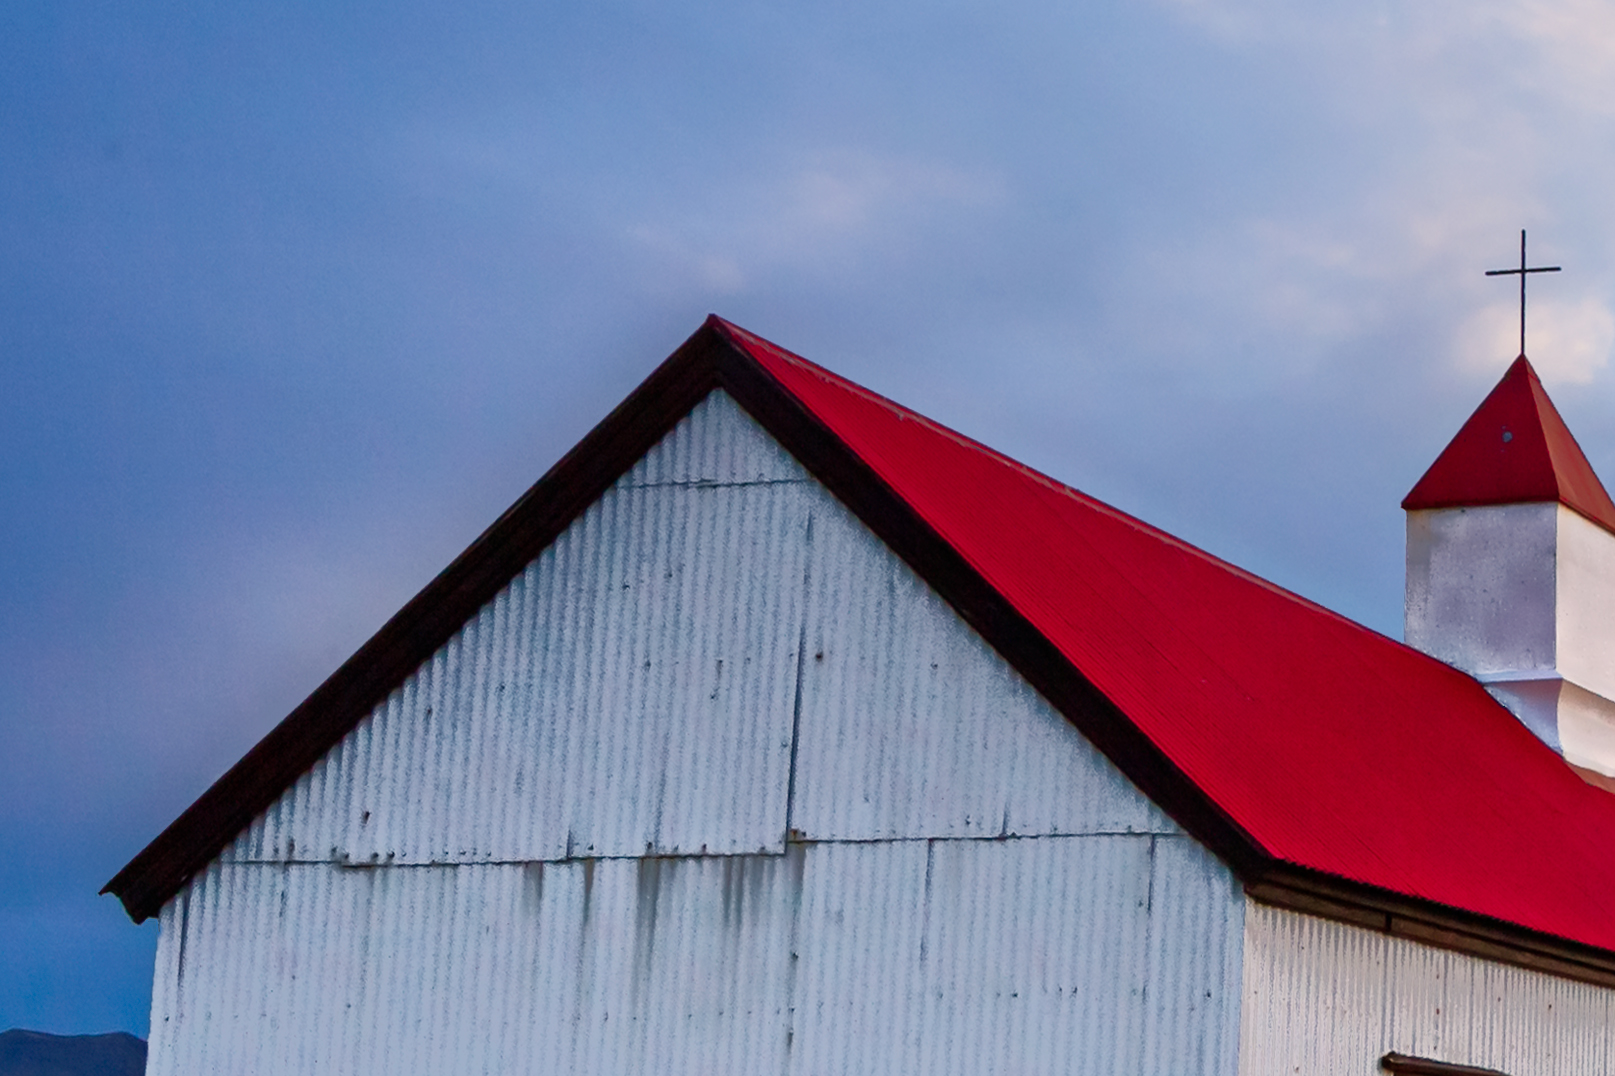
Below is what one looks like. You might have to look carefully, but there is a white line along the top of the red roof. It is even more pronounced on the left side of the chimney just under the red roof.

Red and white coastal church with the beginning of a beautiful sunset overhead

Fortunately, halo’s are very easy to fix using a clever technique in Photoshop.

Start With a Pixel Layer on Top

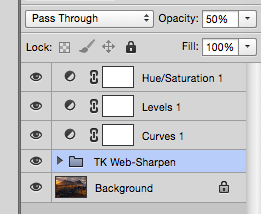
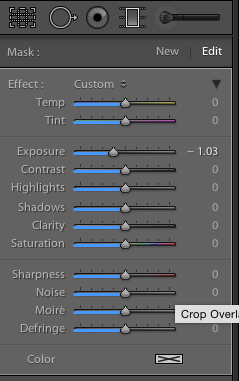
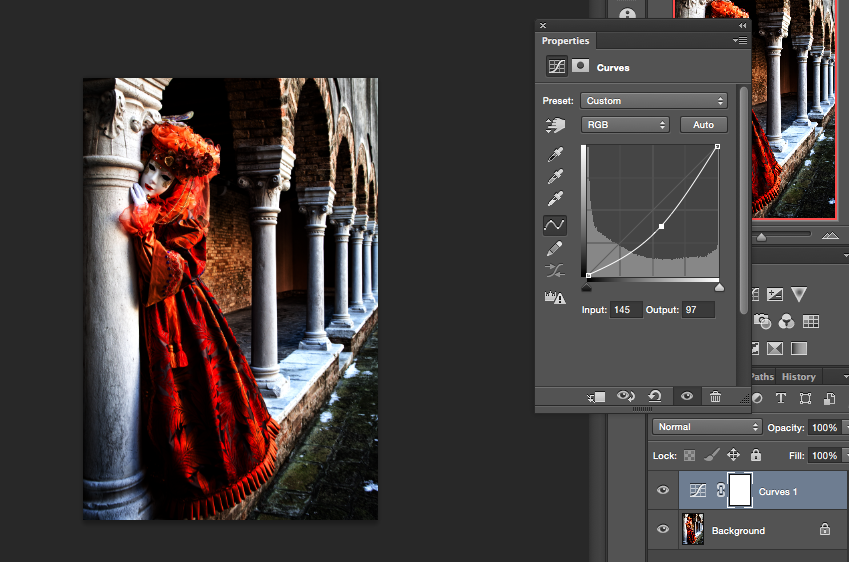
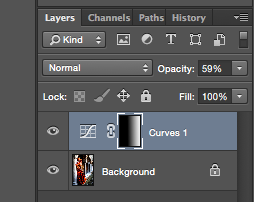
To start out, you need a “pixel layer”, rather than an adjustment layer, at 100% opacity on top. Let’s say that our layer stack looks like this… just the pixel layer and an adjustment layer on top.

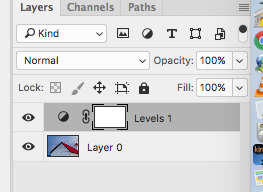
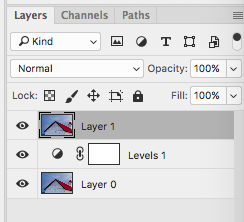
Because you need a 100% opacity pixel layer on top, we will next do a “stamp visible”, which is a new layer that is a picture of all the other layers as they appear. On a Mac, you hit “Cmd-Opt-Shift-E”. With Windows, you hit “Shift-Ctrl-Alt-E”. You’ll then see a new layer appear on top of your layer stack.

Clone Stamp Tool, Darken Mode

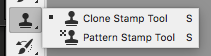
With the top layer active, grab the Clone Stamp Tool, which you are probably already familiar with:

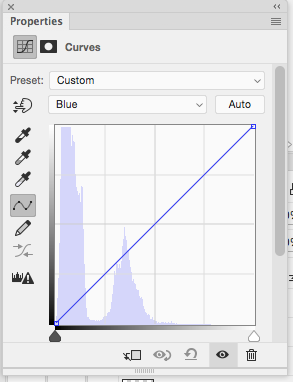
Switch the mode of the Clone Stamp Tool to “Darken”. This is done using the pull-down box that you should see above your image after you have activated the tool. There is a good chance that it is currently set to “Normal”.

Change it to “Darken” mode.

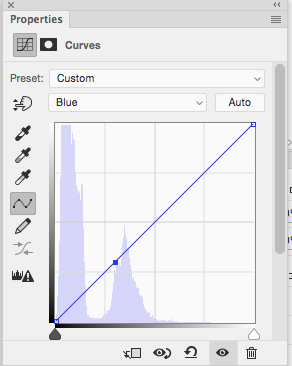
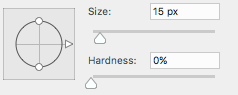
Next, make sure that the Opacity and Flow of the Clone Stamp Tool are both set to 100%.

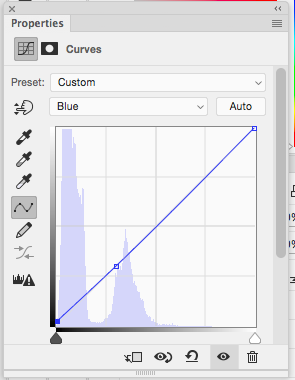
Make sure “Aligned” is checked:

Lastly, make sure that the hardness of the brush is set to 0% and is a relatively small brush.

And Now… The Magic Happens

You have probably used the Clone Stamp Tool before, so I will not go into detail here on that. You simply alt-click on a source area and then brush over the destination area with the tool. The pixels in the destination area are replaced with the source pixels.

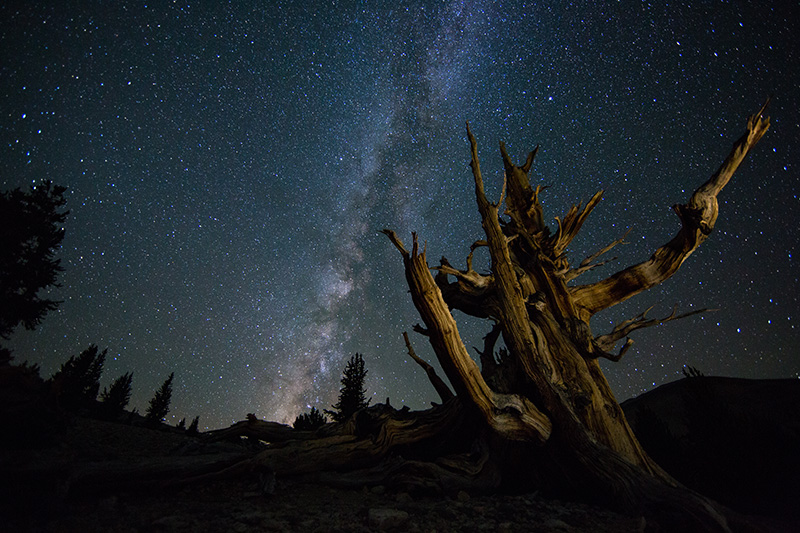
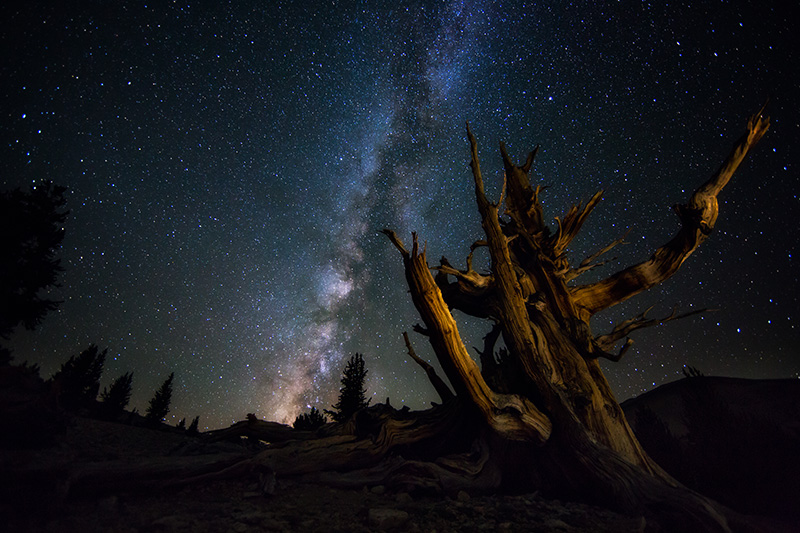
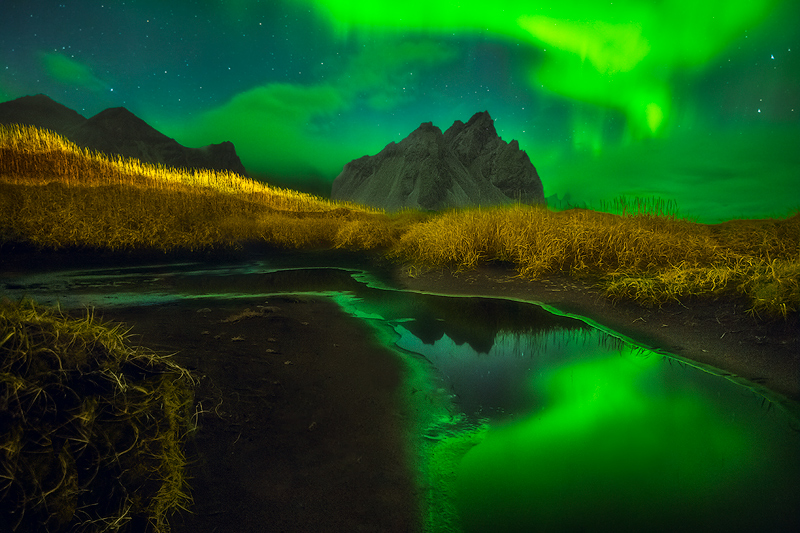
With Darken mode, however, only the pixels that are LIGHTER than the source pixels are replaced. Anything darker or exactly the same luminosity level is level alone. Halo’s are usually brighter than the surrounding pixels. So, by clicking in a nearby spot in the sky and dragging your cursor over the halo, the brighter halo is replaced but the surrounding area (in this case the sky and the red roof) is left alone. Although difficult to see, the halo in the next picture is gone. This took me less than one minute.

Red and white coastal church with the beginning of a beautiful sunset overhead

After you have finished, it is a good idea to switch your Clone Stamp Tool mode back to Normal so that you do not forget and are confused later why it does not appear to be working (the voice of experience talking). Also, it is a good idea to rename your layer something like “Halo Fixed” so that you can tell later what the purpose of the layer is. It might be difficult to see the modification to the layer and you might inadvertently delete it if it is not re-named.

Limitations

Although it is a near-perfect solution, you might run into some cases where it requires a little more precision. For example, if the clouds have texture and differing brightness levels, then you might run into cases where your destination pixels adjacent to the halo are still brighter than the source pixels. When this happens, it helps to run the clone-stamp tool along the edge of the foreground area (such as the red roof in this example) and just let the edge of the brush run over the halo without bleeding much into the sky. You might need to go over it a couple of times due to the feathering of the brush.

Pretty cool trick!

Pushing Blue Into the Shadows Using Photoshop

beach,black,breidamerkursandur,europe,ice,iceberg,iceland,long exposure,morning,ocean,sand,southern,sunrise,water body
Fire and Ice : Prints Available

Sunrise behind Icebergs on Iceland’s black sand beach Breidamerkursandur.

Incorporating transition into an image can make it more dynamic. There are different types of transition that you can use, but one that works well is to have warm tones (such as orange and yellow) transitioning to cool tones (such as blue).

The above image of Iceland’s glacier beach has a decent sunrise in the distance that creates warm tones in the upper part of the image. These warm tones give us half of what we need to create a warm to cool transition. However, the sand in the foreground is black, not blue. So, in order to incorporate a warm to cool transition, I pushed some blue into the shadows.

So, how did I do this in Photoshop? If you have a little experience using Curves layers, it is quite an easy adjustment to make.

First, add a Curves adjustment layer.

Then, click on the layer so that the curve becomes visible and change the RGB pull-down box to “Blue”. The blue tone curve is now showing, as seen in the next image.

Next, click on the curve around 1/4 to 1/3 from the bottom to place an anchor point. The idea here is to limit the adjustment to the darks.

Lastly, click on the bottom-leftmost point on the curve to select it. Click the up arrow on your key- board perhaps 5-7 times. You will notice blue moving into your shadows as the anchor point moves upward. The blue will be subtle. For some images, this can improve the transitional qualities slightly.

An Introduction to Shooting the Night Sky: Part 3 – Creating Star Trail Images Using StarStaX

2016,May,Spring,cyprus,europe,hills,italy,landscape,milky way,night,portrait,rolling,star,star trail,stars,trail,tree,trees,tuscany,val d'orcia,val dorcia,vertical,vitaleta church,wheat fields

Stars Over Tuscany : Prints Available

Vertical star trail image of a church in Tuscany.

Welcome to Part 3 of a 3-part series on shooting the night sky. Part 1 focused on settings and image capture. Part 2 looked at processing a Milky Way image.

IMPORTANT: For star trails, I use many of the same shooting and processing techniques I’ve described in Parts 1 and 2. However, I don’t repeat those techniques in this article. Part 3 focuses only on the additional steps for creating star trails.

Shooting for Star Trails

I shoot in the same way as described in Part 1, with four important differences:

1. Shoot Many Exposures – Instead of one sky shot, you will shoot many. For the above image, I took 180 consecutive 30-second exposures. This equates to a little over 90 minutes when accounting for the slight delay between shots. Most night photographers shoot for at least an hour when shooting trails. Sometimes I use my intervalometer and set the gap between shots at 2 seconds. Other times, I set my camera to continuous shooting mode and lock my shutter down with my remote. Then, I just check the time and release the shutter lock after 90 minutes. Both approaches work.

2. Dark Frames – Just before and after shooting the 180 exposures, I put my lens cap on (being careful not to bump the tripod) and shoot 2-3 dark frames. These dark frames will later be used by the stacking software to help identify and remove hot pixels from the image.

3. Timing is Important – If the sky has not yet reached maximum darkness when you start shooting, then your sky images will have differing levels of brightness. So, make sure to shoot when sky is quite dark for consistent exposures.

4. Positioning – If you are in the Northern Hemisphere, then your trails will spin around Polaris, a.k.a. the North Star. If you do not know how to find the North Star, Google it to see an illustration. The two outer points of the bowl of the Big Dipper (the side opposite the spout) point to Polaris. You might not be able to control your positioning relative to the North Star, but it is good to know what your trails will look like ahead of time. Shooting wide angle means a greater portion of the trails will be included in your image.

Processing Star Trails

The processing I use is essentially what I’ve outlined in Part 2, but with a few differences. (You can ignore some of the Milky Way specific adjustments I made in that article.)

1. Initial Processing of the Sky Images – I first process the sky images in Lightroom much the same as I’ve outlined in Part 2, but process them darker. You can certainly experiment with lighter exposures to see what you think. After these adjustments in Lightroom, here is what the image looked like.

I then copied the settings from this one image to all the other sky images. Keep in mind that I shot for the foreground subject separately, just as I describe in Part 1.

2. Clone Out Airplane Trails – If you shoot late enough, you will probably not have a major problem with airplane trails. However, you will likely have at least some images with streaks from airplanes. You should clone these out. In Lightroom, you can use the local healing brush tool over the trail, making sure it is set to 100% opacity.

3. Create JPGs or TIF Files – Next create JPGs or TIF files for all your sky shots, making sure they all have the same settings (except for the local healing adjustments for the airplane trails). Save at the highest quality. Don’t forget to create JPGs of the dark frames.

Creating the Trails Using StarStaX Software

To combine the images, I use StarStaX software, which you can find here. StarStaX is available as a free download for Mac OS X, Windows and Linux. There are other software options for creating star trails. You can also combine the images manually in Photoshop using layers. This latter option allows you more flexibility but is cumbersome.

When you open StarStaX version 0.71, which is the latest version as of today, you will see the following.

Here are the steps to take in StarStaX:

1. First, click the upper left button (Open Images). Select all of the JPGs/TIFs except for the dark frames. Your star trails will look longer or shorter depending upon how many images you include, so you can experiment with different numbers of images. Your screen will then look like this:

2. Next, add the dark frames using the Open Dark Frames button. This is the 2nd button from the left on the top row, right next to the Open Images button. Your dark images will appear at the bottom of the list in the left column.

3. Next, on the right hand side, in the Blending section, I switch the mode to “Gap Filling” and make sure “Subtract Dark Images” is checked. Try some of the other modes, such as Lighten, to see what they do.

4. Click on the 4th button from the left, which is the “Start Processing” button. It will take several minutes to blend the images.

5. If you have used the Gap Filling mode, then after the software finishes, check the “Show Threshold Overlay” button and adjust the Threshold lever left or right until the star trails are green, but the rest of the image is not. This will help fill in any gaps in the trails.

6. Click the “Save As” button, which is the 3rd button from the left in the top row.

7. When finished, bring this file into Photoshop as a layer and process it as the sky layer in your Photoshop file. Again, see Part 2 for more ideas on processing.

An Introduction to Shooting the Night Sky: Part 2 – Techniques for Processing the Milky Way

Count the Stars : Prints Available

The Milky Way behind an ancient bristle cone pine tree in California.

Welcome to Part 2 of a 3-part article on shooting the night sky. Part 1 focused on settings and image capture. Part 3 will be all about creating star trail images.

For Part 2, I’ll go through in step-by-step format how I processed the above image of the Milky Way in front of a light-painted ancient bristlecone pine tree. This was done using some fairly basic techniques in Adobe Lightroom and Photoshop. Many of the same techniques can be applied to other night images, such as Aurora Borealis shots.

My processing involves making many subtle adjustments to the image, as opposed to just a few drastic changes. That, combined with how small the pictures are in this article, mean that you will not see a lot of difference between some of the steps.

Lightroom: Exposure and Color Temp

  1. I started by increasing the exposure slider to get an overall “proper” exposure. You can see below the exposure level I arrived at in this first step.
  2. I had used auto white balance in camera. In Lightroom, I moved the color temp slider left to increase the blue tones a bit. I left the tint slider alone, although I sometimes add magenta.
  3. I then jumped down to Lightroom’s effects panel and experimented with the dehaze slider. I settled on +20, which is high but worked well in this case.
  4. Because the dehaze slider affects color temp, I went back and tweaked it slightly.

Here is what the image looks like at this point:

Lightroom: More Basics Panel Adjustments

  1. Leaving contrast at 0, I adjusted the highlights, shadows, whites and blacks sliders. Each image is different, but here I brought down highlights, increased shadows slightly, brought whites down slightly and blacks up very minimally. The basic idea is to get some detail in the shadows (unless you want a silhouette) while maintaining contrast in the image. Don’t go too crazy lightening shadows or you will lose too much contrast in your image.
  2. Continuing down the basics panel, I left the clarity slider at 0 because we will apply clarity later to the Milky Way using a local adjustment.
  3. I added vibrance (+21) and saturation (+4).

The image is still looking somewhat flat at this point.

Lightroom: Tone Curve Panel

  1. Next, I added some punch to the image using the whites and darks sliders in the tone curve panel. I moved lights up quite a bit (+43) and brought darks down moderately (-18). The idea is to bring some contrast to the image.

Lightroom: Detail Panel

  1. I left sharpening at Lightroom’s defaults of amount (25), radius (1.0), detail (25), and masking (0).
  2. I brought in some noise reduction due to the high ISO I used. Keep in mind that noise reduction removes some of the detail in your image. In this case, I increased luminance noise reduction to 25 and left color noise reduction at 25. If there was color noise in the sky, I would have increased color noise reduction.

Lightroom: Local Adjustments

  1. Using Lightroom’s adjustment brush, I brushed over the Milky Way and increased clarity, in this case up to +35. This really added some brilliance to the Milky Way.
  2. Adding a new adjustment brush, I brought up some of the shadowy areas on the ground by brushing over them and moving the shadows slider right. The tree looked good, so I left it alone.
  3. Using the radial filter tool (located to the left of the adjustment brush tool) I created a vignette by drawing an oval which covered the majority of the image. I pulled the exposure slider left to create a subtle, feathered vignette along the outer edges. You could also wait until later to do a vignette if you prefer.

Here is the updated image after finishing up in Lightroom:

Photoshop: Orton

  1. I usually open night images as a smart object in Photoshop. This is so that I can make further adjustments to the RAW settings within Photoshop if I want.
  2. I first added a pretty strong Orton Effect to the image, masking out the foreground so that the effect was applied only to the sky and tree. You can read about how to create this effect in the July Issue of Inspirational Photography on pages 18-19.

Here is the updated image after Orton. You can see that this made quite a difference.

Photoshop: Final Adjustments

  1. I almost always create a curves layer late in my workflow and experiment with color balance. I added the curves layer and went into each color curve separately. This is done by using the curves pull-down box and changing “RGB” to “Red”, putting a point right in the middle of the curve, and then using the arrow keys to move the curve up and down to improve the color balance. After the red curve, I went to the blue curve and did the same, followed by the green curve.
  2. To add a little more detail to the ground and tree, I added Nik Filter’s “Detail Extractor” (found in ColorEfex Pro) and reduced the opacity to 12% on the Photoshop layer. I masked out the effect from the sky so that only certain areas of the tree and ground where I wanted more detail were affected.
  3. Lastly, I used Nik’s Viveza to brighten the image, which added punch. I also added a slight bit more contrast and saturation.

After these adjustments, the image looked like this:

Back to Lightroom: Final Adjustments

  1. My workflow always ends in Lightroom with some additional tweaks. In this case, I added a bit of warmth and magenta (with the color temp and tint sliders), increased the exposure, added some more contrast and a bit more saturation. Below is the final image.
The Milky Way behind an ancient bristle cone pine tree in California.

Increasing Water Texture with Nik Filters

The Google Nik Collection is a popular set of Photoshop add-on filters used by many photographers. I still use Nik filters, but I use them differently than I used to. When I was new at processing, I would apply the filters globally at full opacity. Now, I use them sparingly at relatively low opacity for local adjustments. I sometimes use Nik Filters to bring a little added texture and contrast into water, such as in the image below.

bruarfoss,cascade,europe,falls,iceland,south,southern,sunset,waterfall

Inside Bruarfoss : Prints Available

Close up of a section of Iceland’s Bruarfoss.

For the above image, I used a Nik filter called “Dark Contasts” (part of Nik’s “Color Efex Pro” filter set) to enhance contrast of the water. Below are the steps I took to apply the filter. Note that I’ve de-saturated the water in the images below to focus attention on the texture for the purpose of this blog.

First, here is a close-up of the water prior to applying the filter.

Next, I applied Nik’s “Dark Contrasts” filter. Running the filter created a new layer in Photoshop as pictured below. Notice that the effect is much too strong.

Next, I added a black mask to the layer and, using a feathered brush at 30% flow, painted white on the mask over the water. This resulted in the effect being applied to the rushing water and not being applied to the rest of the image.

Lastly, I reduced the opacity of the Nik Filters layer to around 40%.

I use Nik Filters for many other adjustments and often use them at much lower opacity than 40%, usually around 15% and just in parts of the image. I often use Nik’s “Tonal Contrast” filter as an alternative to Dark Contrasts if I am looking for a less dark and gloomy effect.

Drawing Attention to the Subject with a Vignette

Photographers use vignettes to put a subtle frame around (and draw attention to) the subject of the picture. They draw our eyes to one part of an image and away from the remainder of the image. For me, creating an effective vignette is a balance between getting the effect of the vignette, but still not noticeable to the untrained eye.

So, what is a vignette? For the definitive answer, let’s look at the ultimate source of all things true… Wikipedia. According to Wikipedia, a vignette in photography is “a reduction of an image’s brightness or saturation at the periphery compared to the image center.” Couldn’t have said it better myself. Although you can also vignette with a blur. But they got it mostly right. Anyway, in most cases, vignettes are based on a reduction in brightness, which is what we’ll be discussing here.

Below is a picture of a cheetah with no vignette. You will notice the image looks fairly evenly lit throughout.

A cheetah in a field looking intently at the camera

Below I have added a subtle vignette to the image. Notice the cheetah’s face is a little brighter as compared to the rest of the image. It is somewhat difficult to see, but it does help focus your attention on the cheetah. And cheetah’s command attention.

A cheetah in a field looking intently at the camera

Just in case you can’t see the vignette, below is a version in which I apply too much vignette so the effect is clear.

A cheetah in a field looking intently at the camera

Adding a vignette is usually the last thing I do with an image. Although Lightroom has the option of adding a post-crop vignette, I do my vignettes in Photoshop because I do my output sharpening there. In Photoshop, vignettes are easily created non-destructively, meaning you are adding an adjustment and not changing pixels. Here are the steps to create a simple non-destructive vignette:

Take the elliptical marquis tool and drag it over the photo so that your screen looks something like this:

Marquis Drawn

Make sure your foreground and background colors are set to black and white, as shown in the image below. Create a curves adjustment layer which will result in a layer mask that looks like the one below.

Curves Layer

Do Command-Shift-I (Mac) or Control-Shift-I (Windows) which will change the mask colors (black & white) to the inverse.

Curve Inverted

Select “refine mask” in the menu (Command-Alt-R for Mac or Control-Alt-R for Windows) and, if you are working with a RAW or large JPG, try an initial feather at around 250. The idea is to get a nice feather around the edges of the image.

Feathered Normal Model

Change the blending mode to Multiply, which will darken the selected area. You image should look like this, which looks pretty horrible.

100 Percent Opacity Vignette

Lastly, reduce the opacity until the vignette is not really noticeable. I usually reduce to around 20%, as in the case here.

Screen Shot Cheetah Complete

You can make further refinements to the vignette with a brush. I sometimes do this if a corner is already dark and the vignette results in the corner being too dark. Just paint black on the mask at perhaps 30% opacity until the effect is painted out.

TK Actions: Sharpening for Web

For many photographers, the last step in the image processing workflow is the creation of a downsized JPG from a large Photoshop file. During this downsizing process, you lose some sharpness in your image. Because of this, it is important to add back some “output sharpening” while creating the JPG. There are a range of options for doing this, including sharpening during export in Lightroom, sharpening a layer in Photoshop or using a Photoshop plug-in, such as Nik’s Sharpener Pro.

I tried a number of methods and landed on a Photoshop action created by Tony Kuyper. The “Web-Sharpening” tool is built into Tony’s “TK Actions” panel. This set of actions is the best value out there. In fact, almost all of the landscape photographers I know use TK Actions. But, this blog is about the Web-Sharpening tool, so I will [try to] stay focused on that.

I sharpened the image below using the action and, as you can see, the sharpening looks great (click on the image to see it as it appears on my site). I’ll take you through the process so that you can see how easy it is.

LANDFORM,LIGHT,LOCATION,beach,eastern,europe,field,hofn,iceland,klifatindur,mountain,pond,pool,sand,southern,sunset,vesterhorn,water body

Sunset at Vestrahorn : Prints Available

Glowing fields from low-angled sidelight in front of Iceland’s Vestrahorn Mountain.

Below is a screen shot of the Web-Sharpening section of Tony’s actions panel. To size this image at 800 pixels wide for my website, I simply enter “800” pixels in the box, check “horizontal” for a horizontal image, leave the layer opacity at 50% (this can be adjusted later) and hit “OK”.

Web-sharpen section

If I understand correctly, the action first creates an image sized at 1.67 times your final specified image size. This image is over-sharpened and then re-sized to your originally specified size (in my case, 800 pixels wide). The action creates a separate file with a layer stack, as pictured below. Your Photoshop file is left unaltered.

whole screen no mask

Below is a close-up of the layers. The sharpened image layers are grouped together in the layer called “TK Web-Sharpen”. You’ll notice that the 50% opacity that I had specified appears as the opacity in the sharpened group layer.

layers and opacity

I find that 50% opacity works well on the sharpening group layer for most of my landscape images. For landscape images that have a clear horizon line (such as in this example), I then add a white mask to the sharpening group layer and paint a black line on the mask along the horizon line at between 80-100% opacity. This is because sharpening a high-contrast horizon line can often make a slight halo look more pronounced. Masking it out solves this potential problem.

horizon masked out

You then have the option of making additional adjustments using the available hue/saturation, curves or levels layers/masks. I normally use the Curves layer to increase contrast slightly to try to match the contrast of the Photoshop file. These three layers are available to further tweak the color or contrast of your JPG if you noticed a loss of either from your Photoshop file.

With the JPG copy still open, hit the “Save for Web” button on the Web-Sharpening section which opens Photoshop’s Save for Web dialogue box. This dialogue box is beyond the scope of this blog, but here is what it looked like prior to saving my image:

save for web screen

The image below was shot several hours after the image above. Because it was very dark, I shot this at high ISO. I was concerned about sharpening the noise which would make the JPG image appear noisier. So, for this image, I masked out almost all of the sky in addition to the horizon line.

aurora,beach,borealis,eastern,europe,field,hill,hofn,iceland,klifatindur,mountain,northern lights,pond,pool,sand,south,southern,the northern lights

Aurora Over Iceland : Prints Available

The Northern Lights illuminating the sky over southeastern Iceland.

I also use the Web-Sharpening action for my portrait work. Because I want to avoid over-sharpening my already-heavily-sharpened subjects, I drop the opacity to 30% which seems to be the right amount to me.

asia,asian,china,chinese,da zhai,da zhai terrace fields,dazhai,elderly,environmental portait,hat,longji,longji rice terraces,longsheng,male,man,old,older,people,portrait,smoking,standing,terraces,tian

One Eye Closed : Prints Available

Chinese man from the Longji area takes a break outside his house.

You can find the TK Actions panel at the link below, as well as excellent videos by Sean Bagshaw on how to use the actions, including the Web-Sharpening tool.

http://goodlight.us/specialoffers.html

Even though the Web-Sharpening tool alone is worth the price, you get loads of actions as part of the TK Actions panel, including the famous luminosity masking actions which will change your life.

Using Gradients to Draw Attention to Your Subject

I frequently use the gradient tool in Lightroom and Photoshop to draw attention to the subject of my photograph. Gradients are extremely useful because they can help create gradual transitions between adjusted and non-adjusted areas. This blog won’t be a comprehensive look at gradients, but simply a demonstration of how I use them for one particular purpose. This blog assumes that you have a basic knowledge of either Lightroom or Photoshop. With those disclaimers, let’s get started with a quick description of what a gradient is.

For our purposes, a gradient is the gradual feathering of whatever adjustment is being made to the image. There are different types of gradients, but the one I use is the most straightforward. At the start of the gradient, 100% of the adjustment is applied, while at the end 0% is applied. There is an even feathering of the adjustment between start and end.

This will be better illustrated using an example. Here are before and after pictures to show you how I use a gradient to draw attention to my subject by darkening the outer areas of the image.

Original Image

Carnival model in an orange costume by pillars

Image after darkening the outer parts of the image using 3 gradients

Carnival model in an orange costume by pillars

For some of you, you may need to look a few times to see the effect. Notice that the transition from darkened to non-darkened areas is smooth. Here is how to create this effect in both Lightroom and Photoshop, starting with Lightroom:

1. First click on the gradient tool (pictured below). This will bring up the local adjustment menu.

Lightroom Gradient Tool

Lightroom Local Adjustment Tools

2. Adjust the exposure slider left, as in the image below.

Exposure Slider Down

3. Then drag the gradient from somewhere outside the image towards the subject. I usually overlap the gradient with the subject because the effect is hardly applied as you get to the center.

4. Fine-tune the adjustment using the exposure slider. Generally, you don’t want to go too obvious with the adjustment.

5. Hit “New” at the top of the menu and then repeat the adjustment from other sides and angles if you want. In this case, I’ve used three gradients, including from the right side, left side (but angled upward) and top left corner.

Screen with Picture

For Photoshop, below is one way among many to get the same basic effect.

1. Create a curves adjustment layer.

2. Click on the middle of the curve and drag the curve down to darken the whole image.

Photoshop Curve Layer and Curve

3. Click on the gradient tool button (pictured below)

Photoshop Gradient Button

4. Make sure your foreground color is set to white and your background color is set to black, as in the picture below. Hitting the letter “d” on the keyboard should re-set the foreground/background colors to these default settings.

Photoshop Colors

5. Then, make sure the layer mask is active by clicking on it and drag the cursor from outside the image towards the subject. This will result in a feathered mask.

6. Adjust the opacity of the curves layer until you get the desired effect.

Photoshop first layer adjusted

You might ask whether you can accomplish the same thing by creating a vignette. With a vignette, you have less control because it is a single adjustment rather than several adjustments from multiple sides, each controlled independently.

Lastly, you can use the same gradient techniques with a variety of adjustments, like contrast, saturation and a color fill layer, among others.

Controlling Tonal Contrast Using a Histogram

Okay, I admit it. The title to this blog sounds pretty boring. However, this is pretty important stuff. Apart from getting a compelling composition in camera, controlling tonal contrast during post-processing is perhaps the most important part of creating a successful image. So, read on!

First, what does tonal contrast mean from a photography perspective? It is simply the magnitude of the difference between the light and dark areas of the image. To see this visually, let’s look at the histogram… a tool found in your post-processing software that can help you control contrast more effectively. In Adobe Lightroom, you can make the histogram visible by making sure the word Histogram is checked under the Window menu. Whatever software you use, it should have the option to view a histogram.

Screen Shot 2015-07-13 at 5.22.29 PM

Identical tones in your image are reflected in the vertical movement of the graph, while differences in tones are reflected in the left to right movement. An overall darker image results in a histogram concentrated on the left, while a lighter image results in concentration on the right. The following should make this clear…

The image below is just a gray box. Every pixel is filled with the same tone… middle gray, which is exactly halfway between pure black and pure white. This zero contrast image results in a histogram that is made up of a single column right in the middle.

Screen Shot 2015-07-13 at 4.39.31 PM

Now, look at the next image. As expected, the histogram has two columns at the edges… the left representing the black pixels and the right representing the white pixels. All of the pixels are concentrated in two tones.

Screen Shot 2015-07-13 at 4.40.03 PM

Lastly, here is an image with a gradient applied from pure black to pure white. You can see what the histogram looks like in this case, with a full range of tones.

Screen Shot 2015-07-13 at 4.40.31 PM

So, how do I actually control contrast and how do I use the histogram when processing an image? Although I work with contrast at different stages in post-processing, I initially adjust contrast as one of the first steps, right after white balance and exposure if needed. I will focus here on this initial contrast adjustment using a landscape image as an example.

The image below is a pretty extreme example of one that completely lacks contrast and looks “gray” in tone. The histogram is concentrated around the middle. This image can be substantially improved by increasing contrast.

Screen Shot 2015-07-13 at 5.05.39 PM

Below is the same image after a quick contrast adjustment. This image is not finished with processing, but it certainly looks a lot better already. The histogram shows greater left to right movement. Each side of the graph does not quite reach the edge. I do this because I like to leave myself some room for a later contrast adjustment in Photoshop.

Screen Shot 2015-07-13 at 5.35.09 PM

In the partial screenshot above, you can see the adjustments I made using the sliders in Lightroom. Other software should have similar sliders. Again, this is a pretty extreme example, so my adjustments are pretty extreme here. There is no real right way to do this, but here is what I did for this image:

First, looking at the histogram, I moved the Blacks slider to the left to get the leftmost part of the graph line fairly close to the edge, but not touching. So, there is no pure black in this image. If this image had pure black from the start, I may have moved the slider to the right to reduce the pure black in the image.

Next, I looked at the darker parts of the image (ignoring the histogram) and adjusted the Shadows slider so that the image had greater contrast, but without losing detail in shadow areas. You usually want to still be able to see detail in at least some of the shadows.

Third, looking at the histogram, I moved the whites slider to the right until the graph line was close to the edge, but had room to spare. If the image didn’t look good with that adjustment, I could have simply backed off on the adjustment. Also, if the graph was up against the right side at the beginning and I didn’t want pure white in the image, I would have moved it left to reduce or eliminate the pure white cells.

Fourth, looking at the image, I adjusted the highlights slider until the image looked good and the lighter areas of the image showed some nice contrast.

Fifth, I went back and tweaked the sliders again.

It is important to note that this is really only an example of how I initially adjusted contrast for one particular image. In many cases, you want to reduce contrast, rather than increase contrast. For some images, it is okay or desirable to have a fair amount of pure black and/or pure white in the image. In some cases, you want your image histogram concentrated to the left, middle or right. An image of a night sky will likely have a histogram that shows a lot of dark tones and pure black.

So, the above doesn’t apply in all cases. But, hopefully this exercise is helpful to you. Most importantly, be sure to balance what you see in the histogram with what looks good to your eyes.

Transitioning From Cool to Warm

It is March here in Chicago and most people are a little tired of cold weather and are waiting for Spring. So, it is a fitting blog topic to talk about a cool-to-warm transition in a photography context. I’ve touched on this briefly in a past blog, but you have probably forgotten about that if you even read it.

Transition can give life and dimension to an image. There are a few types of transitions possible, one of which is moving from a warm color(s) to a cool color(s) or vice versa. As you know from a previous blog, blue is a great example of a cool color, while yellow is a great example of a warm color. Moving from blue to yellow within your image creates transition. This especially works in landscape images, but can be effective in other types of pictures as well. Here are some examples…

asia,asian,boat,dock,dock worker,environmental portait,indonesia,indonesian,jakarta,java,portrait,ship,smoking,sunda kelapa,west java

Taking a Break : Prints Available

Indonesian dock worker taking a break behind a shipping container

The image above of an Indonesian dock worker starts with warm on the left and moves to a cool color in the upper right corner.

america,california,death valley,death valley national park,dune,dunes,evening,mesquite dunes,north america,sunset,united states,us,usa,west

Sunset Over Mesquite Dunes : Prints Available

Horizontal view of Death Valley’s Mesquite Dunes at the end of the day.

This picture of the Mesquite Dunes transitions from warm sand and sun to a cool looking sky in the upper right corner.

beautiful,columbia river gorge,gorton creek,horizontal,north america,northwest,oregon,pacific northwest,pacific northwest portfolio,rock,rushing,s

Gorton Creek : Prints Available

Lower Gorton Creek in the Colombia River Gorge

The above picture of Gorton Creek in Oregon’s Columbia River Gorge does the opposite… it moves from a cool foreground to a warmer background.

In some cases, the transition can occur naturally in your scene. In other cases, you can accomplish this in post-processing. You can do this in a variety of ways in Photoshop, but one way is to add a solid color layer with a warm or cool color and then add a gradient mask to make the transition. Be sure to reduce the opacity of your layer. Or, warm or cool photo filters can be used with the gradient mask to make the transition.