Photographers have a lot of pet peeves. For those of you unfamiliar with the expression, a “pet peeve” is something specific that is particularly annoying to you. The list of pet peeves among photographers is so long that you could literally write a doctoral dissertation on the subject. But, generally, anything that can ruin a picture is included. Without a doubt, “foggy lenses” makes the top ten list. This is because it takes quite awhile for lenses to un-fog in humid conditions…. sometimes 20 minutes or more.
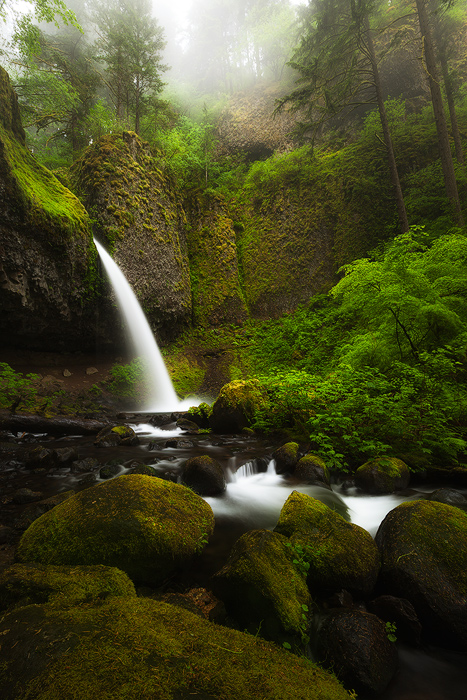
Lenses become foggy when you go from a cool environment (such as an air-conditioned vehicle) to a hot, humid environment. This scenario is not uncommon in photo shoots where you are jumping out of a vehicle to shoot a scene. Lenses can also fog up in very wet or humid environments, even if the camera had already adjusted to the outdoor temperature. This is common when you are shooting in the rain or next to a waterfall.
Fog creeps through the trees overlooking Ponytail Falls
Here are a few quick tips for minimizing the risk of ruining part or all of a shoot due to a foggy lens:
1. Shut off the air-conditioning prior to the shoot. When on the way to photograph in a warm area, I try to get the environment in the car similar to the environment outside. Opening the window and dealing with some heat or humidity is well worth it.
2. Control the lens temperature with your camera bag’s zipper. If I am stuck in a cool environment and have no control over it, I’ll leave my camera bag zipped. However, if I’ve left an air-conditioned or cool temperature and am now in the car and can keep the car warm, I’ll begin to acclimate my camera and lenses by unzipping the camera bag slightly.
3. Use the air blower and lens cloth. If your lens is already fogging up, then using your air blower and lens cloth between shots to keep the lens as dry as possible is your best option.
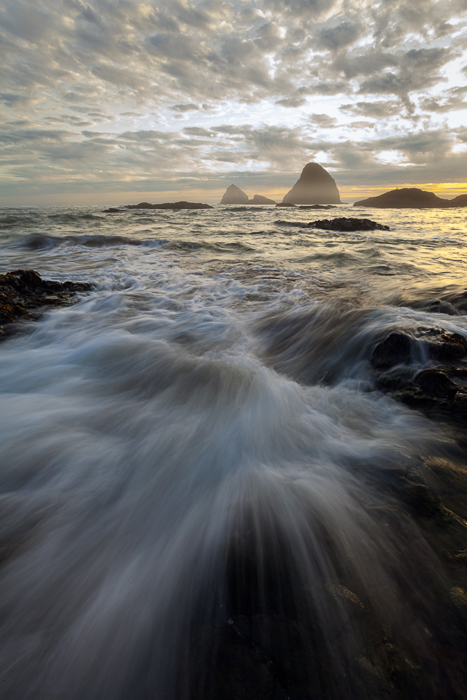
A wave crashing on the rocky shore of Oceanside, Oregon is frozen in time
Sometimes, you are in a situation where the environment is so wet and humid that these techniques don’t solve the problem. During my recent visit to Iceland, I was photographing waterfalls close up and was getting pummeled with spray from the falls almost constantly. I was battling both water drops and fog on the lens. In those cases, you just do your best to keep the camera dry between shots and wipe the lens after each shot. Using this technique, I was able to get the pictures I wanted, but I did end up with moisture in the lens that lasted until the following day. Another photographer was photographing the same waterfall and ended up with actual water in his lens because his camera and lens did not have sufficient weather sealing. So, you need to be extra careful if you do not have a higher end camera and lens with good sealing.
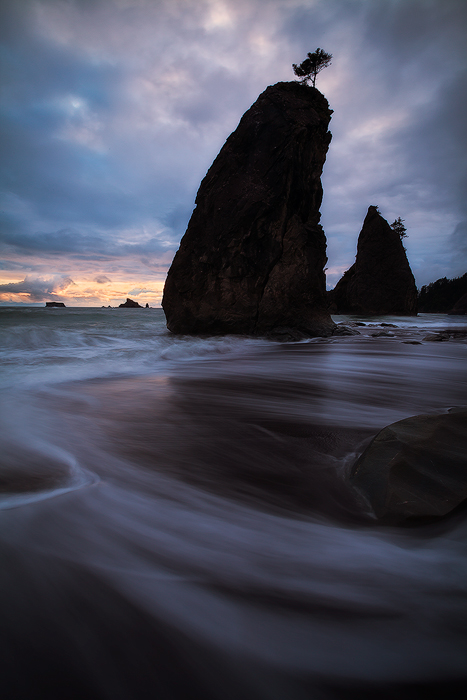
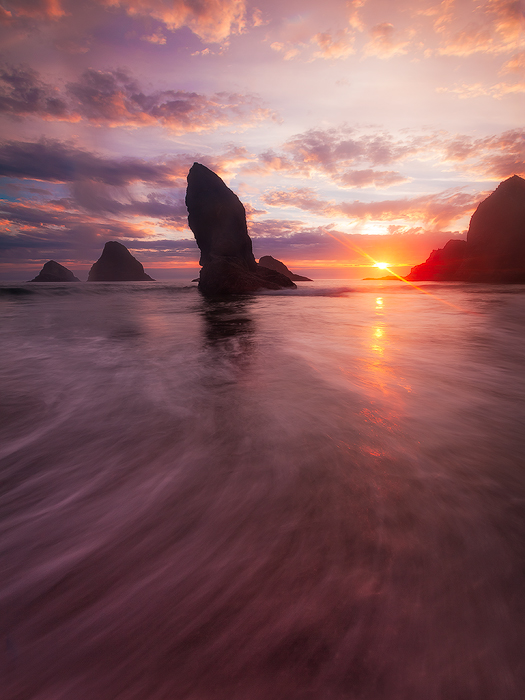
I love coastline images that include moving water. Although there are many ways to incorporate water into an image, I especially like combining blurred streaks of water bubbles with an interesting distant subject. Here is an example:
Retreating water in front of sea stacks on Washington’s Rialto Beach
The above image works well because the sea stack makes a great subject out in the water. This is not always easy to find, which is why so many landscape photographers flock to the Pacific Northwest. If you are lucky enough to have access to this type of scenery, here is how to take these pictures:
You’ll Need…
A sturdy tripod. This is especially important because the camera needs to stay still during a relatively long exposure while standing in moving water.
A remote shutter trigger. This will help you keep your eyes on the waves to get your timing right, as well as minimize camera shake.
Depending on the lighting, you will most likely need a solid neutral density filter, such as a 4-stop or even a 10-stop for bright conditions.
A wide to ultra-wide lens (probably in the 14-24 range).
Where you stand and what focal length you use will be driven by getting the water streaks composed properly in the foreground and the subject as an important part of the image. The picture above is an example of a good balance between foreground and distant subject.
You want to position yourself in a spot where the water passes you as the waves go in and out but is relatively shallow or dry after the water moves out. Yes, this means your feet and probably legs will get wet.
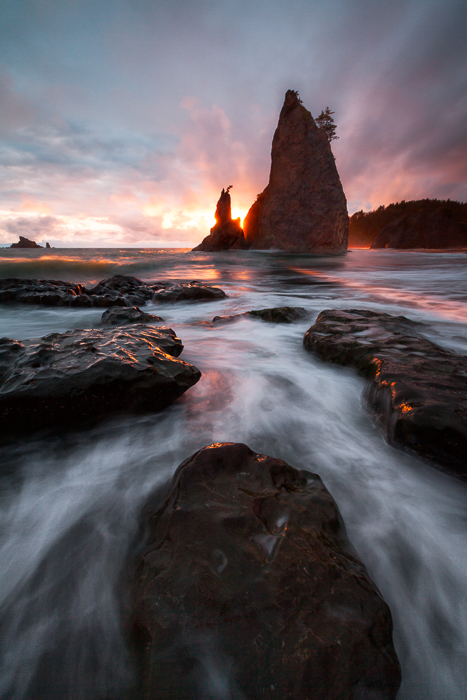
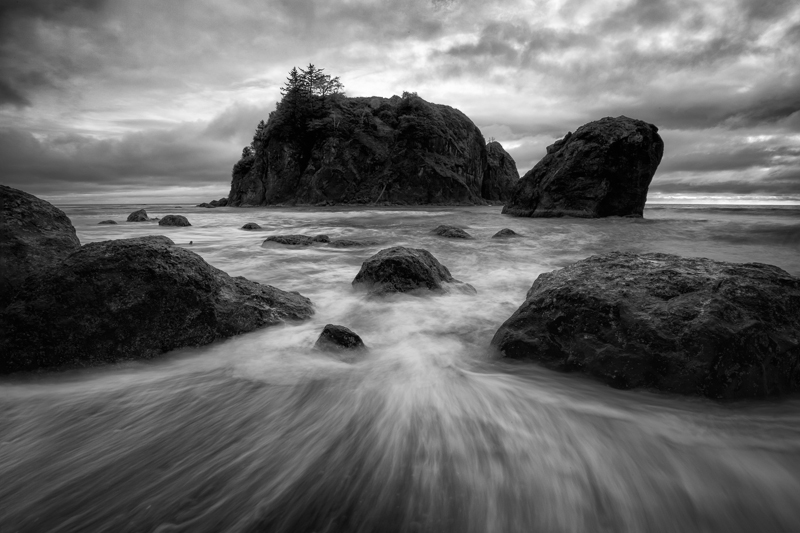
One good compositional technique is to use the water streaks as leading lines to the subject, such as in the image below.
Water retreating between rocks on the shores of Ruby Beach
Your Settings…
Set your camera to manual or shutter priority
Set ISO to 100
For starters, set your shutter speed to between 1/4 and 2 seconds. You can then adjust later based on what looks good.
You then have to arrive at a desired aperture. I generally choose between f/18 or f/20 so that the distant subject as well as the water streaks are in focus. Even though the foreground water is blurred, you still want it to be in focus.
If you are still overexposing the image, you can then bring in the neutral density filter(s) and re-adjust to your final aperture to get a proper exposure.
You want to shoot as the water is retreating back into the ocean or lake. When the water retreats, there are often bubbles which help the water streaks look more pronounced. You will have to work with the timing of when to trip the shutter, but I generally wait until the water is retreating around the tripod.
Keep checking what your images look like and make adjustments to your settings and timing.
Lastly, take a lot of pictures… each one will be different, so it is best to have more options to choose from.
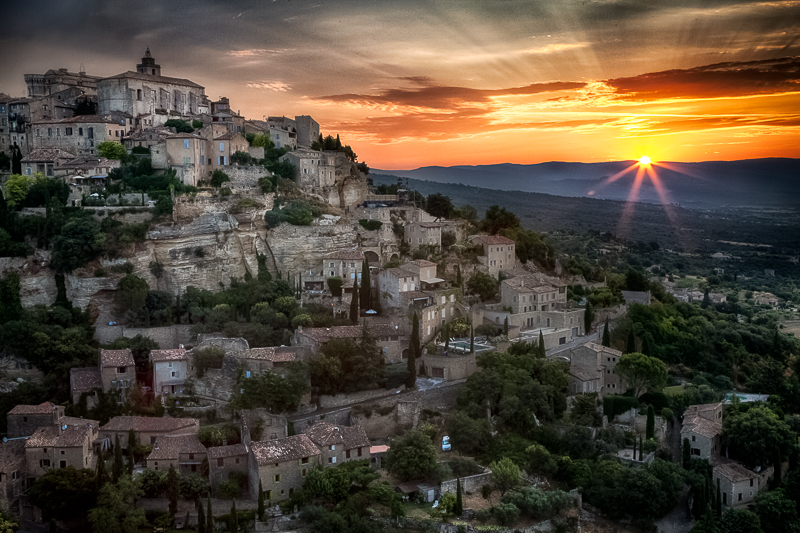
Although the scenery in the image below of Gordes, France is spectacular, the “sunburst” or “starburst” created by the sun adds a nice finishing touch.
Beautiful sunrise over the hilltop city of Gordes, France
This is really easy to do. You will need a “point source of light”, such as the sun, somewhere in your image. To get the starburst, use a wide angle lens and set your f/stop to a small aperture, such as F/22. Then point the camera and shoot as normal. That’s about it. The starburst is created by the combination of a wide angle lens with a small aperture.
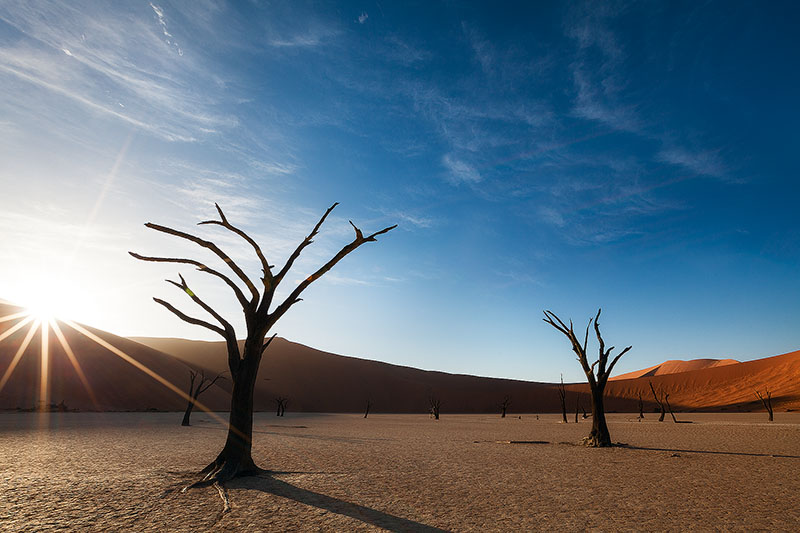
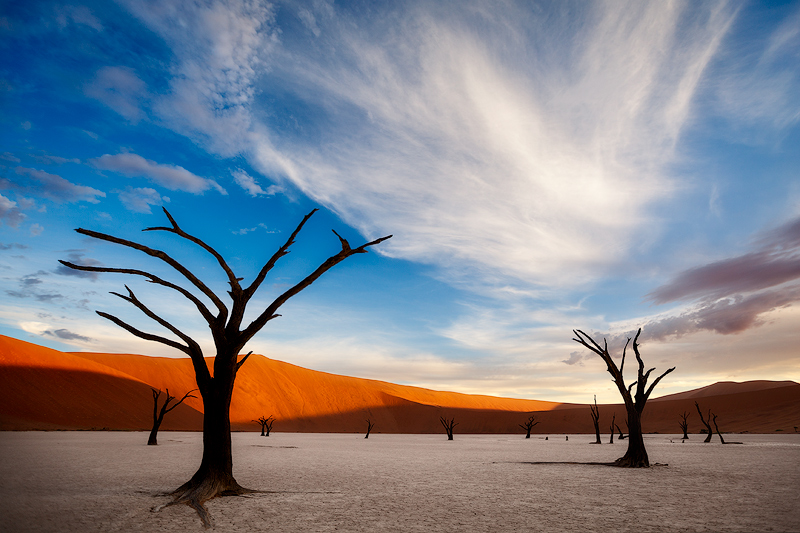
Morning burst of sun over the top of the dunes at Deadvlei
You can experiment with different f/stops to see what kind of effect you get. If the sun is large in the frame, you can create a smaller point source of light by positioning a foreground element in front of the sun to partially obscure it.
One thing to keep in mind is that working with a small aperture means a longer shutter speed is needed. So, don’t forget your tripod.
We’ve all heard the saying “opposites attract”. Looking around, you could probably make a pretty compelling argument that the saying holds true. I mean, what else could possibly explain chocolate covered pretzels tasting good? I rest my case.
Good photographers know how to use opposites in a picture. By the way, I’ve deliberately used the term “opposites” rather than “contrast” because the latter is generally more narrowly defined in photography. You can build in opposites before, during and after the shot. Here are just a few of the many ways how:
Light and dark. Photography is all about lighting. Notice the shadows on the dunes below. I waited for what I considered to be the right balance of light and shadow on the dunes before taking this picture. It remains one of my favorite images. Without the shadows, the picture would have been much less dynamic.
Evening light striking the orange dunes at Deadvlei
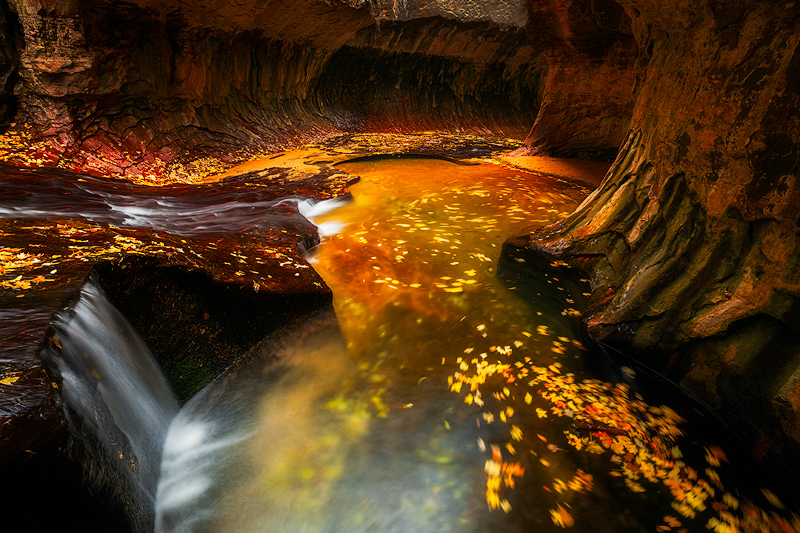
Moving and Still. It is no secret that combining moving and stationary elements can make a photo more interesting. (See my other blog article on including movement in your images). Moving water, clouds, vehicle or people all work. You need to select the right shutter speed to blur the moving object (depends on a variety of factors, but initially think in ranges of 1/15 to 1/125). You also need to make sure your camera is stationary to keep the still objects sharp, given your shutter speed. So a tripod may be needed.
A flood in the Subway leaves the formerly turqoise pools filled with sand
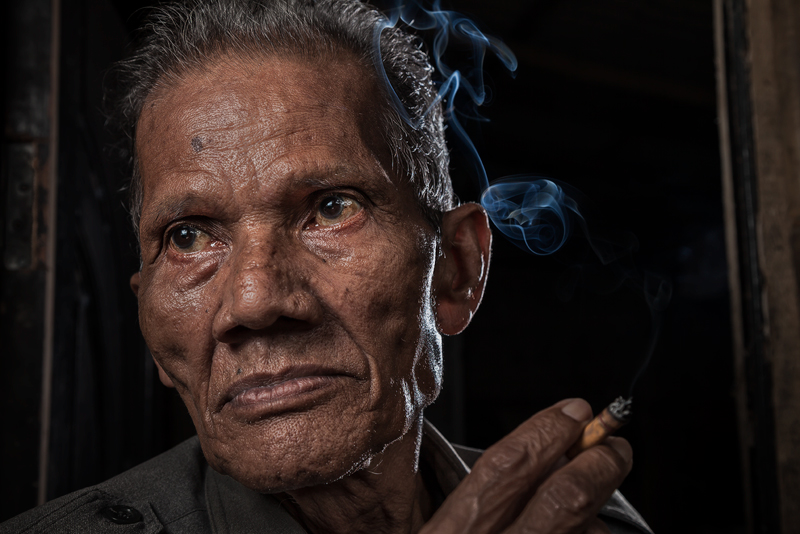
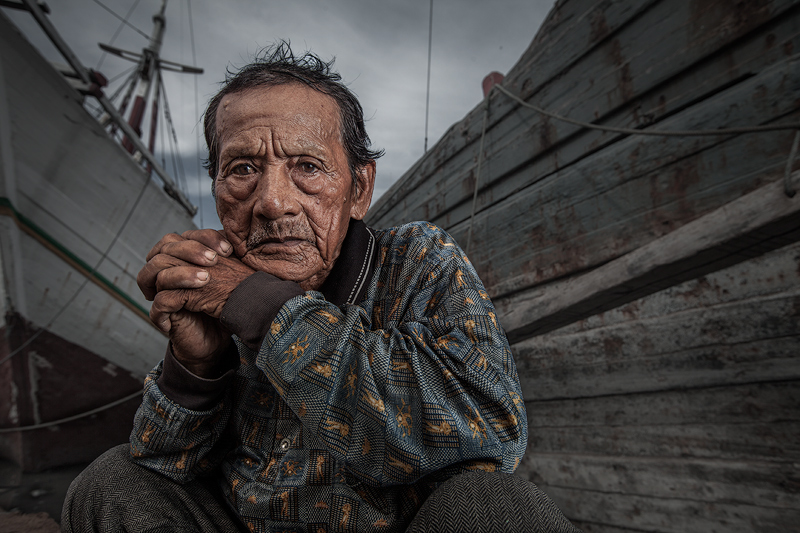
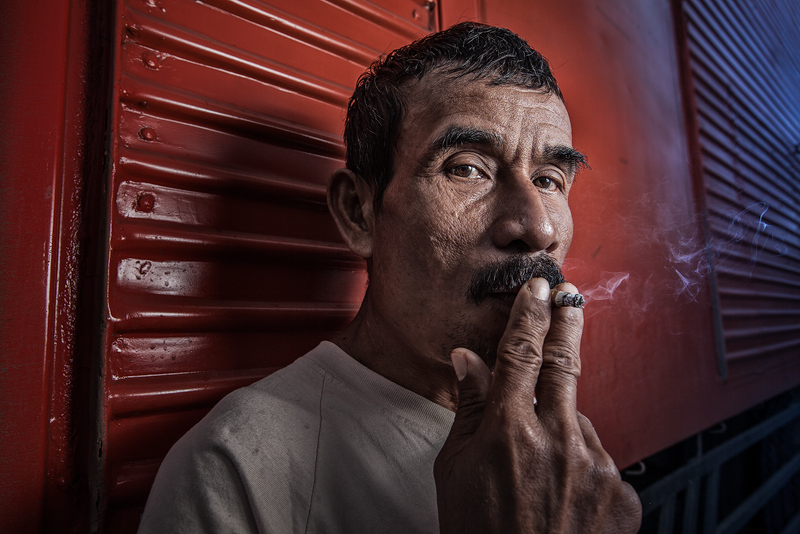
Sharp and Blurred. Notice the eyes of the subject are sharp (and higher contrast) while the doorway is quite blurry (and lower contrast). This directs your attention to the eyes and away from the doorframe. During shooting, you can do this by selection of wider aperture or by positioning yourself closer to the subject and leaving more distance between the subject and the background. You can also create or accentuate this during post-processing.
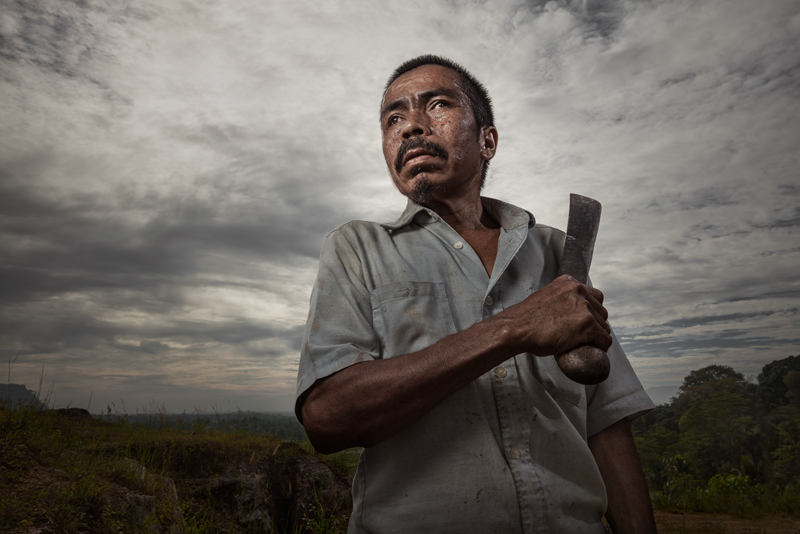
Close-up portrait of Indonesian man smoking in the doorway to his home
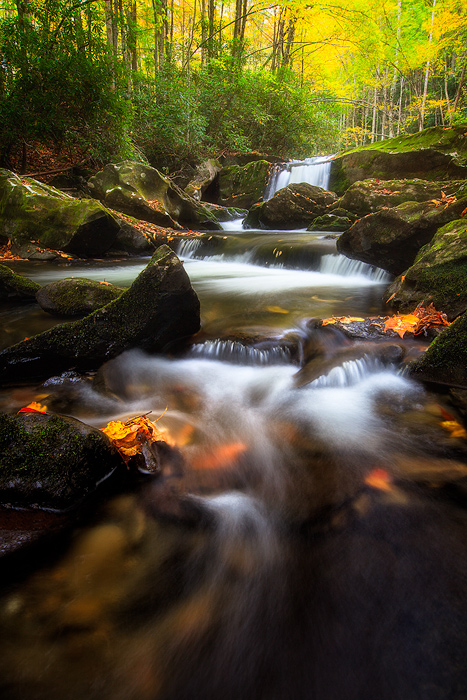
Warm and Cool. Orange, yellow and red are considered warm colors. Blue is a cool color. A movement across your image of cool colors to warm colors can add dimension. This can occur naturally with low, angled sunlight. However, this is generally something you can do during post-processing. Just don’t get carried away. The image below starts cooler at the bottom and gets warmer towards the top.
Creek on Middle Prong Trail of Little River during Autumn.
Lastly, creatively including opposite concepts or characteristics in the image (fast and slow, old and new, etc) can work well for conceptual pictures.
Everyone loves an amazing landscape image that stands on its own with no analysis required. However, pictures that require a little extra thought by the viewer can be compelling. Getting the viewer to take an extra second or two to think or wonder about your image is a good thing. Here are a few suggestions on how to make that happen:
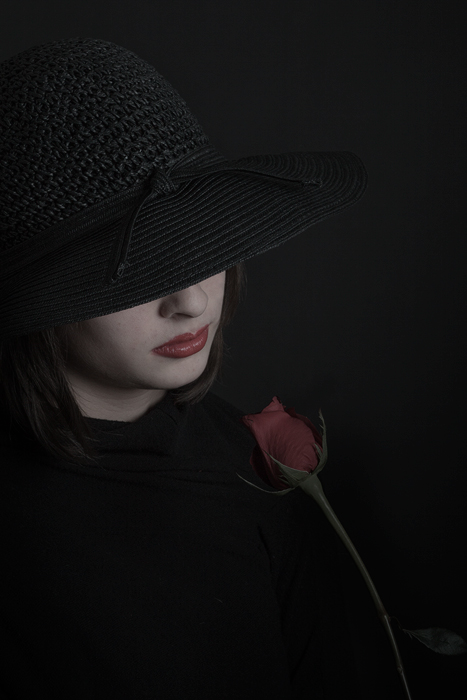
Convey a strong emotion. The image below is of an obviously sad or heartbroken girl that has gone through some sort of loss. This is an emotion that any viewer can identify with. In this case, you might wonder what it was that made the girl so sad. Now, before you start worrying about her… she’s fine. In fact, if I remember correctly, she was holding back a sneeze shortly before this picture was taken.
Heartbroken girl wearing black and looking at a red rose
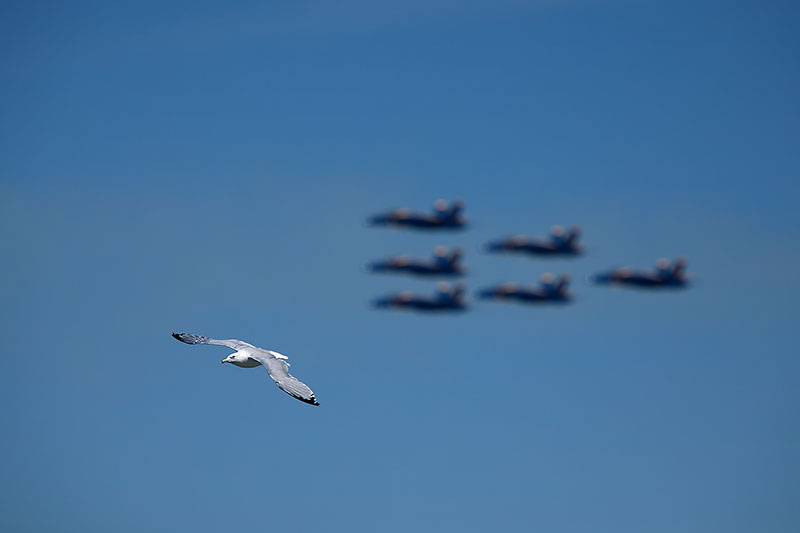
Convey a concept. The shot below isn’t an amazing picture, but it does convey a cool concept. The juxtaposition of two very different types of flight in the same image makes you look a little longer at the picture. (In case you were wondering, this was taken as a single shot at an air show… this is not a composite of two separate images)
Two forms of flight represented by a lone seagull flying in front of the Blue Angels during the Chicago Air and Water Show
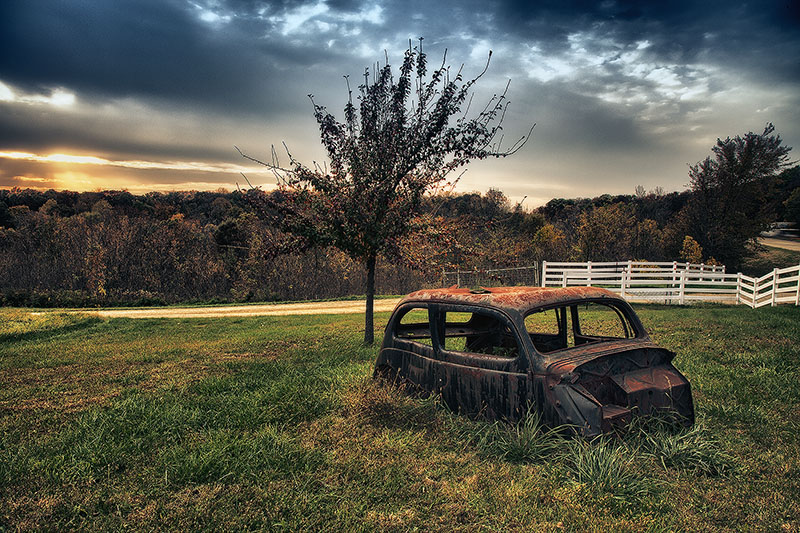
Show something that needs additional explanation. You might do a quick double-take when you look at the image below and wonder why an old rusty car is sitting in what looks to be a front yard. People will generally try to make some sense of an image before looking away, so this picture might hold your attention a little longer than if the car was sitting in a junkyard instead.
Include intriguing people as your subject. There is something about intriguing people that make you want to better understand what is going on inside their head. I’ve used this image in a recent blog, but the photo below is such a great example of a person that makes you want to better understand what they were thinking and feeling when the picture was taken.
Any serious photographer knows the feeling of looking closely at their pictures after a shoot only to realize their favorite image is blurry. Uggghhhh. Awful feeling. That feeling is much worse if it is your fault because you used a shutter speed that was too slow.
This blog will focus on choosing the right minimum shutter speed for sharp images. Having said that, you might want part or all of your image to be blurry. I love pictures that include both sharp and blurry components, such as the image below which combines a sharp landscape with blurred water. However, this blog focuses on minimum shutter speeds for sharp images.
Fog creeps through the trees overlooking Ponytail Falls
There are four things that I can think of that go into choosing a shutter speed. There might be more, but it’s 5:45 am here and my mind isn’t quite functioning yet. I think I’ll say four for now and I can always go back and change it and you’ll never know the difference.
Whether elements in your image are moving and how fast they are moving.
How still the camera is. This translates into whether you are hand-holding the camera (and how stable you are holding it) or have the camera on a tripod.
The distance from the camera to the various components in the image. A person riding a bicycle left-to-right five feet in front of you will move across the frame much faster than if they were off in the distance.
The focal length of the lens. If you are holding the camera, longer lenses are generally heavier which is one factor. Additionally, if you are using a 200mm telephoto lens, you have a much narrower perspective than if you are shooting with a wide-angle lens. This narrower perspective means that the same subject moving around or across the frame will take up a greater proportion of the image and be more of a factor.
Whether you are using flash and whether flash is lighting all or part of the image.
Okay, so that’s five reasons. The white chocolate mocha must be working. Now, here are some shutter speed guidelines for different shooting situations. As a general rule, if shutter speed is an issue, I like to err on the side of shutter speeds that are too fast rather than too slow. The trade-off is a higher ISO or wider aperture, but I prefer this to risking it with shutter speed.
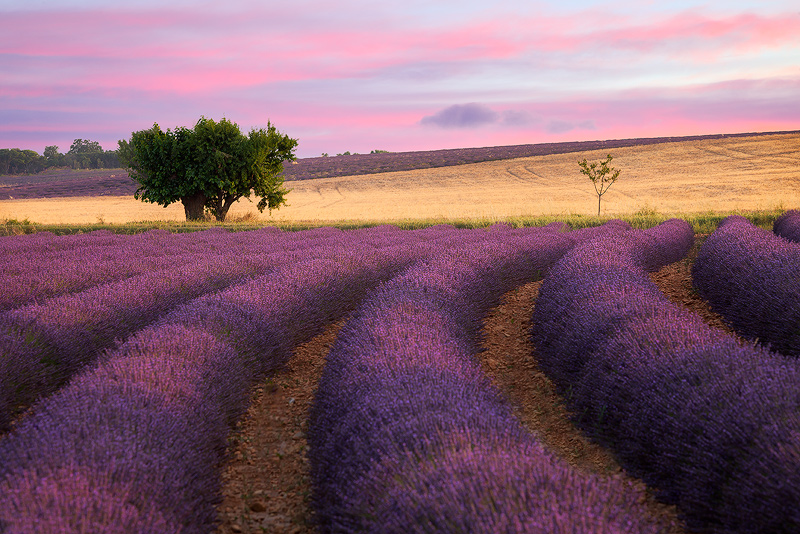
For stationary subjects, such as a landscape, I almost always select my aperture as the top priority and then use a tripod for the sharpest image. If it is windy out and there are moving trees or grass in the image which might become blurred, then I must decide on whether that is acceptable to me. If not, I can either adjust my aperture or ISO for a faster shutter speed OR take two images – including one with a faster shutter speed to freeze the movement – and then blend the images in Photoshop. For the image below, because I used a tripod, I used ISO 100 (for image quality), f/13 (for depth of field) which resulted in 1/25 as my shutter speed.
Late evening light strikes a tree in the middle of a lavender field
For stationary subjects in cases where I am hand-holding the camera, I will generally use the “reciprocal rule” and then often increase shutter speed a bit. What does that mean? If I am shooting at 200mm, I would use a 1/200 shutter speed or faster (so, 1/250 at minimum) to avoid the effects of camera shake. However, if I am using a wide angle lens (say 14mm), I would still not shoot below 1/40. For slower shutter speeds, I will turn on image stabilization and, if possible, lean against something to increase my stability. I’ll hold my breath and fire off 3 rapid shots by holding down the shutter button (in continuous firing mode). Then, later I can choose the sharpest image.
For slower moving elements (such as a person walking), you have two things to keep in mind… first, camera shake and, second, the moving elements in the image. However, the moving elements will be more of a factor here unless you are taking a picture of a sloth. Generally, for slower moving objects, such as a person walking, I use at least 1/125 and prefer 1/250 at minimum.
For somewhat fast moving elements, such as a person running, I prefer 1/500 or faster. A little bit of blur looks good sometimes, but this blog is about creating sharp images.
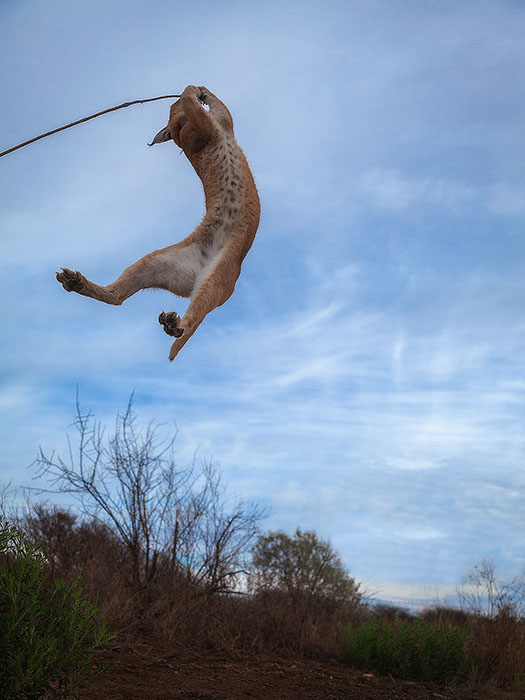
For fast moving objects, such as a moving car or running water, I generally prefer about 1/800 or 1/1000. For very fast objects, such as a bird in flight, 1/2000 is often recommended as a minimum. For the image below, I used 1/1600 as my shutter speed. I then had to use a slightly higher ISO than I would otherwise have used.
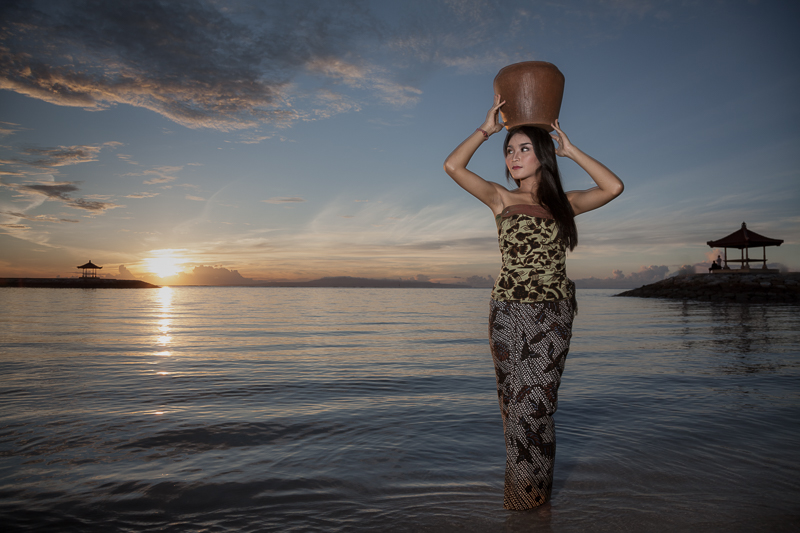
Now, if you are using flash, things get more complicated. I will only touch on the topic here. First, you will want to know your camera’s maximum sync speed and not exceed it. My camera (in theory) has a maximum sync speed of 1/250, although you really need to use 1/200 or slower. The “speed” (or duration) of the flash depends on the settings and the flash itself. However, the flash will be “faster” (a quicker burst of light) than your shutter speed. If your settings are such that the flash is providing the vast majority or all of the light in the image, then the duration of the flash is the key factor in freezing movement. However, it is very common for photographers to blend flash and natural light. In the picture below, the flash generally lit up the model while natural light lit the background. So, the duration of the flash was the key factor in freezing any movement of the model (so, not a real issue here) while the shutter speed was the factor for the background (and therefore I needed to pay attention to shutter speed to keep the background sharp… I used 1/160).
I have learned most of what I know in photography by observing others that are better at some aspect of it than I am. I recently learned some great portrait techniques from Indonesian photographer Rarindra Prakarsa, who shoots beautiful and compelling environmental portraits. I really enjoyed shooting these pictures and was happy with the results.
Indonesian dock worker taking a break behind a shipping container
Here are five tips for creating these types of images:
First, the subject and background must both be compelling. Notice in the shot below how excellent the subject is and how well the background complements him. This was a very friendly guy who works in a shipyard in Jakarta, Indonesia and who just happens to really know how to pose. You have to be really talented to get a bad picture of this guy… I had a number of keepers and it was difficult deciding on my favorite. What makes this image is his great expression and the interesting background which complements him so well.
Dock worker in a Jakarta shipyard poses for the camera.
Second, use a wide-angle lens and shoot from below eye level. Wide-angle lenses aren’t normally thought of as portrait lenses and don’t work for everyone. But, for certain subjects, shooting in the 20mm-30mm range can really work well. Shooting from below eye level makes your subject look larger than life. In the image below, I shot from significantly below eye-level and the result was…. well, very cool.
Third, carefully position the hands to be part of the composition. When a wide-angle lens is used, hands in the foreground will look much bigger than normal (as in the picture below). However, this looks good in these images in my opinion.
Indonesian man holding a machete with the rising sun behind him.
Fourth, use a mix of natural light and flash. These pictures were generally shot using just one off-camera flash at a 45-degree angle to the subject. Don’t overpower your subject with flash. You want to make it look like no flash was used. You’ll want to set your camera to “manual”, expose for the background (I generally underexposed a bit for these shots) and then bring in the flash.
Fifth, shoot either early or late in the day (when the sun is low in the sky) or in overcast conditions. Bright sunlight on your subject will generally ruin the picture… especially if he or she is squinting from the sun.
What I like about these images is that the wide-angle lens creates a perspective that doesn’t look quite “real”. Because of that, these techniques are entirely inappropriate for many or even most portraits. You will want to use different techniques if you are shooting a wedding or senior portrait, for example.
I love wide-angle lenses. I love them so much that I need to say it again. I LOVE wide-angle lenses.
When I refer to my love for wide-angle lenses (I really love these lenses), I am mostly talking about the widest lenses, also known as ultra-wides. Without getting too technical (because I can’t), these are lenses in the 14mm-16mm range for those of you who have full frame sensors (you know who you are). For cropped sensors, the 10mm range is the upper end of ultra-wide. These are different from fish-eye lenses, because ultra-wides keep the lines straight while fisheyes curve the lines. Don’t know what I’m talking about? That’s okay… read on as the same principles apply (somewhat) to wide-angle lenses in general.
I’ll start with the most important thing I have to say about wide-angles. Do NOT just use these lenses for jamming as much as possible into the picture. In fact, this usually doesn’t look good.
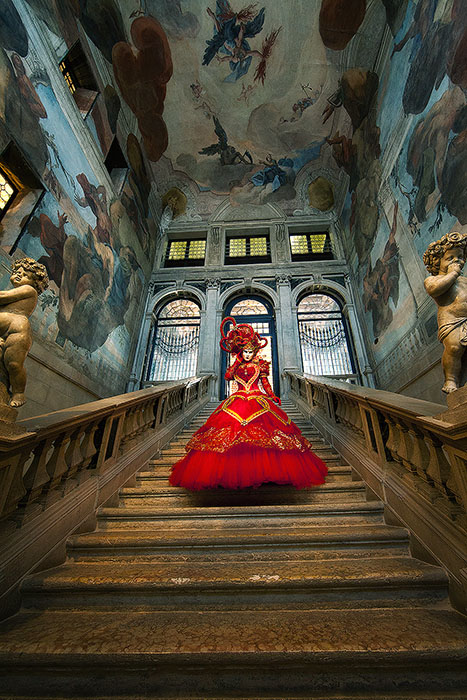
There are three things that I like about ultra wides. First, these lenses exaggerate the distance between the foreground and background. Objects that are far away look smaller than they really are while closer objects look larger. Getting close to a foreground subject makes the subject more prominent in the frame. Below is an example. I was shooting somewhat close to the model… probably 12-16 inches away from her left hand. The model’s dress and hand look large… like they have been pulled towards the camera. The building feels farther away than it was.
Carnival model in red walking down a beautifully painted staircase
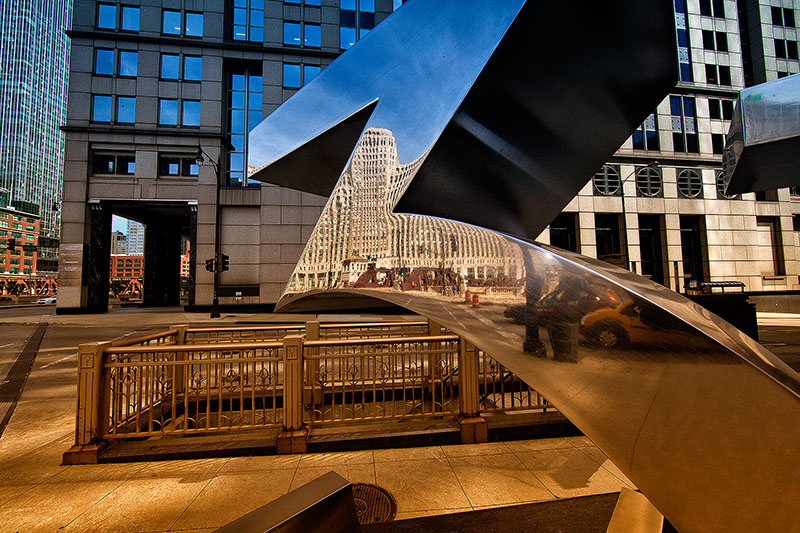
Second, ultra wides make the corners look stretched out. Check out the lower right corner of this picture shot with my 14mm lens and compare it to the center of the frame and the building in the distance. This stretching of the corners adds a lot of dimension to this image. One challenge in taking this shot was keeping myself out of the reflection in the sign.
Color rendition of a reflection in a sign on Wacker Drive
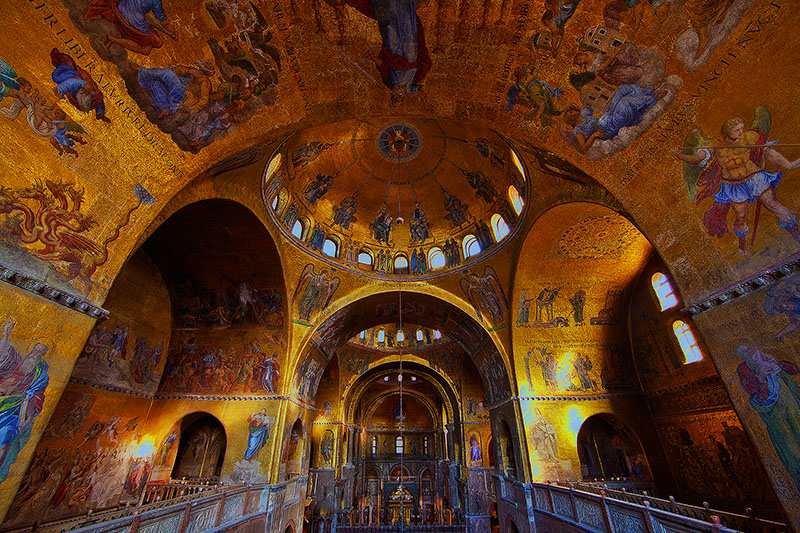
Third, yes, sometimes wide angles are helpful for jamming everything into the picture. Cathedral shots are an example. I could not have gotten this entire shot in without an ultra wide lens.
Here is some advice on using ultra-wides (and wide angles in general):
First, do not be shy about getting very close to your subject. Walk up to and around your subject while looking in the viewfinder and you will see how moving forward or back just inches can dramatically change your composition. This will also make you look cool to those around you. Just don’t trip on anything while looking through your viewfinder. Not that I’ve done that. I’m just saying.
Second, pay extra careful attention to the background. There is more background to worry about. It is much easier to inadvertently include unwanted elements. It is also more challenging to position yourself just right in order to get corners and lines where you want them. An example of where I blew this is the stairway shot earlier in this article. Notice the ceiling isn’t straight. I was positioned slightly off-center.
Third, and last, start without a tripod. Even if you will actually shoot with a tripod, start by walking around and determining your position first.
I love dramatic portraits. You can add drama to a portrait in a variety of ways, but the starting point is your lighting. Creative use of light and shadows can make almost anyone look cool. Almost.
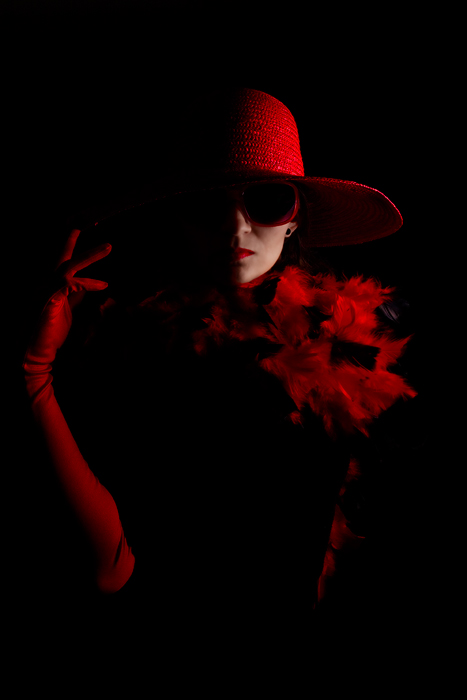
An easy and effective approach is called “side lighting”, also known as “split lighting”. Take a look at the image below and notice the obvious… that the light is coming in at a 90 degree angle to the subject and putting half of her face in light and half in shadow. This is a pretty extreme example of side lighting.
Stylish woman decked out in a red hat and sunglasses against a dark background
In this case, I took the picture in a fairly dark room with a black background. I used a studio light (strobe) and a light modifier called a “beauty dish” placed very close to the left of the subject’s face. I also had her move her right arm forward to light her arm and balance out the picture.
It was important to make sure that the light did not hit the background and did not go directly into the lens and create flare. You can prevent light from hitting either by placing a couple pieces of black cardboard near the front of the flash (parallel to the light and on each side of the flash) to block the light that would otherwise hit the background and lens.
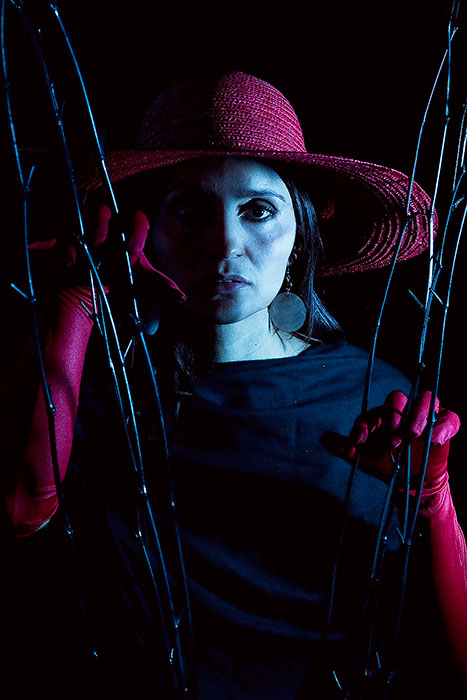
For the above image, I wanted very directional light. For the image below, I allowed a bit more light through on the front of the model.
Distressed looking woman wearing a red hat in a dark room
To get a less dramatic effect, you can bounce light back onto the unlit side of the subject’s face using a reflector. Also, window lighting can be used to side light, although the light coming in from the window will also create ambient light in the room, meaning you will have less contrast between light and shadows.
Photographers are faced with the challenge of bringing life to a static, two dimensional image. The creative use of light and shadows can make images appear three dimensional (I’ll address this in a future blog). You can also make your images more dynamic by capturing motion, which is the topic of this blog. Below are a few examples on how to do this.
Use very long exposures in dark environments. The picture below looks like the London Eye on steroids. The motion blur in the clouds and ferris wheel is the result of a 20 second exposure. These long exposures are only possible when minimal light is hitting the camera’s sensor, such as at night or when using a very dark neutral density filter.
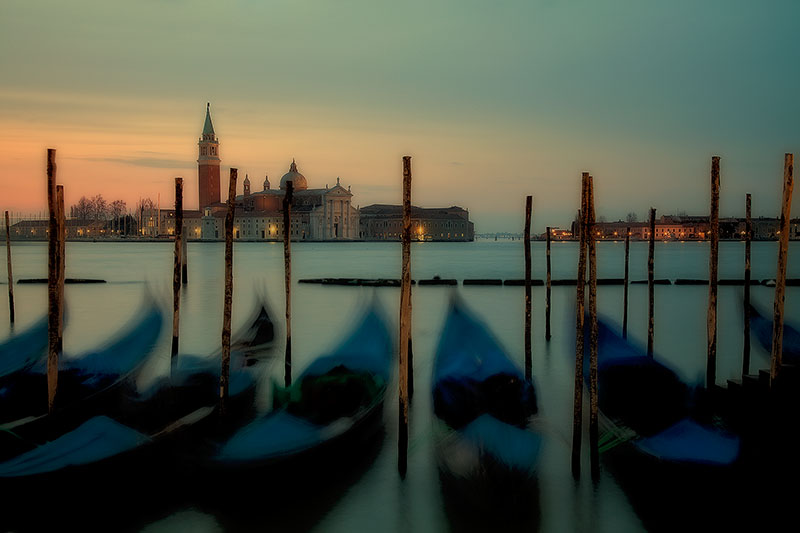
Capturing moving objects in brighter conditions. You can still get motion blur in a light environment. The amount of motion depends upon your lens focal length, distance to the subject, shutter speed and, of course, how fast the subject is moving. The shot below from Venice was taken using a shutter speed of 1/2 second, although you can blur fast moving objects using faster shutter speeds, such as 1/250 or faster. Generally, you’ll want to experiment to get the effect you want.
Freezing motion. Capturing and freezing water or moving objects using a fast shutter speed can still add movement to your image. This is especially true if the moving subject is prominent in your composition, such as in the wave splash below.
A wave crashing on the rocky shore of Oceanside, Oregon is frozen in time
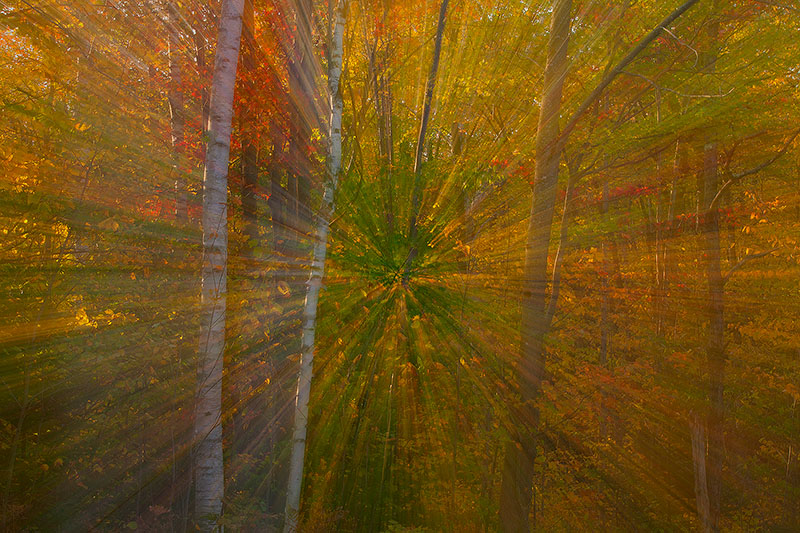
Zooming during the capture. If you use a zoom lens, another way to capture motion is by zooming during the actual capture. In most cases, these shots look better if at least part of the picture is sharp (notice the trees are sharp in the image below). So, it is still important to focus on your subject before zooming.