Don’t Miss the Shot

Everyone has regrets over having missed some great photo opportunity which they will never get back. However, nobody’s story is as sad as mine. So, grab a handkerchief and read on…..

It was shortly after I got my first 35 mm film camera while in college. I was in Rome with a group and had the opportunity to see Pope John Paul II speak at St. Peter’s Basilica. I was in the front row in the back section and perfectly positioned as he was driven by to touch hands (FYI, yes, I touched the Pope’s hand). As he approached, I got a beautiful close-up portrait shot of him waving while looking right at me. Or, so I thought. When I picked up my pictures after processing (yes, this was in the days of film), I discovered that my prize-winning image was completely out of focus.

Now, before you rush to judgment and close my blog window, my ancient camera did not have autofocus and the Pope was in a vehicle driving straight at me. However, the point is, I’ll never get this shot back. Here are a few tips for avoiding missing the shot in situations where you are shooting a scene with a moving subject which you cannot control, such as a Pope driving by:

Tip #1: Keep looking through the viewfinder. This shot of the cormorant fisherman with his bird is one of my favorite images. I shot this in Guilin, China. The bird spread its wings like this for a split second. There is no doubt that I would have missed this shot if I wasn’t looking through the viewfinder and ready to shoot.

asia,boat,china,chinese,cormorant,fish,fisherman,fishing,guilin,hat,horizontal,household,lamp,lantern,li r

The Fisherman's Bird : Prints Available

Chinese fisherman next to his cormorant bird

Tip #2: Pre-focus on your subject. I have my camera set up to lock in auto-focus at the press of a button on the back of the camera. In this case, I zoomed in, focused on the eyes of the fisherman, then framed the shot with the bird in it and waited. I didn’t need to worry about focusing after that since the fisherman was staying still. If the main subject is moving, you can use a focus setting which tracks moving subjects, such as AI Servo on Canon cameras. Or pre-focusing on a spot where you anticipate your subject will move to is a good strategy in some cases.

Tip #3: In some cases, use Program Mode. Many photographers prefer having independent control over aperture and shutter speed. However, in some cases, you just need to get the shot. Consider using Program mode. You don’t have to tell anybody you shot in Program mode. Heck, just tell your friends you got the shot in Manual mode and manually focused, too.

Tip #4: Don’t put your camera away too soon. I got this cool shot of a helicopter headlight trail over Chicago about an hour after the 4th of July fireworks had ended and most people were headed home. I noticed a helicopter flying around the city in the distance and saw a potential photo opportunity. After about an hour, the helicopter flew a cool “S” curve around the Sears Tower. (Yes, I know it is now the Willis Tower, but I am a long-time Chicagoan and will always call it the Sears Tower.)

america,chicago,city scape,cityscape,helicopter,helicopter trail,horizontal,il,illinois,light trail,midwest,night,north america,sears tower,s

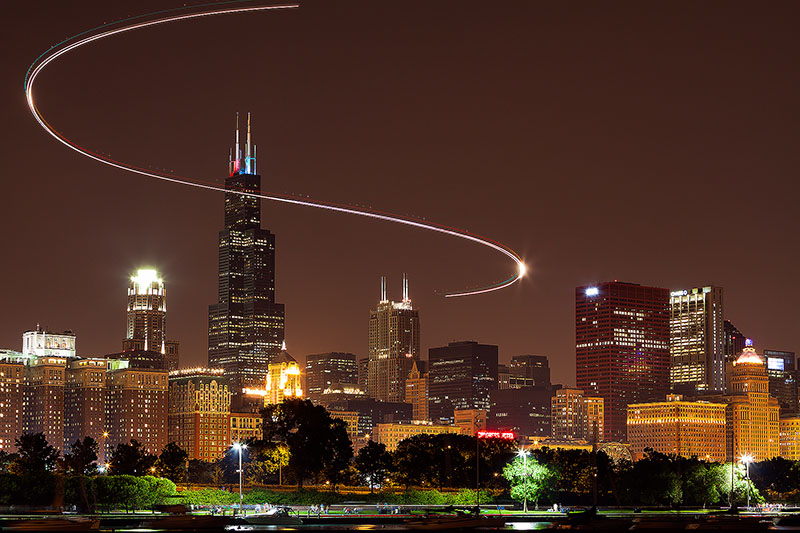
Light Trail : Prints Available

Helicopter light trail around Chicago’s Sears (Willis) Tower

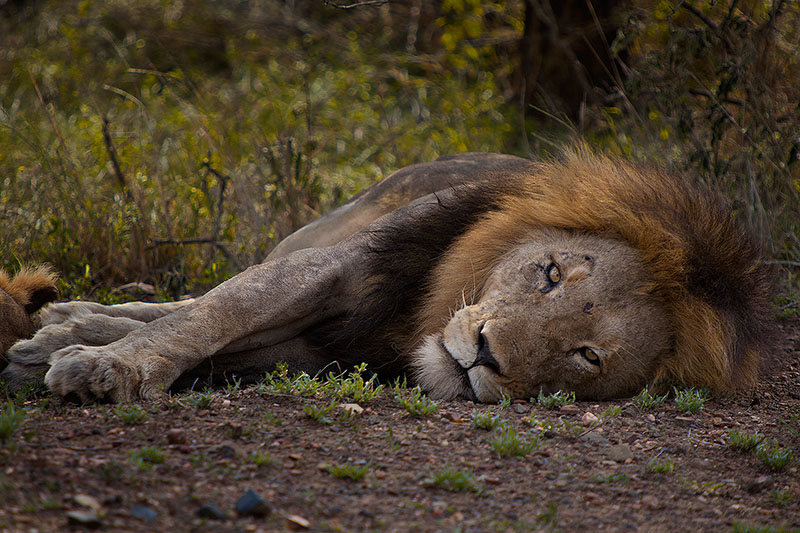
Tip #5: Pay attention to your settings. This is especially important when shooting in aperture priority mode with moving subjects or when shooting handheld. Failing to pay attention to your shutter speed could result in a blurry image.

Tip #6: Check the image on the LCD display. For those shooting digital, take advantage of the LCD display. If you can afford the time, zoom up close in key parts of the image to check for sharpness.

Introduction to Neutral Density Filters

Whenever I want to impress somebody, I bring up the topic of neutral density filters. It sounds highly technical and makes me look smart. Truth be told, neutral density filters (a.k.a. ND filters) are just shaded pieces of glass or plastic that go over your camera lens. The fancy name is so that the suppliers can charge ridiculously high prices for them.

Although there are a variety of types, here are the most commonly used ND filters:

  • Solid ND filter This is a piece of glass or plastic with the same level of shading throughout. Using this filter is like putting sunglasses on your camera, but without a polarizing effect. The basic idea is to just reduce the light getting to the sensor. These are typically available in 1-3 stop varieties. A 2-stop ND filter will reduce the light by 2 stops. Now, why would you want to reduce the light reaching your camera’s sensor? One reason is to slow your shutter speed during the day in order to blur running water, as I did in the following waterfall picture.
beautiful,columbia river gorge,north america,northwest,oregon,pacific northwest,panther creek,panther creek falls,united states,vertical,water body,waterfall

Panther Creek Falls Up Close : Prints Available

Sunlight hits a section of Panther Creek Falls

  • Extreme ND filter (a.k.a. “black glass”) These are solid ND filters on steroids. They reduce the light by around 10 stops, allowing for very slow shutter speeds. I really like these filters. You can get a night exposure quality during the day. This can result in cool effects, especially when a body of water is in the picture. The following picture of the Portland Headlight was taken in the afternoon (in the pouring rain, actually) using black glass.
america,building,east,eastern,head light,horizontal,lighthouse,long exposure,maine,new england,north america,portland,portland headlight,united states,us,usa,water,water shot

Clouds Over the Headlight : Prints Available

Maine’s beautiful Portland Headlight lighthouse on a cloudy day

  • Graduated ND filter. The graduated ND filter has a transition line in the middle, with half the filter clear and half shaded. These are available with both hard and soft transitions. The hard transitions go very quickly from clear to fully shaded, whereas the soft variety blends the transition more slowly. The most common use is when you are shooting a landscape shot which includes the sky. The sky is typically brighter than the land, so without the filter you might either blow out the sky or the land goes dark. You simply set the filter so the sky is behind the shaded part of the glass and it reduces the contrast between the sky and the land. Generally, if you only buy one of these, get a 2-stop soft graduated ND filter. If you can buy two, get a 2-stop soft and a 3-stop hard.

All of the above filters come in two main varieties:

  • Filters that screw onto the lens. So, if you have lenses with different diameters, you would likely need one for each diameter. Screw-in graduated ND filters make no sense to me. That’s because the transition line is fixed right at the center, so they won’t work if you want the transition anywhere but the center of the frame.
  • Flat pieces of glass or plastic (mostly plastic) which go into a holder. The holder either screws onto your lens or gets pushed onto the outside of the lens, depending upon the holder. You can then position the filter however you like. These come in different sizes. I use 4×6 inch filters, which is the most common size used for digital SLR cameras.

As for brands, the highest end (and most expensive) are the Singh-Rays. If you don’t like spending $160 on a 4×6 inch piece of plastic, but like the idea of spending $80 or $90 for a piece of plastic, then Lees are also known to be excellent. There are other cheaper brands available.

So, why not just make the adjustments in Photoshop, or blend exposures using HDR or Photoshop layers? A few issues here:

  • Depending upon your camera and software, it is difficult to handle extreme contrast in a single shot. You either blow out the highlights are get digital noise in the shadows.
  • Blending two or more pictures with different exposures using layers adds to your post processing work.
  • HDR is cool, but it doesn’t always look natural and generally requires multiple shots.
  • Conventional wisdom says to get the picture as right as you can when you press the shutter, rather than fixing it later.

There’s a lot more to say on the topic, but I hope this brief intro helps explain the basics.

Image De-Stabilization

Some time ago, I spent a day at Kruger National Park in South Africa. I was fortunate to have three lion sightings in a day.

africa,african,cat,horizontal,kruger,kruger national park,lion,mammal,safari,south africa

The King at Rest : Prints Available

Male lion resting on the ground

I was in a truck and hand-holding the camera. I set my Canon 70-200 lens (with a 2x extender) to “image stabilization” (IS). This turned out to be a big mistake.

The conventional wisdom is to turn IS off when using a tripod because your pictures may come out blurry. This is because the IS doesn’t like a very still camera and tries to account for camera shake. However, prior to the trip I read an article on a website which (in theory) should have been the definitive source on the subject. This article stated that this doesn’t really happen with the newer lenses and that you can pretty much leave IS on all the time. Well, from my experience on that trip and from the experience of others, this simply is not true.

africa,african,gazelle,horizontal,impala,kruger,kruger national park,mammal,safari,south africa

Young Gazelles : Prints Available

Two gazelles at Kruger

When I was shooting, I used a reasonably fast shutter speed and rested my left arm on the edge of the truck and then my right arm and camera on top of my left arm. My technique effectively created a tripod and the result was a number of blurred pictures due to IS being on, including some hyena pictures that would have been quite cool otherwise. Unless, of course, you like your hyenas blurry.

My suggestion is to not believe everything you read (except for this post) and to leave IS off unless you are shooting still subjects hand-held and shutter speed is a concern. If you are forgetful like me, you might also want to leave a note for yourself to turn IS back off when you are done shooting, too.