Welcome to Part 2 of “Taking Blurred Water Pictures of Creeks”. The first article focused on setting up the shot, including settings and positioning. This article deals with the fun stuff… composing and shooting.
Judging by the number of emails I’ve gotten, a lot of you were anxiously awaiting Part 2. Actually, that’s not true. I didn’t even get one email. No phone calls, no texts, no emails, no nuthin’. In fact, while I’m on the subject, it’s really lonely authoring a blog. If it wasn’t for this large white chocolate mocha sitting next to me, I don’t know how I’d handle it. But, let’s move on, first with composing the shot…
Composing
- Use leading lines to direct the viewer’s attention – This is an often used compositional technique, but is especially helpful in creek shots. Creeks are full of leading lines, starting with the creek itself. As in the shot below, look for rapids which will form white blurry lines. Also look for rocks to form leading lines. You want the stream, rocks and whatever else to focus the viewer’s attention where you want it. Generally speaking, you will want to avoid straight lines in your composition, particularly if they don’t point to the background or subject. If there are fallen trees in the middle of your composition, you might have to think about a different spot until they get cleared out.

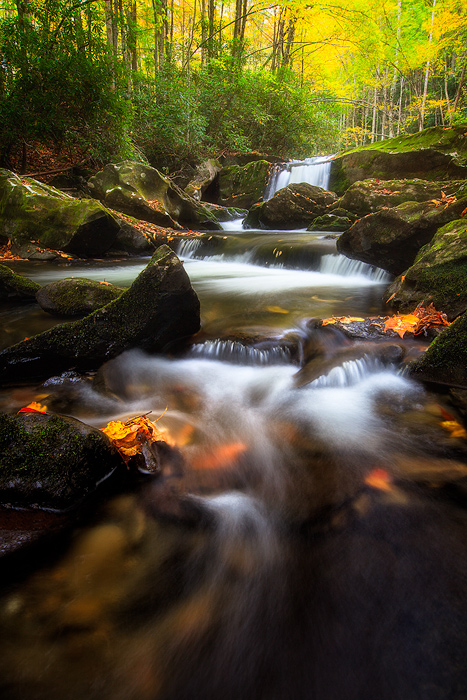
Middle Prong Creek : Prints Available
Fall colors on Little River off of Middle Prong Trail.
- Don’t let the rapids run out of the frame – Remember those white blurred lines we just talked about? Well, you will typically not want these small rapids running out of your composition. It doesn’t look good. Notice in the image above that the blurred rapids are close to the edge of the image, but don’t actually run out of the frame.
- Avoid patchy lighting – Don’t go out on a bright sunny afternoon and expect good creek shots. You will want to avoid patchy lighting in your foreground or background, so shoot in cloudy conditions, or else very early or late in the day. This isn’t necessarily a rule… sometimes a bit of sun coming through the trees can really add a nice glowing effect on the scene. It is harsh, patchy light you want to avoid.
- The shot must be compelling, front to back – When composing, make sure the entire image works together. The foreground and background need to have a connection.
- Include partially submerged objects – Sometimes a leaf or other objects which have water flowing over them can really add to the picture. Notice the water running over the leaves near the foreground in the image above.
- Look for natural “frames” within the picture – Curved trees near the top of the frame look cool and help form a natural frame for the image. I’m talking about distant trees, not close-up. In general, I don’t like using leaves in the immediate foreground to frame an image.
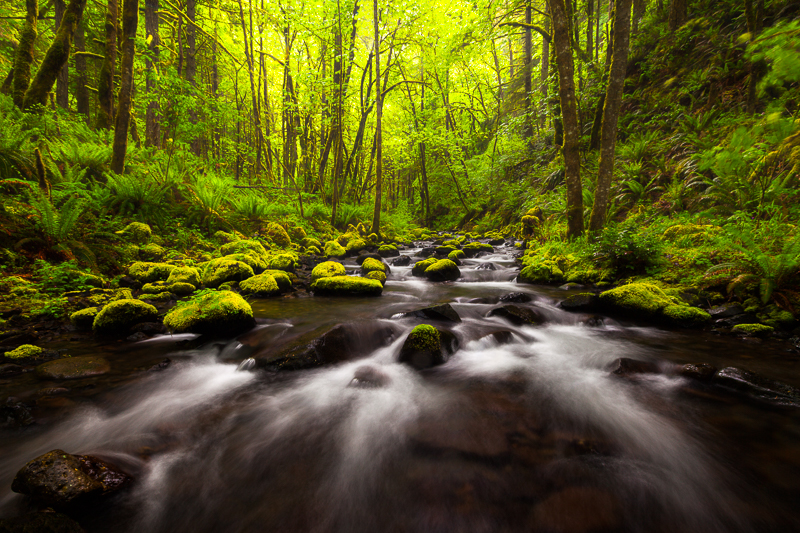
Gorton Creek : Prints Available
Lower Gorton Creek in the Colombia River Gorge
Shooting
- Use Live view – As in most landscape images, using “live view” is helpful in getting good focus on the scene. For creeks, you generally want your scene to be sharp from front to back and avoid blurred objects in the foreground. This is a much bigger topic that is beyond the scope of this blog, however.
- Use wide angles, but not necessarily the widest setting – Although a lot of people set their wide angles to the widest setting, this doesn’t always work in stream shots. You are trying to balance the emphasis placed on the foreground and background. The widest setting of your wide angle may not give you the right balance.
- Sometimes two shots are necessary – With long shutter speeds, trees and plants have more time to move due to wind. You may want to take two shots and blend them… one with a fast shutter speed to freeze the blurred plants and a second with a longer shutter speed to blur the water. This is especially true for foreground plants. You can get away with some blurred leaves in the distance, but blurry foreground objects ruin the image.
- Leaf blurs – If there is a small pool in your composition which has a current (especially a circular current), then toss some leaves in there to get a nice leaf blur. This adds some motion to the images, as in the image below.
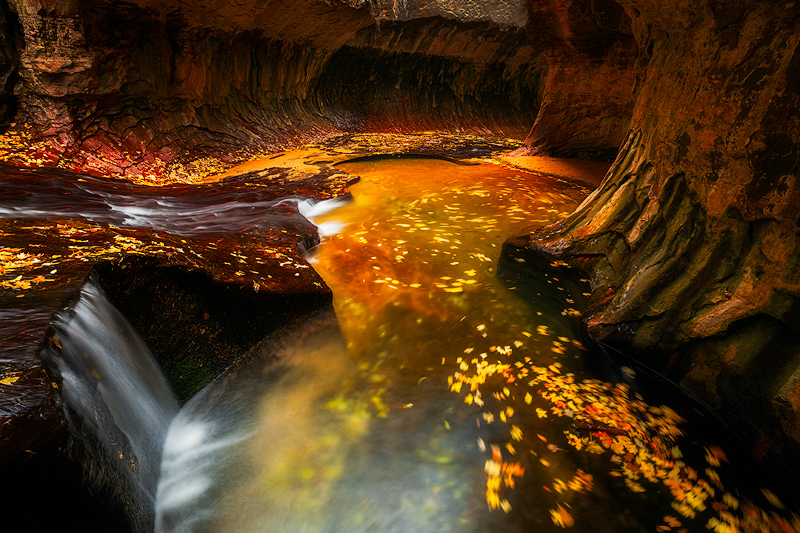
Subway Gold : Prints Available
A flood in the Subway leaves the formerly turqoise pools filled with sand
Bonus tip – Once it gets too bright outside to shoot standard creek shots, consider shooting some reflections in the creek. These can make great abstract pictures, especially if the light is hitting the trees along the creek (which are reflected in the water), but not lighting the creek itself.
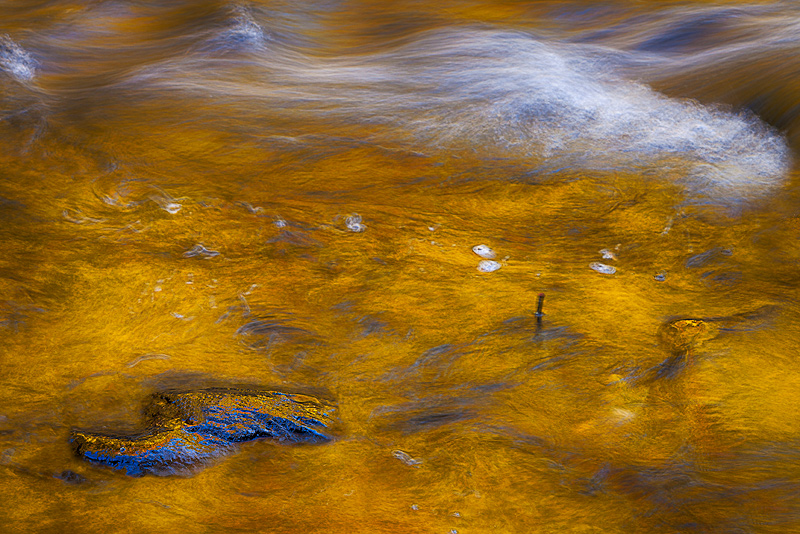
Golden River : Prints Available
Abstract of golden reflections in Tennessee’s Little Rover