Stars Over Tuscany : Prints Available
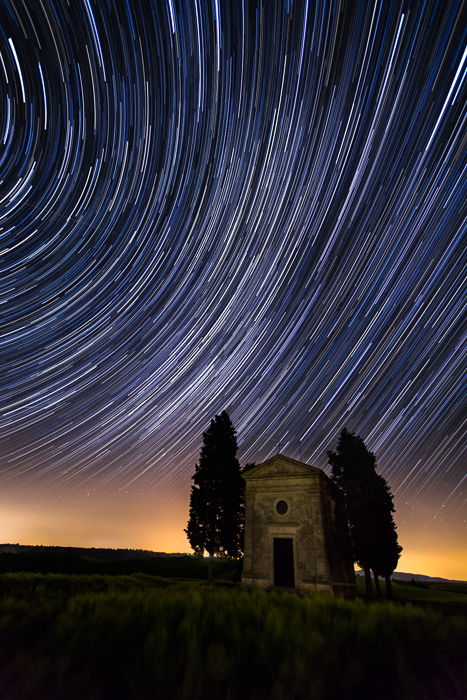
Vertical star trail image of a church in Tuscany.
Welcome to Part 3 of a 3-part series on shooting the night sky. Part 1 focused on settings and image capture. Part 2 looked at processing a Milky Way image.
IMPORTANT: For star trails, I use many of the same shooting and processing techniques I’ve described in Parts 1 and 2. However, I don’t repeat those techniques in this article. Part 3 focuses only on the additional steps for creating star trails.
Shooting for Star Trails
I shoot in the same way as described in Part 1, with four important differences:
1. Shoot Many Exposures – Instead of one sky shot, you will shoot many. For the above image, I took 180 consecutive 30-second exposures. This equates to a little over 90 minutes when accounting for the slight delay between shots. Most night photographers shoot for at least an hour when shooting trails. Sometimes I use my intervalometer and set the gap between shots at 2 seconds. Other times, I set my camera to continuous shooting mode and lock my shutter down with my remote. Then, I just check the time and release the shutter lock after 90 minutes. Both approaches work.
2. Dark Frames – Just before and after shooting the 180 exposures, I put my lens cap on (being careful not to bump the tripod) and shoot 2-3 dark frames. These dark frames will later be used by the stacking software to help identify and remove hot pixels from the image.
3. Timing is Important – If the sky has not yet reached maximum darkness when you start shooting, then your sky images will have differing levels of brightness. So, make sure to shoot when sky is quite dark for consistent exposures.
4. Positioning – If you are in the Northern Hemisphere, then your trails will spin around Polaris, a.k.a. the North Star. If you do not know how to find the North Star, Google it to see an illustration. The two outer points of the bowl of the Big Dipper (the side opposite the spout) point to Polaris. You might not be able to control your positioning relative to the North Star, but it is good to know what your trails will look like ahead of time. Shooting wide angle means a greater portion of the trails will be included in your image.
Processing Star Trails
The processing I use is essentially what I’ve outlined in Part 2, but with a few differences. (You can ignore some of the Milky Way specific adjustments I made in that article.)
1. Initial Processing of the Sky Images – I first process the sky images in Lightroom much the same as I’ve outlined in Part 2, but process them darker. You can certainly experiment with lighter exposures to see what you think. After these adjustments in Lightroom, here is what the image looked like.

I then copied the settings from this one image to all the other sky images. Keep in mind that I shot for the foreground subject separately, just as I describe in Part 1.
2. Clone Out Airplane Trails – If you shoot late enough, you will probably not have a major problem with airplane trails. However, you will likely have at least some images with streaks from airplanes. You should clone these out. In Lightroom, you can use the local healing brush tool over the trail, making sure it is set to 100% opacity.
3. Create JPGs or TIF Files – Next create JPGs or TIF files for all your sky shots, making sure they all have the same settings (except for the local healing adjustments for the airplane trails). Save at the highest quality. Don’t forget to create JPGs of the dark frames.
Creating the Trails Using StarStaX Software
To combine the images, I use StarStaX software, which you can find here. StarStaX is available as a free download for Mac OS X, Windows and Linux. There are other software options for creating star trails. You can also combine the images manually in Photoshop using layers. This latter option allows you more flexibility but is cumbersome.
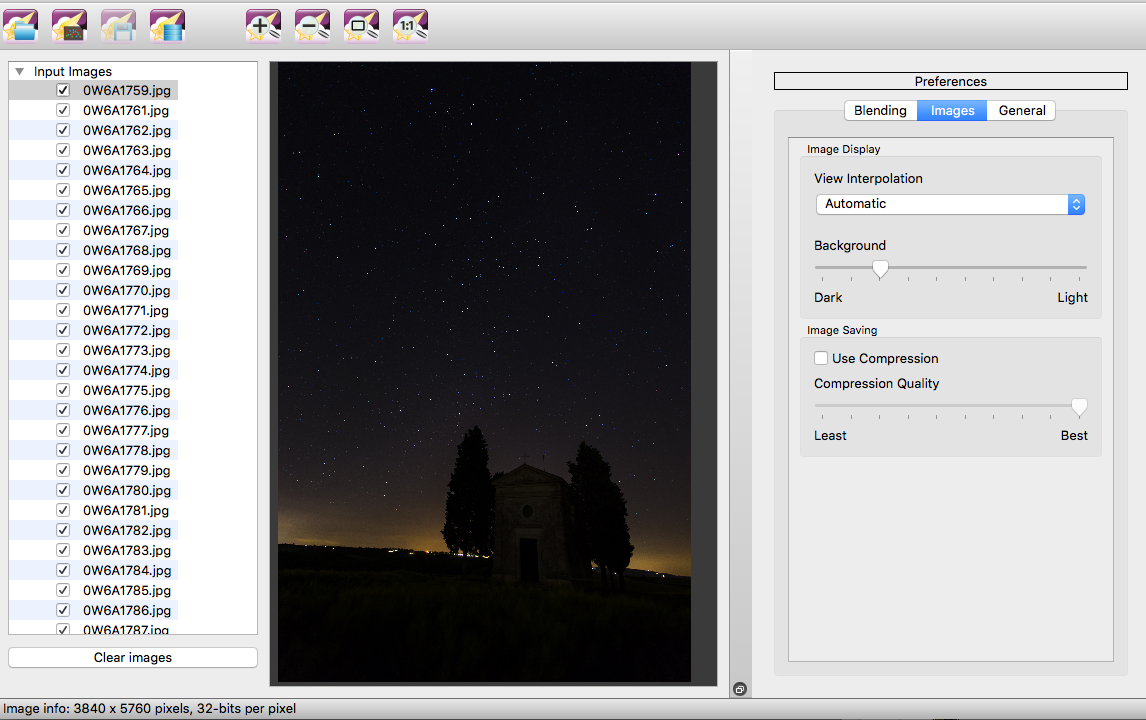
When you open StarStaX version 0.71, which is the latest version as of today, you will see the following.
Here are the steps to take in StarStaX:
1. First, click the upper left button (Open Images). Select all of the JPGs/TIFs except for the dark frames. Your star trails will look longer or shorter depending upon how many images you include, so you can experiment with different numbers of images. Your screen will then look like this:
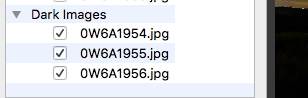
2. Next, add the dark frames using the Open Dark Frames button. This is the 2nd button from the left on the top row, right next to the Open Images button. Your dark images will appear at the bottom of the list in the left column.
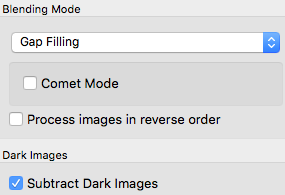
3. Next, on the right hand side, in the Blending section, I switch the mode to “Gap Filling” and make sure “Subtract Dark Images” is checked. Try some of the other modes, such as Lighten, to see what they do.
4. Click on the 4th button from the left, which is the “Start Processing” button. It will take several minutes to blend the images.
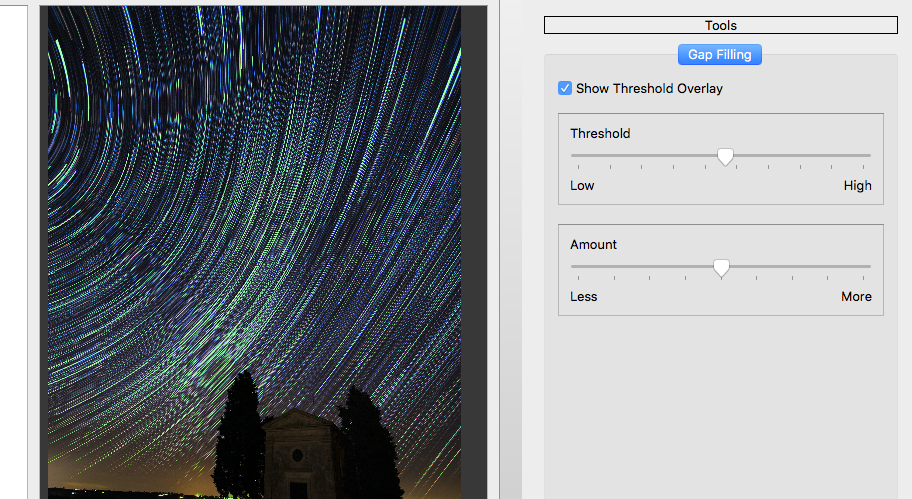
5. If you have used the Gap Filling mode, then after the software finishes, check the “Show Threshold Overlay” button and adjust the Threshold lever left or right until the star trails are green, but the rest of the image is not. This will help fill in any gaps in the trails.
6. Click the “Save As” button, which is the 3rd button from the left in the top row.
7. When finished, bring this file into Photoshop as a layer and process it as the sky layer in your Photoshop file. Again, see Part 2 for more ideas on processing.