The Orton Effect is a processing technique which helps make images “glow”. This technique is quite popular among landscape photographers. Although it was originally used in film processing, this is accomplished in Photoshop by combining a blurred image with the original (non-blurred) image and then applying some brightness and/or contrast adjustments.
I’ve seen different ways to get the same effect, but the version I prefer is one taught by Sean Bagshaw. It takes an extra step or two to set up, but then gives you more control. First, here are some images to show you what the Orton Effect looks like:
Image Without the Orton Effect
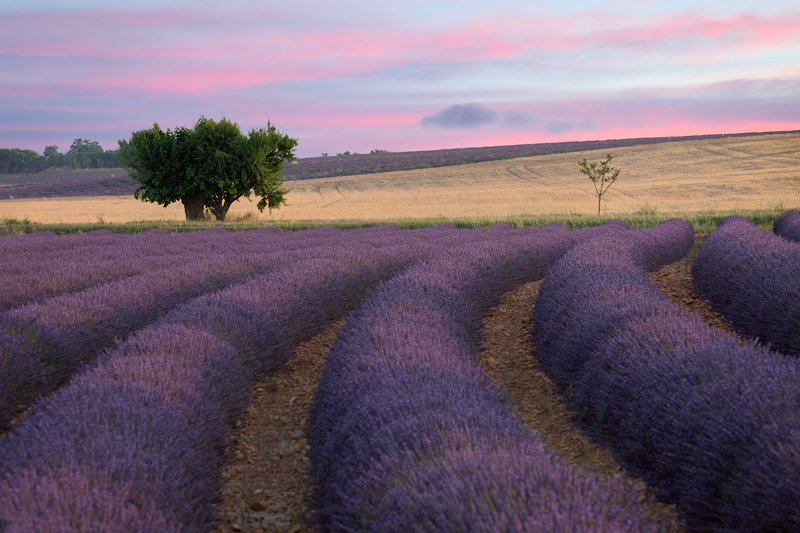
Full Orton Effect Applied to the Entire Image
This is too much Orton, but you can see the glow I am referring to. Notice that the sky goes white due to the increased brightness I used (more on that later) when the full effect is applied.

Reduced Orton Effect Applied to the Entire Image
For this image below, I’ve reduced the effect to 30%, which is in the range I’d normally apply, but have left it applied to the entire image. The sky is still lighter than without the effect, which is undesirable.
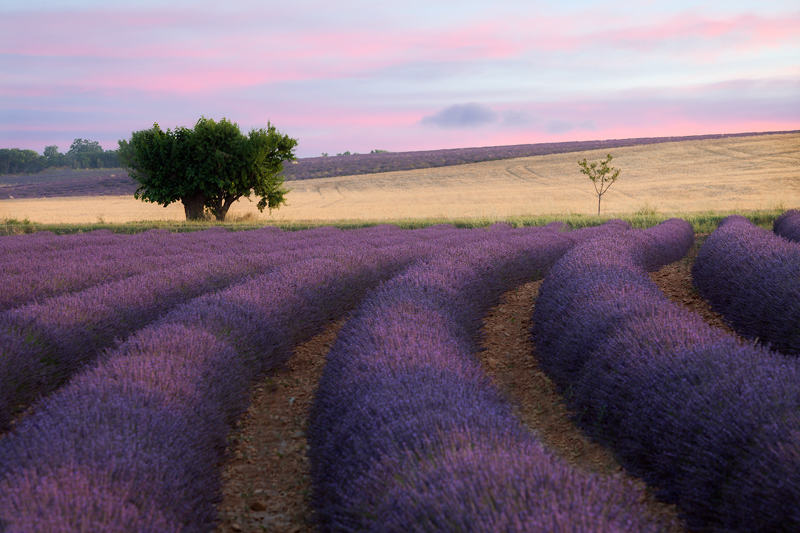
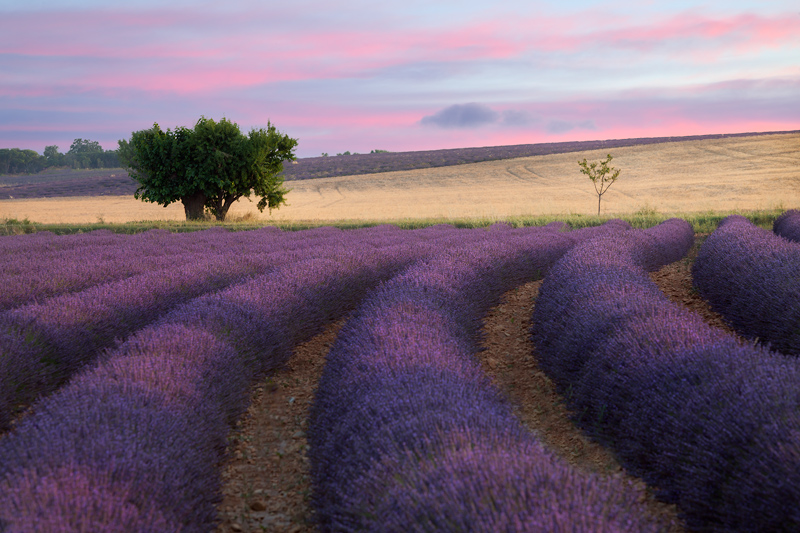
Orton Effect Applied Selectively
In this case, I’ve applied the effect moderately in selected parts of the image, namely the lavender, the distant yellow field and the right part of the larger tree which is getting sunlight.
My opinion is that images look their best when the Orton Effect is applied selectively to only part of the image rather than the entire image. Here is how to create the effect in Photoshop (Note: I am assuming you have some basic knowledge of Photoshop here):
- First, make a copy of the background layer (Layer – Duplicate Layer).
- Second, create a new group folder by either clicking on the group folder icon or going to Layer – New –> Group. You can name the folder “Orton”. Move the copy of the background layer into the Orton folder.
- Third, create two brightness/contrast adjustment layers in the Orton folder. Move one layer above the background layer copy and one below.
- Fourth, select the top brightness/contrast layer and clip it to the background layer copy by doing a Control-Click (Mac) or Right-Click (Windows) on the brightness/contrast layer and choosing “Create Clipping Mask”. Change the blending mode to “Luminosity”. Then double-click on the left side of the layer to open up the adjustment panel. For now, increase the brightness to around 40 or so and decrease contrast to around -20 or so. You will adjust it later.
- Fifth, select the bottom brightness contrast layer and double-click on the left side of the layer to open up the adjustment. For now, increase the brightness to around 40 or so and decrease contrast to around -20 or so. You will adjust it later.
- Sixth, click on the background copy layer and choose “Filter-Blur-Gaussian Blur”. When the filter opens, you will have one value to adjust. Generally you don’t want the value too high or too low. I generally like the effect somewhere between 7 and 40 and usually between 10 and 15. Click okay and then change the blending mode of the layer to “Soft Light”.
- Seventh, now that you have the full effect applied, it is time to make adjustments to the brightness/contrast layers. Double-click on the left side of each brightness/contrast adjustment and try modifying the adjustments to get the image looking more like you want, keeping in mind you will be lessening the overall effect. Sometimes, it looks good to apply increased contrast rather than decreased.
Now, there are two options:
- Option 1: If you want to apply the effect to the entire image, then simply click on the Orton folder layer and reduce the opacity until it looks how you want it to. I usually settle on around 30% opacity.
- Option 2: If you want to apply the effect selectively (recommended), then Alt-Click on the “add layer mask” icon while the Orton folder layer is selected to add a black mask to the layer. Then select a soft brush using white as the foreground color and reduce the flow on the brush to around 15%. Paint white on the mask to build up the effect in the areas of the image that you want. In general, I find that having the distant elements of the image glow looks better. Also, you may want to retain the detail in certain parts of the image, such as a detailed foreground subject, so avoid painting the effect into those areas. I also usually avoid applying the effect to bright areas of the sky, as the Orton Effect (depending on your settings) will typically brighten that part of the image.