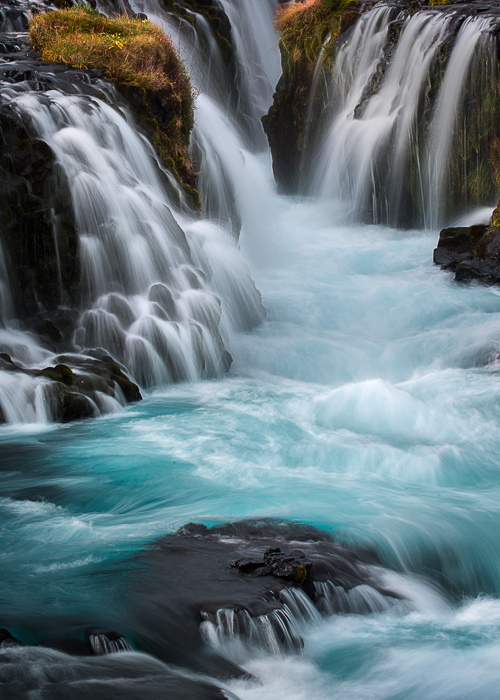
Sign up for my mailing list at the top of this page to receive regular updates!
I love shooting into the sun. It does sound a bit counterintuitive. Cameras don’t handle contrast as well as our eyes do, so skies can easily go white and shadows black in high contrast situations. But, with a little bit of technique in shooting and processing, you can get some cool images. So, embrace the contrast.
Here are some tips for shooting into the sun:
Tip #1: Shoot into low-angled sunlight. I shot the image below in Death Valley just as the sun was hitting the horizon. You’ll get better results with this very low-angled sunlight because it is warmer and less contrasty than mid-day sunlight. Twenty minutes earlier and this would have been a pretty lousy picture. The light would have been too contrasty resulting in white skies and washed out colors. The cool shadows on the dunes would be missing.
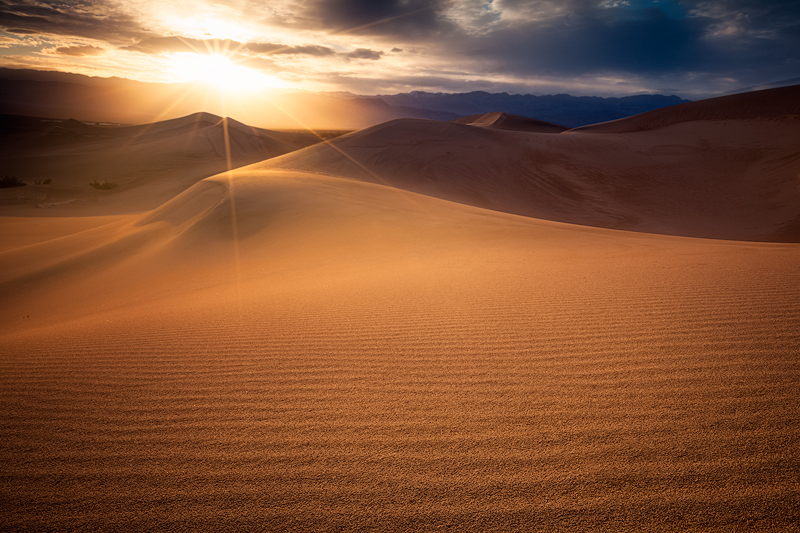
Sunset Over Mesquite Dunes : Prints Available
Horizontal view of Death Valley’s Mesquite Dunes at the end of the day.
Tip #2: Create a sunstar. The images above and below each have a “sun star”. I posted an earlier blog on this, but basically you shoot with a very small aperture (such as f/22) using a wide-angle lens. This doesn’t work well with all lenses, but the Canon 16-35 f/2.8 works great. This doesn’t work well with mid-day or diffused sunlight.
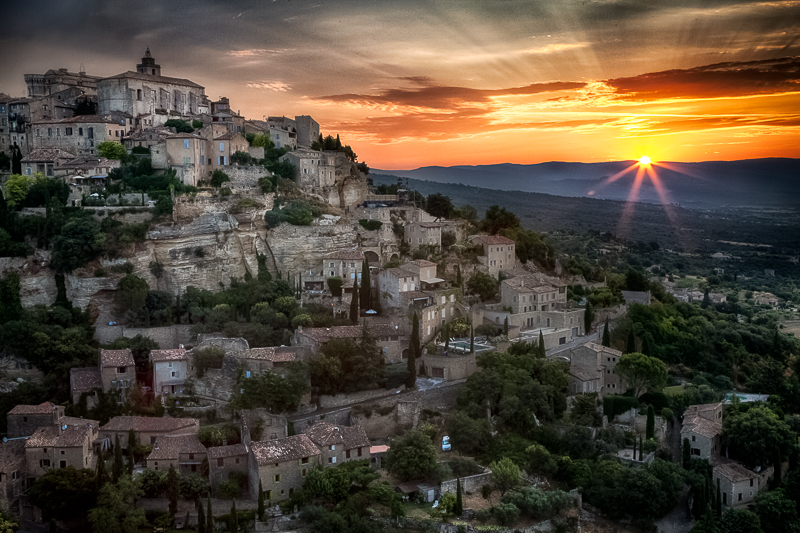
First Light Over Gordes : Prints Available
Beautiful sunrise over the hilltop city of Gordes, France
Tip #3: Partially obscure the sun. Partially obscuring the sun works well in increasing a focus area for the sun’s intensity and also reducing the contrast a bit. For the image below, the sea stack partially obscured the sun, creating a nice glow.
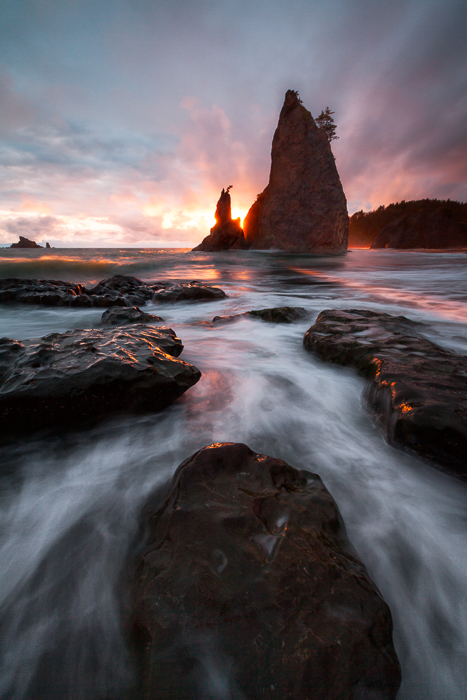
End of Day at Rialto Beach : Prints Available
A beautiful sunset on the shores of Rialto Beach
Tip #4: Use clouds as a diffuser. As a photographer, clouds are my best friend or worst enemy depending on the situation. In some cases, clouds will act as a nice diffuser which allow you to shoot into the sun. Notice the sun was higher in the sky, but the image still has the effect of low-angled light due to the diffusion of the sun.
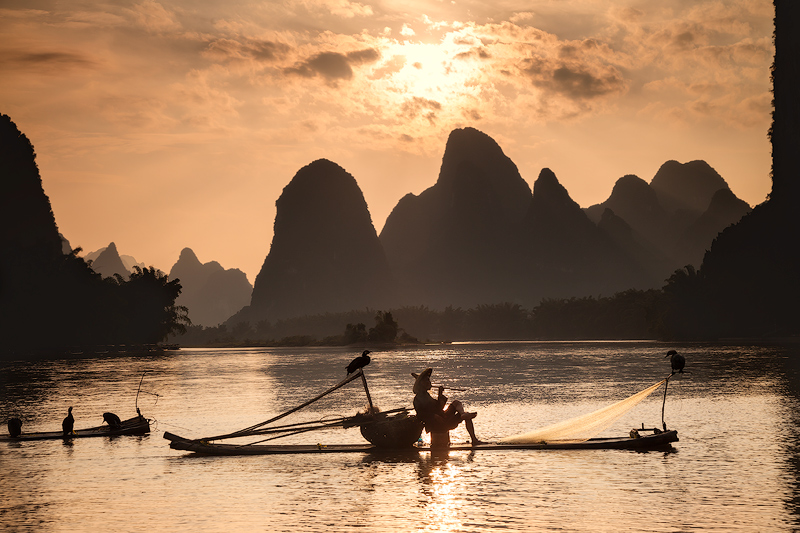
Xingping Fisherman : Prints Available
A fisherman on the Li River at Xingping near Guilin taking a break.
Tip 5: Put the sun at the edge of the frame. This is a similar concept as partially obscuring the sun. The sun was half-in / half-out in the image below.
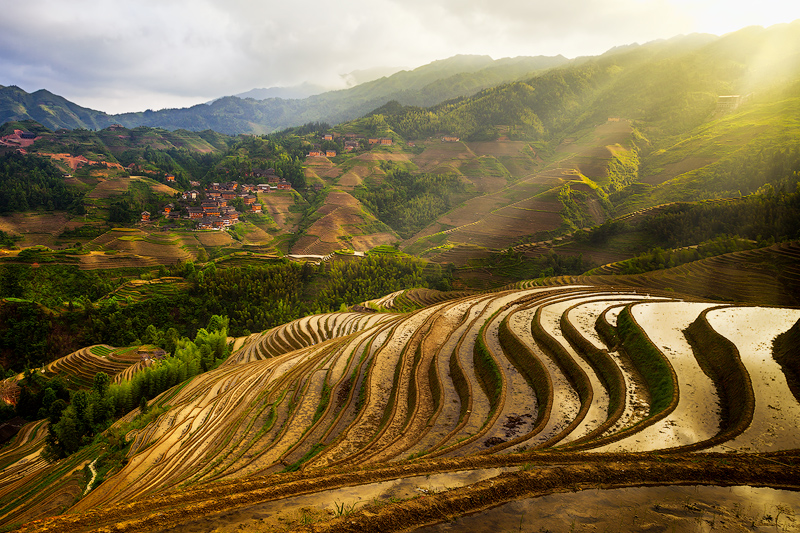
Sunset over the Terrace : Prints Available
Sunset at viewpoint 3 in China’s rice terraces
Tip 6: Get the exposure right! Because of the high level of contrast, it is very important to get the exposure right. In most situations, you don’t want to blow the highlights, which is when some of the pixels go white and lose all detail. It may be okay to have part of the image blown out, such as the brightest part of the sun, but avoid blowing out parts of the sky. You also usually don’t want the image to have a lot of black shadows with no shadow detail, unless you are creating a silhouette. Tip 7 is one solution to this.
Tip 7: Shoot multiple exposures if necessary. In these high contrast situations, I’ll often “bracket”, which means shooting the same shot with different exposures. I’ll do an underexposed shot to make sure I get the details in the sky, a normal exposure for the mid-tones, and an overexposed shot for shadow details. I usually don’t use all the exposures, but sometimes use two and blend them in Photoshop. If your highlights are getting blown and your shadows are black, then you should bracket. Some photographers use graduated neutral density filters as a way of reducing the contrast in the image.
Processing. The processing of high contrast images is another topic for another day. But, generally speaking, you will want to get your skies darker and your shadows lighter, while still having a nice amount of contrast in your image. This can involve blending your bracketed images, multi-processing the image in RAW, using the various exposure adjustment sliders, making adjustments in Photoshop, etc.