China Photography Trip Highlights

It has been over six weeks since my last blog. Much too long. There are three reasons for my long absence. First, I was preparing for an 18-day trip to China. Second, I was taking an 18-day trip to China. Third, I was recovering from 18 days in China.

A number of people have asked me what these trips are like. So, I thought it was fitting to do a blog about the trip, including where I went, what my strategy was for getting good photos and what my days were generally like. Sound good? If not, the good news is that there will be a blog post on a completely different topic in about a week.

Where did I go in China?

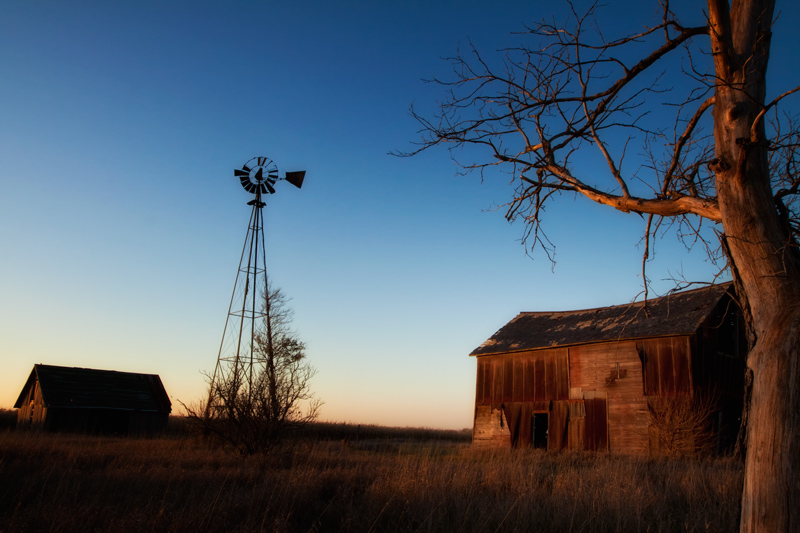
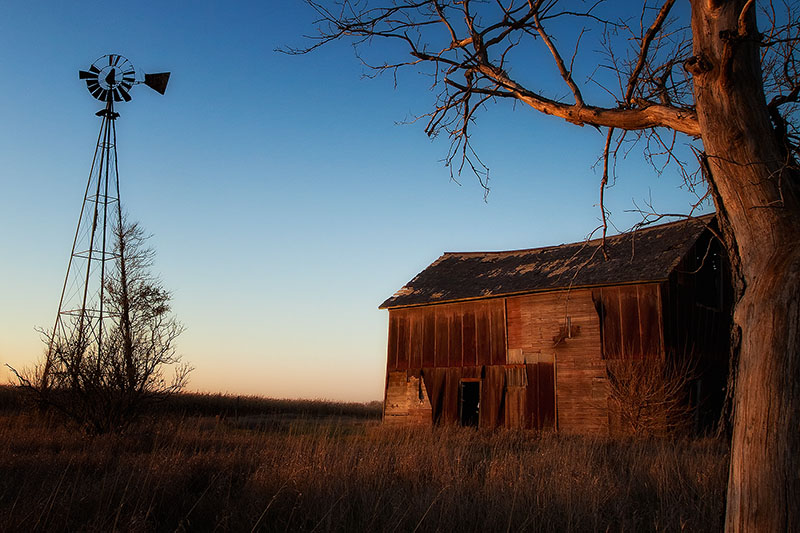
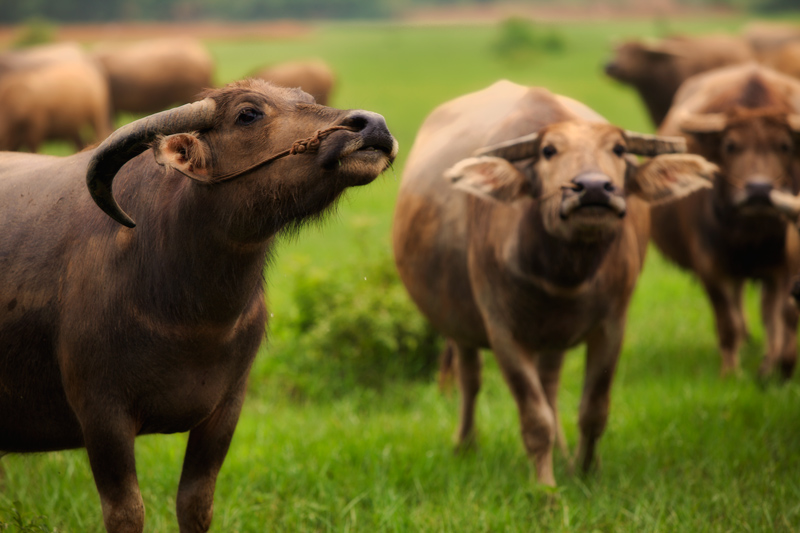
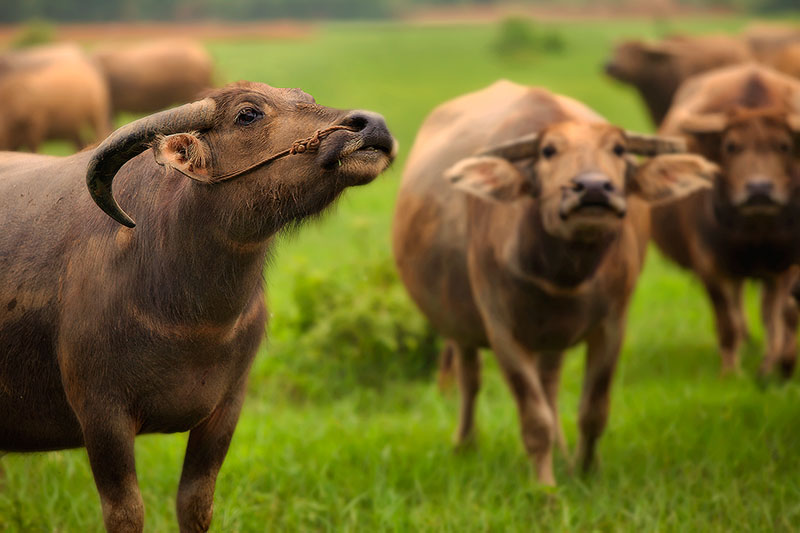
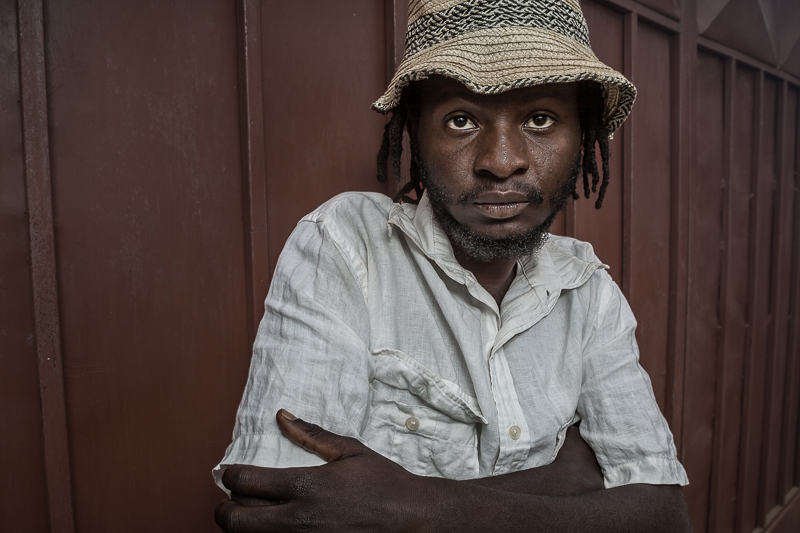
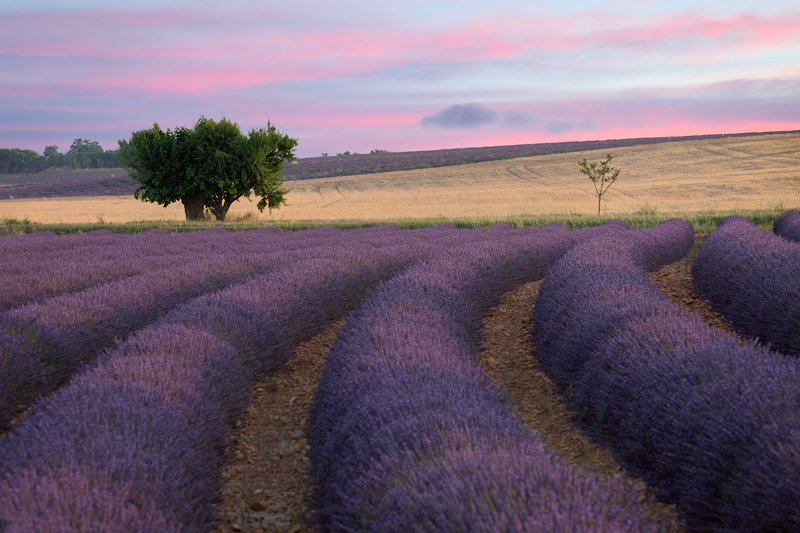
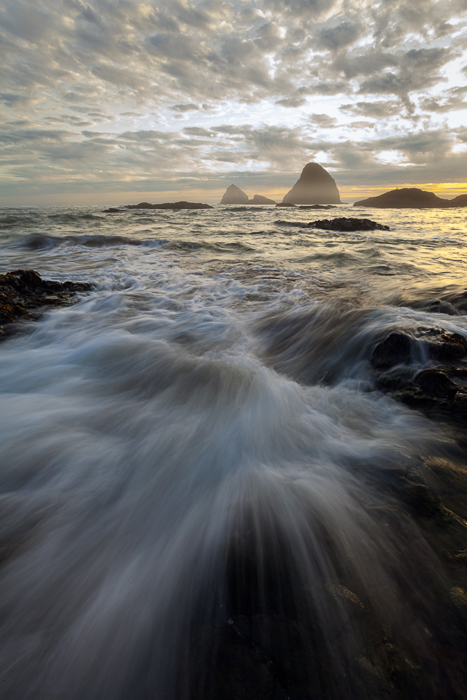
I flew into Guilin and spent 9 days there “on my own” with a local Chinese guide and driver. This area is known for the beautiful karst mountains and Li River, as well as the cormorant fisherman. The picture below has all three. A short drive away are the Longji rice terraces, which are amazing. I then traveled to XiaPu with a group of other photographers from Asia, led by Steve Chong (stevechong.com). Steve has become a good friend and is very experienced at leading photography tours in Asia. XiaPu is well known for its painterly landscape scenery.

asia,asian,boat,china,chinese,cormorant,environmental portait,evening,fisherman,fishing boat,guilin,hill,karst,karst mountains,landscape,li river,male,man,mountain,mountain range,people,portrait,range

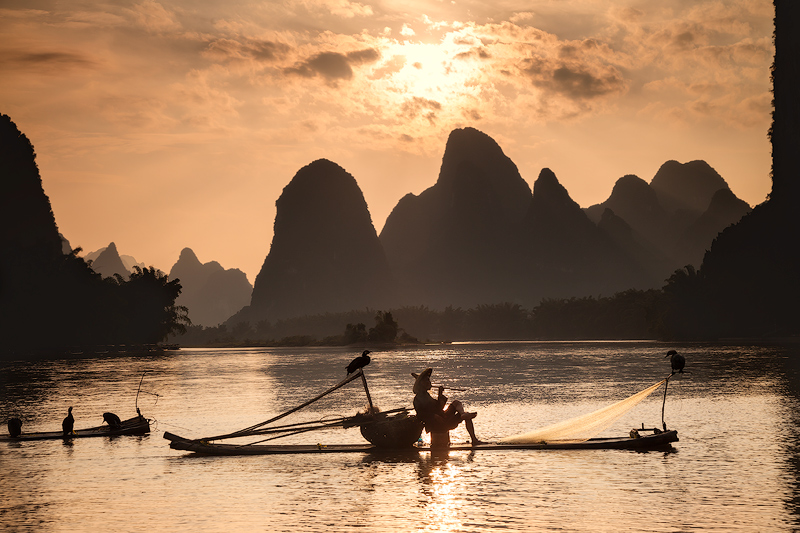
Xingping Fisherman : Prints Available

A fisherman on the Li River at Xingping near Guilin taking a break.

What was a “typical” day like?

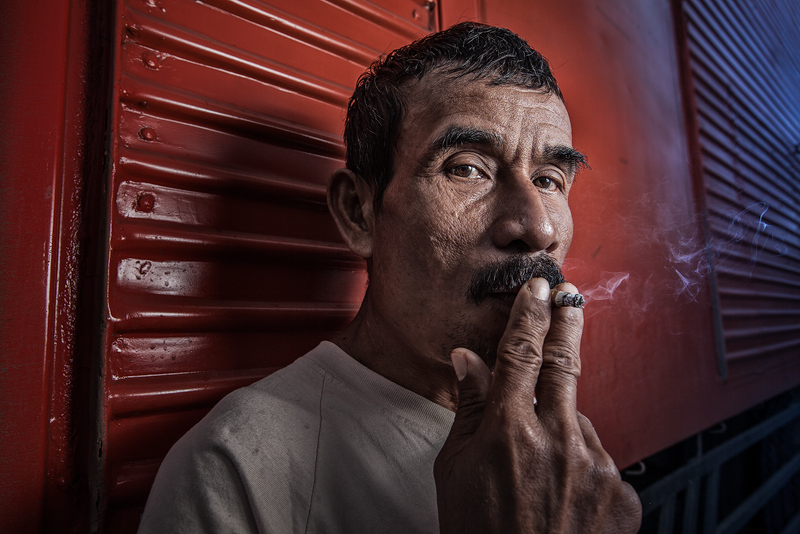
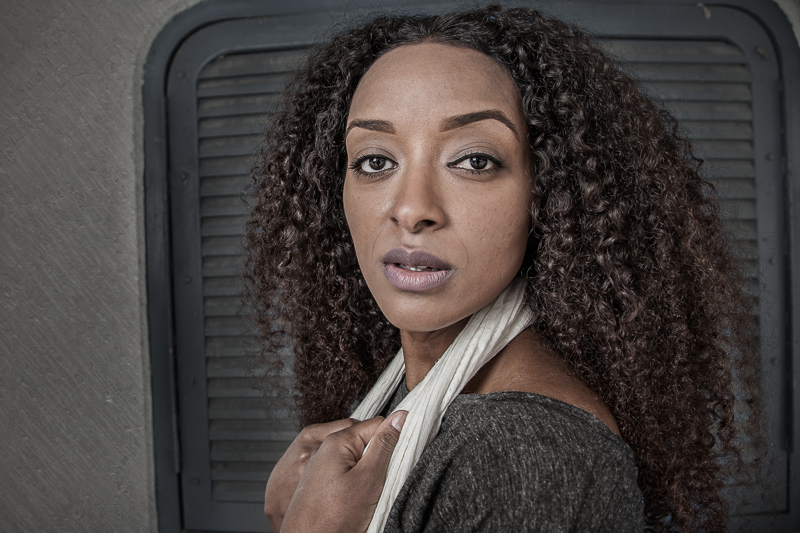
While in Guilin, I had a routine that I followed every single day for all 9 days, without exception. Every morning, I woke up around 4:00 and got to a great landscape location for sunrise. This usually meant climbing a hill or taking a boat in the dark to the location, then spending perhaps 3 hours there. After coming back and having breakfast, I would take a short break and then head out to local villages where my guide and I would walk around in search of interesting looking people for portraits. Our typical strategy was to inquire where the older people of the village lived and go knock on doors. After shooting portraits, we would head to a sunset location, where we would stay until after the sun went down. Then, the day ended with traveling back to the hotel, followed by dinner, backing up my photos and generally getting to bed around 11:30 or 12:00. So, the basic routine was sunrise-portraits-sunset with a few meals in between.

For the second half of the trip, I was with the group, so I followed the group’s schedule. Because this was focused more on landscapes and seascapes, most of the shooting was at the beginning and end of the day.

asia,asian,china,chinese,da zhai,da zhai terrace fields,dazhai,elderly,environmental portait,hat,longji,longji rice terraces,longsheng,male,man,old,older,people,portrait,smoking,standing,terraces,tian

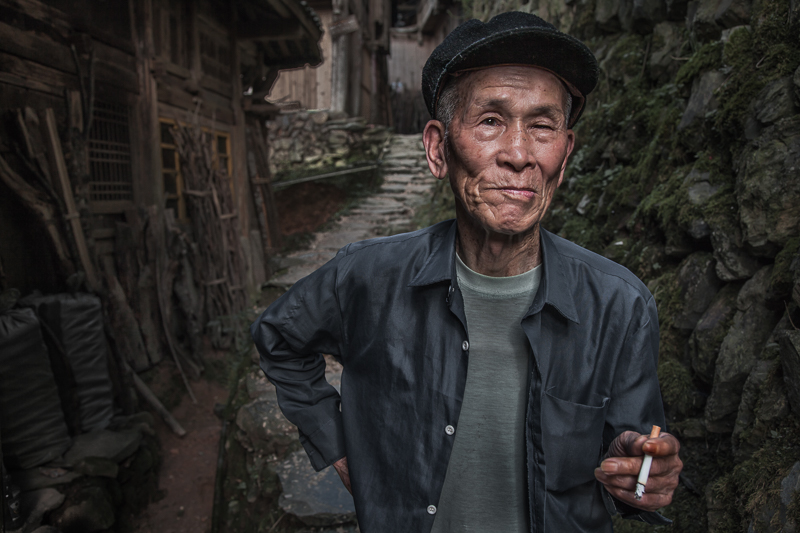
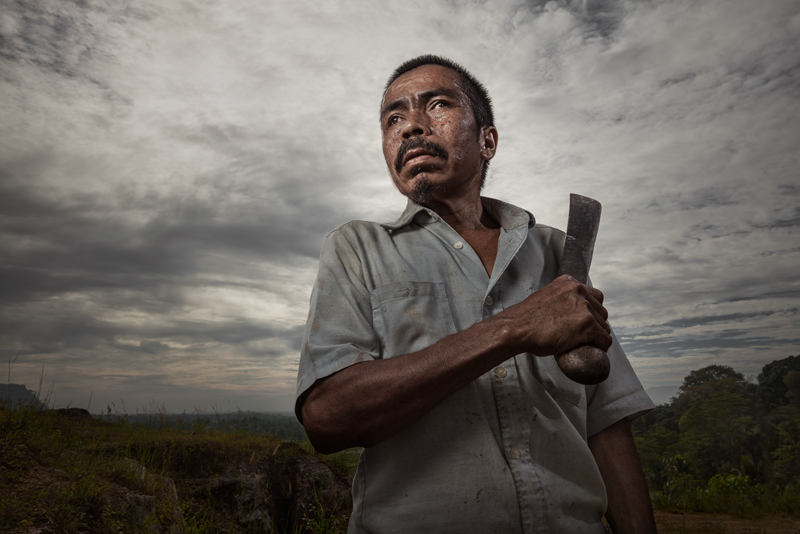
One Eye Closed : Prints Available

Chinese man from the Longji area takes a break outside his house.

What were the hotels and food like?

I had specifically instructed my Guilin guide that keeping costs low was a priority over staying in nice hotels. Let’s just say that he took this seriously and that I stayed in some pretty bad hotels. In one case, there was a dead bug on the floor the size of a small bird.. and a rusted drain pipe in the sink, so that all of the water and whatever else going down the drain ran out all over the floor. The room hadn’t been cleaned in a long time as far as I can tell. In XiaPu, I was with the group and stayed in a very nice hotel and ate good food.

What were your strategies for getting good pictures?

First, I carefully chose my local guide in Guilin. I was on a budget and found a number of people advertising themselves as photography tour guides. However, the fact is that a number of these are tour guides who occasionally bring photographers around. I really needed someone that knew photography well, including what spots were good for sunrise and sunset. I needed someone that was used to working long hours, including getting up very early. Also, I wanted someone that knew the local villages and could help arrange portrait shoots. Although there was a foreign guide or two available, I went with a well-connected, experienced local guide.

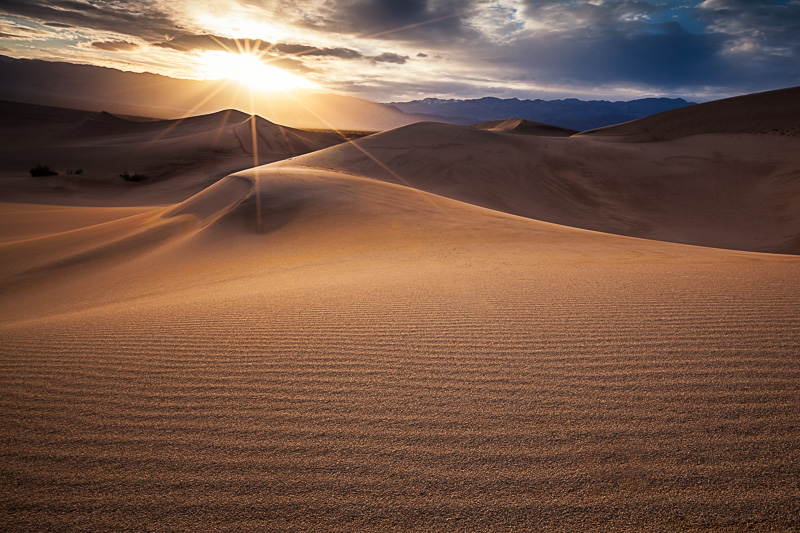
Second, I planned for bad weather. In this part of China at this time of year, the weather does not cooperate most of the time. For my landscape locations, I built in at least two opportunities at each of the higher priority locations and then had a full free day at the end of the trip for going back to a spot where I didn’t get good weather. Also, I didn’t let bad weather deter me from shooting. Even if it was raining, I hiked to my location and waited for a break in the weather. This paid off a couple of times, such as with the picture below.

asia,china,cloud,cloudy,guilin,hill,horizontal,li river,mountain,xiang gong shan

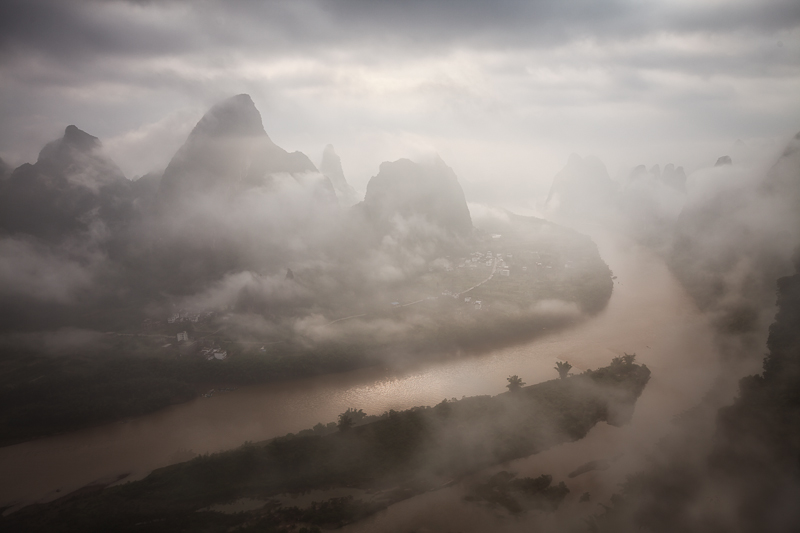
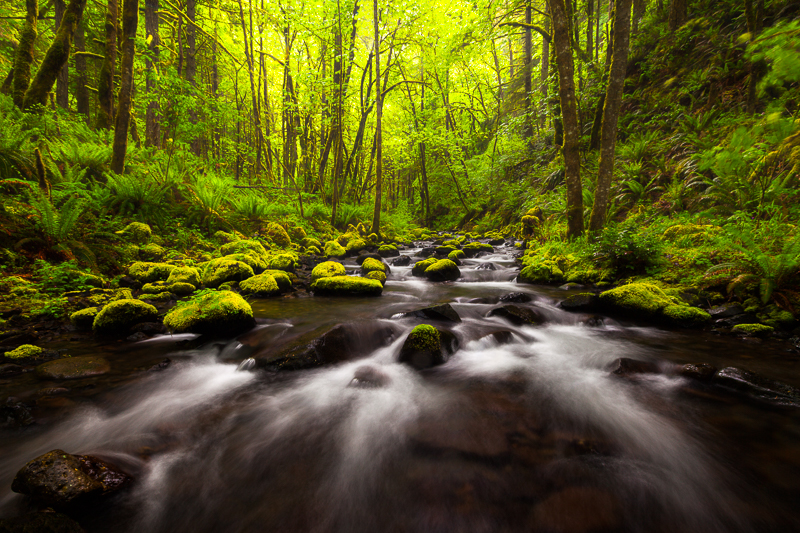
Clouds Over the Li : Prints Available

Clouds from a viewpoint atop Xiang Gong Shan mountain

Third, I made sure to keep the itinerary flexible. I made this clear up front when I booked my guide. On the 2nd day of shooting, we learned that the Li River was still flooded from torrential rains the previous week. The Li River was so high that the cormorant fisherman could not be on the river. My guide suggested we wait it out a day and hope for the best the following day. Instead, I flipped the itinerary on the spot and we went to the rice terraces first, re-booking all the hotels and driving in the opposite direction. This turned out to be the right decision, since the Li River remained too high for the fisherman until the day we returned back from the terraces. Much of the trip would have been ruined if we hadn’t changed the itinerary.

Fourth, I combined several different categories of subjects for variety. This was helped by combining the time on my own in Guilin, along with time with the group in XiaPu. Also, my focus on environmental portraits allows me to shoot during the day rather than only focusing on landscapes during the very beginning and end of the day.

2,Xia Pu,XiaPu,Xiao Hao,XiaoHao,abstract,asia,asian,beach,beautiful,bucket,buckets,china,chinese,evening,female,gold,golden,lady,looking down,sand,silhouette,sun,sunset,texture,two,walking,warmth,woma

Twins : Prints Available

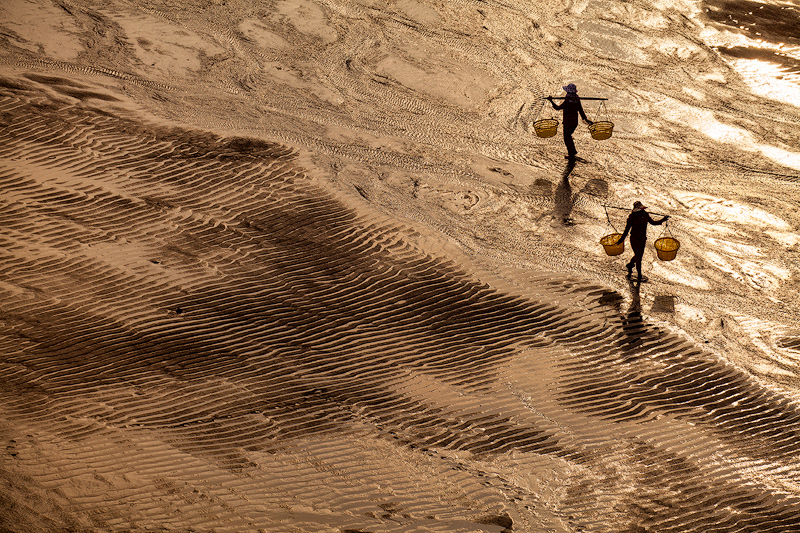
Two women in silhouette on beach outside XiaPu, China

What were some of the challenges I faced?

There are numerous challenges in a trip like this. For example, the travel logistics all went fine until the first day. Our flight into Hong Kong was diverted to Taiwan where we spent a night. This meant missing all my connections and my reserved hotel. I had to get on my phone to cancel and rebook flights and hotels. I also had one case where my local hotel name was not written in Chinese on the reservation, resulting in a very angry taxi driver. Sleep deprivation was a big challenge, as I averaged around 4 hours of sleep per night for 18 days. Lastly, I had to deal with a lot of rain, although I did have some good luck with the weather.

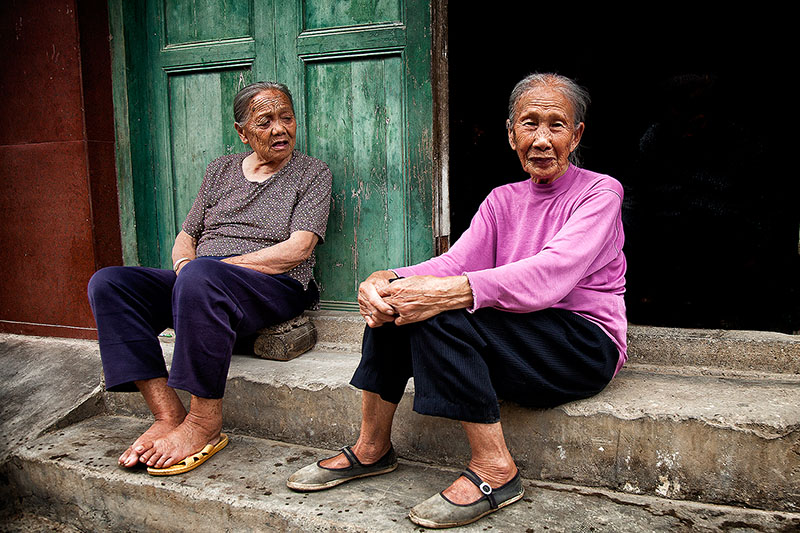
One final note: an interesting experience.

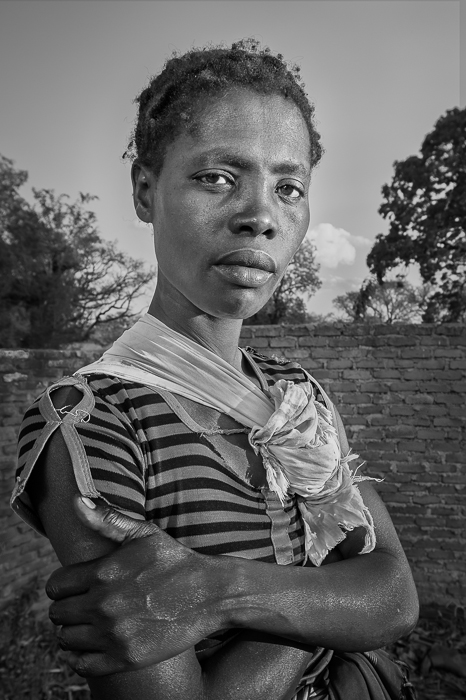
Back in 2012, I was in Guilin for four days and took the picture below. Fast forward three years later and I somehow ended up in the same village and came across these same ladies, sitting in the same positions on the same stairs and wearing the exact same clothes. This time, they had no interest in having their picture taken, but it was fun showing them the picture I took in 2012.

asia,china,chinese,doorway,elderly,female,friendly,horizontal,old,older,portrait,sitting,staircase,stairs,stairway,stairwell,structure parts,woman

Friendship : Prints Available

Older Chinese women sitting on the stairs

Big Impact with Small Subjects

If you regularly read photography articles, you’ve probably gotten the message by now that it is important to make sure the viewer knows what your subject is and looks at it. In many cases, this means a simple composition with the subject being a pretty prominent part of the image. However, you can also create effective pictures when the subject is very small in the image by guiding your viewer to the subject. Here are four ways to do that.

1. Even though the distant hikers are small in the picture, you can still identify them quickly as the subject of the photograph. This is primarily because the sidewalk forms a leading line. As discussed in a prior blog post, you can use leading lines to direct the viewer’s eyes.

center,central,europe,geothermal,horizontal,hveravellir,iceland,interior

Three Hikers : Prints Available

Path forms a leading line to hikers in the distance

2. A second way to make a small subject stand out is by framing it within the image, such as I’ve done below with the small tree in Namibia’s dead tree forest. Even though the tree is a small part of the overall image, your eye goes right to it due to the larger foreground tree framing it.

africa,african,dead tree,deadvlei,desert,forest,horizontal,namibia,namibian,sand,tree,woods

Clouds Over the Forest : Prints Available

Clouds over Deadvlei, Namibia’s dead tree forest

3. You can also draw attention to a small subject by lighting. I had no control over the actual lighting when taking the picture below, so I used dodging and burning in post-processing to brighten the subject and darken the rest. Also, the raised hands of the group help put a frame around him, so this image uses a couple of techniques.

asia,asian,bali,dance,dancer,east java,indonesia,indonesian,java,kecak & fire dance,uluwatu kecak,kecak & fire dance

Kecak Fire Dancers : Prints Available

Bali’s Kecak & Fire Dance getting underway after sunset.

4. A fourth way to make a small subject stand out in a big space is through color and/or contrast. Your eyes are easily drawn to the hiker below because of the red coat and because he is darker than the landscape he is walking in.

boiling mud pit,europe,geothermal,horizontal,hverir,iceland,lake myvatn,mud pit,myvatn,north,northern,sulfur,volcanic

Hiker at the Georthermals : Prints Available

A lone hiker walks through one of Iceland’s geothermal fields

Eliminating Distracting Elements

You can improve a photo by removing elements that distract from the subject. Giving the viewer less to look at helps to focus more attention on the subject. Although you should compose with this in mind from the start, you can also re-evaluate your image during post-processing and simplify (again) then. This blog contains a few examples of where I eliminated some distractions during post-production to improve the picture.

The top image below has an extra barn. The barn itself isn’t bad and doesn’t ruin the picture. However, in this case I felt it distracted from the big barn, which is the main subject. So, I cropped the picture to focus attention on the subject.

Before
Red-Barn-and-WIndmill-Distracting

After

america,barn,building,farm,highway 55,horizontal,il,illinois,midwest,mill,north america,rural,united states,us,usa,windmill

The Old Red Barn : Prints Available

A classic old red barn and windmill in early evening light

Ugly white skies are almost always a distraction. They draw attention because they are the brightest thing in the picture. So, the viewer looks at the ugly sky first instead of the subject. Had I had a more powerful lens, I would have eliminated the ugly white sky while shooting. However, I planned to crop the image later. Notice how much more focused the image is with the sky and the “1/2 child” cropped out.

Before
Tukad-Unda-Kids-Distracting

After

asia,asian,bali,boy,dam,east java,indonesia,indonesian,java,klung kung,male,splashing,swimming,tukad unda river,water,young

Tukad Unda Kids : Prints Available

Children playing with water in a dam on Tukad Unda River

Animals generally do not listen to anything I say. That includes the cows below who were not positioning themselves as I wanted. In the picture below, I had to do a little facial surgery using Photoshop to eliminate a distracting horn on the right side. I also eliminated the back of a cow behind the main subject. Getting rid of these distractions improved the picture.

Before
China-Water-Buffalo-Distracting

After

asia,buffalo,china,chinese,herd,horizontal,mammal,water buffalo

The Water Buffalo : Prints Available

Small herd of curious water buffalo

Transitioning From Cool to Warm

It is March here in Chicago and most people are a little tired of cold weather and are waiting for Spring. So, it is a fitting blog topic to talk about a cool-to-warm transition in a photography context. I’ve touched on this briefly in a past blog, but you have probably forgotten about that if you even read it.

Transition can give life and dimension to an image. There are a few types of transitions possible, one of which is moving from a warm color(s) to a cool color(s) or vice versa. As you know from a previous blog, blue is a great example of a cool color, while yellow is a great example of a warm color. Moving from blue to yellow within your image creates transition. This especially works in landscape images, but can be effective in other types of pictures as well. Here are some examples…

asia,asian,boat,dock,dock worker,environmental portait,indonesia,indonesian,jakarta,java,portrait,ship,smoking,sunda kelapa,west java

Taking a Break : Prints Available

Indonesian dock worker taking a break behind a shipping container

The image above of an Indonesian dock worker starts with warm on the left and moves to a cool color in the upper right corner.

america,california,death valley,death valley national park,dune,dunes,evening,mesquite dunes,north america,sunset,united states,us,usa,west

Sunset Over Mesquite Dunes : Prints Available

Horizontal view of Death Valley’s Mesquite Dunes at the end of the day.

This picture of the Mesquite Dunes transitions from warm sand and sun to a cool looking sky in the upper right corner.

beautiful,columbia river gorge,gorton creek,horizontal,north america,northwest,oregon,pacific northwest,pacific northwest portfolio,rock,rushing,s

Gorton Creek : Prints Available

Lower Gorton Creek in the Colombia River Gorge

The above picture of Gorton Creek in Oregon’s Columbia River Gorge does the opposite… it moves from a cool foreground to a warmer background.

In some cases, the transition can occur naturally in your scene. In other cases, you can accomplish this in post-processing. You can do this in a variety of ways in Photoshop, but one way is to add a solid color layer with a warm or cool color and then add a gradient mask to make the transition. Be sure to reduce the opacity of your layer. Or, warm or cool photo filters can be used with the gradient mask to make the transition.

Including Hands in Portraits

When I am shooting portraits, I like to include the subject’s hands in the composition. If you follow my blog, you know that I shoot my portraits with a (somewhat) wide angle lens. This means that including the hands in the foreground will make the person’s hands look a little larger than normal and draw attention to them. Not everyone likes this, but I think it adds interest in certain types of portraits.

The picture below is of a super-cool Malawian guy. Here, I’ve used the hands and arms in the foreground to frame the picture.

africa,african,black,environmental portait,juvenile,malawi,malawian,male,man,portrait,young

Cool Malawian : Prints Available

Super cool Malawian guy in an alley in Lilongwe.

In some cases, it works really well if the person is doing something with their hands. I am not suggesting that holding a machete works in every situation. For example, if you are a wedding photographer, I wouldn’t suggest this one. But the farmer below had a machete and it works great in this picture.

asia,asian,environmental portait,indonesia,indonesian,jakarta,java,knife,machete,male,man,portrait,rumpin,west java

Stand Tall and Hold a Machete : Prints Available

Indonesian man holding a machete with the rising sun behind him.

One last example from another Malawian… this time a woman. Here she is simple grabbing her arm with her hand. Notice her hand looks bigger than normal, due to the wide angle lens I used.

africa,african,baby,black,child,daughter,environmental portait,evening,family,female,girl,infant,juvenile,lady,malawi,malawian,mom,mother,portrait,woman,young

Portrait of a Malawian Woman : Prints Available

A young Malawian woman poses for the camera in early evening sunlight.

Making Your Images Glow Using the Orton Effect

The Orton Effect is a processing technique which helps make images “glow”. This technique is quite popular among landscape photographers. Although it was originally used in film processing, this is accomplished in Photoshop by combining a blurred image with the original (non-blurred) image and then applying some brightness and/or contrast adjustments.

I’ve seen different ways to get the same effect, but the version I prefer is one taught by Sean Bagshaw. It takes an extra step or two to set up, but then gives you more control. First, here are some images to show you what the Orton Effect looks like:

Image Without the Orton Effect

Lavender-No-Orton

Full Orton Effect Applied to the Entire Image

This is too much Orton, but you can see the glow I am referring to. Notice that the sky goes white due to the increased brightness I used (more on that later) when the full effect is applied.

Lavender-100-Percent-Orton

Reduced Orton Effect Applied to the Entire Image

For this image below, I’ve reduced the effect to 30%, which is in the range I’d normally apply, but have left it applied to the entire image. The sky is still lighter than without the effect, which is undesirable.

Lavender-30-Percent-Orton

Orton Effect Applied Selectively

In this case, I’ve applied the effect moderately in selected parts of the image, namely the lavender, the distant yellow field and the right part of the larger tree which is getting sunlight.

Lavender-Selective-Orton

My opinion is that images look their best when the Orton Effect is applied selectively to only part of the image rather than the entire image. Here is how to create the effect in Photoshop (Note: I am assuming you have some basic knowledge of Photoshop here):

  • First, make a copy of the background layer (Layer – Duplicate Layer).
  • Second, create a new group folder by either clicking on the group folder icon or going to Layer – New –> Group. You can name the folder “Orton”. Move the copy of the background layer into the Orton folder.
  • Third, create two brightness/contrast adjustment layers in the Orton folder. Move one layer above the background layer copy and one below.
  • Fourth, select the top brightness/contrast layer and clip it to the background layer copy by doing a Control-Click (Mac) or Right-Click (Windows) on the brightness/contrast layer and choosing “Create Clipping Mask”. Change the blending mode to “Luminosity”. Then double-click on the left side of the layer to open up the adjustment panel. For now, increase the brightness to around 40 or so and decrease contrast to around -20 or so. You will adjust it later.
  • Fifth, select the bottom brightness contrast layer and double-click on the left side of the layer to open up the adjustment. For now, increase the brightness to around 40 or so and decrease contrast to around -20 or so. You will adjust it later.
  • Sixth, click on the background copy layer and choose “Filter-Blur-Gaussian Blur”. When the filter opens, you will have one value to adjust. Generally you don’t want the value too high or too low. I generally like the effect somewhere between 7 and 40 and usually between 10 and 15. Click okay and then change the blending mode of the layer to “Soft Light”.
  • Seventh, now that you have the full effect applied, it is time to make adjustments to the brightness/contrast layers. Double-click on the left side of each brightness/contrast adjustment and try modifying the adjustments to get the image looking more like you want, keeping in mind you will be lessening the overall effect. Sometimes, it looks good to apply increased contrast rather than decreased.

Now, there are two options:

  • Option 1: If you want to apply the effect to the entire image, then simply click on the Orton folder layer and reduce the opacity until it looks how you want it to. I usually settle on around 30% opacity.
  • Option 2: If you want to apply the effect selectively (recommended), then Alt-Click on the “add layer mask” icon while the Orton folder layer is selected to add a black mask to the layer. Then select a soft brush using white as the foreground color and reduce the flow on the brush to around 15%. Paint white on the mask to build up the effect in the areas of the image that you want. In general, I find that having the distant elements of the image glow looks better. Also, you may want to retain the detail in certain parts of the image, such as a detailed foreground subject, so avoid painting the effect into those areas. I also usually avoid applying the effect to bright areas of the sky, as the Orton Effect (depending on your settings) will typically brighten that part of the image.

Adding Texture to an Image

Little things mean a lot in photography. Sometimes a minor modification to a photo can make a real difference. For the image below, I thought it wasn’t quite right. So, I sent it off to a mentor of mine… Indonesian photographer Rarindra Prakarsa… who always has great ideas and suggestions.

Rarindra suggested adding a texture to the white wall, which really made a difference in the image. Below is the before and after:

Before

Woman-With-Cool-Hair-No-Texture

After

america,beautiful,brunette,castaways,chicago,environmental portait,fashionable,female,il,illinois,midwest,north america,north ave beach,north avenue beach,portrait,scarf,united states,us,usa,woman

Love the Hair : Prints Available

Portrait of an elegant woman on North Avenue Beach in Chicago

In this blog, I’ll focus on the addition of the texture to the wall. This was actually the first time I’ve added a texture to an image. Here is what I did:

First, I had already taken pictures of textured walls. The one I used was from Venice. You can also buy texture images, but what’s the fun in that? When you take the picture, be sure to have the camera facing straight at the textured surface.

Second, I brought the textured image into the Photoshop file as a separate layer, placing it as the top layer. I added a mask to the texture layer to mask out everything except the white wall. Although a selection tool could also be used, in this case I just temporarily reduced the opacity of the texture layer (so that I could also see the image beneath it) and used a black paintbrush on the mask over everything but the wall.

Third, I changed the blending mode to “overlay”. You can also try different blending modes for a variety of effects, but “soft light” and “overlay” are good options.

Fourth (optional), I added a hue / saturation adjustment and clipped it to the texture layer. I then de-saturated the texture layer.

Fifth (also optional), I added a brightness / contrast adjustment layer and, in this case, reduced brightness and increased contrast a bit.

Sixth, and last, I adjusted the opacity of the texture layer down to around 45%. However, the amount should be based on your judgment of what looks good.

Perfect Camera Placement

Most of the time, you have a variety of options on camera placement while taking a picture. However, there are certain circumstances where “perfect camera placement” is essential. Even if you don’t consider yourself a perfectionist, it is a good idea to “practice perfectionism” in these cases. Below are a few examples where getting camera placement exactly right made a big difference.

First, if you are going for symmetry in an interior cathedral shot, the camera has to be perfectly centered. Look in the lower right and lower left corner as well as the top of the image and you’ll notice it is perfectly symmetrical. Cathedral shots (or any shot with symmetrical detail like this) have to be taken dead-center. Spend the extra time to get your camera positioned perfectly. One inch to the right or left can ruin the shot.

building,cathedral,chicago,church,illinois,midwest,nicholas ukrainian cathedral,north america,united states, saint nicholas, st nicholas, catholic

Saint Nicholas Cathedral : Prints Available

Interior shot of Chicago’s own Saint Nicholas Ukrainian Catholic Cathedral.

Second, wide-angle lenses with foreground subjects in the composition often require perfect camera placement. Sometimes, the perfect place for your camera and tripod isn’t always the most comfortable location, such as with the shot below. However, in order to get the splash of the wave to be a prominent part of the composition, there was one option for camera placement. Because of the wide-angle lens, moving my camera back a little would have resulted in the wave being a much smaller, and less significant, part of the composition.

cloudy,coast,coastal,north america,northwest,ocean,oceanside,oregon,pacific northwest,pacific ocean,sea stack,united states,vertical,water body,wave

Wave Crash at Oceanside : Prints Available

A wave crashing on the rocky shore of Oceanside, Oregon is frozen in time

It is Carnival in Venice this week, so I’m using an image from my trip there a few years back as another example. For this picture, there was really only one good spot to shoot from… laying on the floor underneath the piano and shooting up at the model. This made the dress closer to the camera and caused it to distort into a triangle shape. An eye-level shot would not have worked as well in this case. So, it is worth taking your time and trying a number of different perspectives in order to arrive at what you consider to be the best possible camera placement.

carnival, celebration, colorful, costume, europe, horizontal, italy, mask, myriam, myriam melhem, palace, party, red, venice

Lady in Red : Prints Available

Gorgeous Carnival model in red inside a Venetian palace

Combining Light Painting with the Night Sky

Sometimes the pictures that require the most effort to take end up paying off the most. This was certainly the case for me during a recent trip to Door County, Wisconsin. A friend and I drove through the night, arriving at Cave Point at about 3 am. We then waited for the moon to go down and took some night pictures in the pitch blackness on the frozen beach. The image below was well worth being a little tired and cold for a couple hours.

america,cave point,cave point county park,dawn,door county,ice,lake,lake michigan,light painting,midwest,north america,snow,twilight,united states,us,usa,white fish dunes,whitefish dunes,whitefish dun

Starry Sky Over Cave Point : Prints Available

Stars in the night sky over Door County’s Cave Point in Winter

I’ve had a few people ask me how I took this picture, so I thought I’d put together a quick summary in a blog. I’ll approach this by covering the four concerns I had in mind when shooting, namely 1) composition, 2) focus, 3) exposure for the background, and 4) lighting for the foreground.

Before we start, there are a few conditions that need to be present for night sky images like this. Obviously, you need to be able to see a lot of stars, so no cloud cover is important. Equally important, you need a very dark location away from light pollution. Your backyard will not work. Deserts are ideal, but this remote area along Lake Michigan met “minimum standards” for lack of light pollution. You also want an area with some interesting foreground elements.

Another consideration is the moon. You definitely do not want the moon in front of you as it will be the equivalent of shining a flashlight into your camera. In some cases, having the moon to your back serves to light your foreground as you shoot, which might be a good thing. In our case, we waited for the moon to go down and had a couple hours to shoot before sunrise.

Now, for my four main concerns while taking this shot:

Composition – It is easy to get sloppy in composing night pictures. This is because: a) it is tough to set up your composition in the dark; and b) it is easy to just focus on how great the stars look. However, a compelling composition, including an interesting foreground, makes all the difference. If possible, you can set up your composition on your tripod while it is still light. In my case, we didn’t arrive until the middle of the night, so I used “live view” in my Canon camera and then shined a flashlight around the foreground to determine my composition.

Focus – You will generally be using a wide angle lens for night pictures that include a foreground element and the sky. So, there is a good chance that focusing on your subject will mean focusing on infinity. To focus, I used a flashlight on the subject and used auto focus, zooming in using live view for the most accurate focus (message me if you want advice on how to do this). Then, I switched off auto focus.

Exposure for the Background – After getting my composition and focus set, I next made sure that I got a good exposure for the background, namely the stars and the horizon. Although the horizon looks a bit like a sunrise here, it is actually light pollution from across the lake.

I first set my camera to Manual, opened up the aperture as wide as possible (in my case to 2.8) and set the shutter speed for 30 seconds. If you are using a wide angle lens, you don’t want to go above 20-30 seconds or you start to get star trails (even shorter shutter speeds are necessary when shooting telephoto). Then, I adjusted the ISO up high enough so that the stars became visible and the highlights on the horizon did not get blown out. So, my settings here were ISO 2500, f2.8 and 30 seconds. I used in-camera noise reduction because of the high ISO.

Exposure for the Foreground – I was literally in pitch blackness as I was shooting. The foreground subjects had no light on them. Although foreground silhouettes look good in some cases, I thought a lighted foreground would look much better. Had I gotten there much earlier, I could have set up my tripod and taken a picture before it got dark… then blended the foreground with the night sky in Photoshop. However, in this case I lit the foreground with a flashlight during the 30-second exposure.

Basically, you just need to experiment. Because the ISO was high, it only took a little light before the foreground would get too bright. I took 6 or 7 pictures until I got the foreground lighting how I liked it. I found that using the “edge” of the flashlight’s beam (not the center) and moving the flashlight around very quickly and only for a second or two worked the best. You want to avoid hot spots in the image. You are better off with a less powerful flashlight in this case. Practice makes perfect here.

Processing – Post-processing was critical in this image. In a few weeks, I’ll be traveling to Death Valley (I can’t wait!) and plan on shooting some additional pictures of the night sky. After that trip, I’ll post an additional blog on processing night pictures like the above image and show you the results from that trip. Stay tuned!

How to Create Starbursts in Camera

Although the scenery in the image below of Gordes, France is spectacular, the “sunburst” or “starburst” created by the sun adds a nice finishing touch.

beautiful,brilliant,europe,france,gordes,horizontal,southern,sunrise

First Light Over Gordes : Prints Available

Beautiful sunrise over the hilltop city of Gordes, France

This is really easy to do. You will need a “point source of light”, such as the sun, somewhere in your image. To get the starburst, use a wide angle lens and set your f/stop to a small aperture, such as F/22. Then point the camera and shoot as normal. That’s about it. The starburst is created by the combination of a wide angle lens with a small aperture.

Here is another example:

africa,african,beam,burst,dead tree,deadvlei,desert,forest,horizontal,namibia,namibian,ray,sand,starburst,sun,sunburst,tree,woods

Desert Sunburst : Prints Available

Morning burst of sun over the top of the dunes at Deadvlei

You can experiment with different f/stops to see what kind of effect you get. If the sun is large in the frame, you can create a smaller point source of light by positioning a foreground element in front of the sun to partially obscure it.

One thing to keep in mind is that working with a small aperture means a longer shutter speed is needed. So, don’t forget your tripod.