Oil and water pictures can look pretty amazing and are fairly easy to take. To do so, you’ll need a way to trigger off-camera flash, a macro lens (or other way to take close-ups, such as a lens with an extension tube), something with a colorful pattern, a tripod (recommended), a glass dish or container with a flat bottom surface, oil (vegetable or olive oil work) and water. Once you’ve collected all this, here are a few simple steps for how to take these images:
Oil and Water : Prints Available
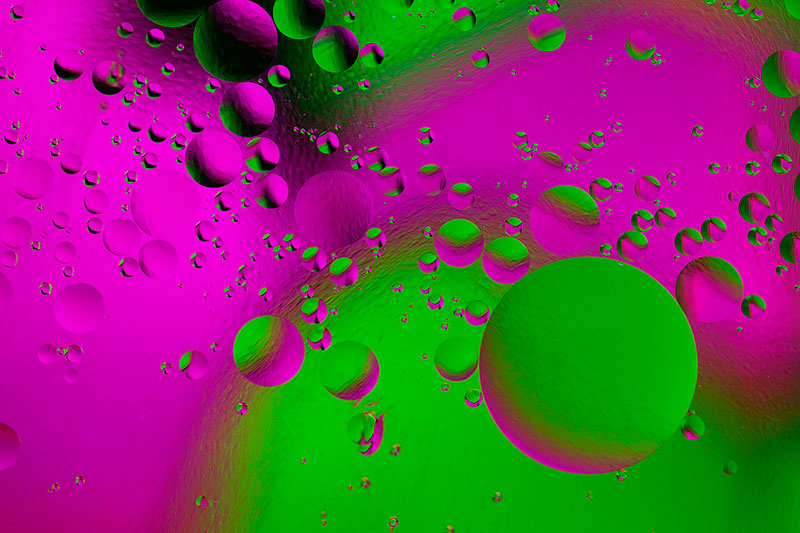
Close-up of bubbles made from oil and water
1. Use a glass plate or baking dish with a flat bottom surface. Put just enough water in the dish to cover the bottom of it, perhaps around 1/4 of an inch at most.
2. Now comes the tricky part. You’ll want to get the dish suspended at least a foot or so off of the ground or some other surface. The dish should be suspended flat and there should be nothing in the center of the dish. In other words, you will need to be able to look through the dish from the top and see the floor or surface below through the dish. I used a square baking dish and balanced two opposite sides of it on chairs so that the entire middle area of the dish was suspended. I only dumped the water over once, which isn’t bad.
3. After you get the dish stable, you will want something colorful underneath it. I took some construction paper of various colors and cut out little circles and set them on the floor about a foot or two below the suspended baking dish. You can also use a colorful shirt, scarf, CD cover, or anything you want with good colors and an interesting pattern.
4. Set your camera with a macro lens up on a tripod (preferred) above the dish pointed straight down through the water.
5. Set up your off-camera flash so that it points towards whatever colorful thing you have below the dish. In my case, I set the flash on the floor on a very small stand pointed down towards the construction paper. The idea is to light up the colorful object.
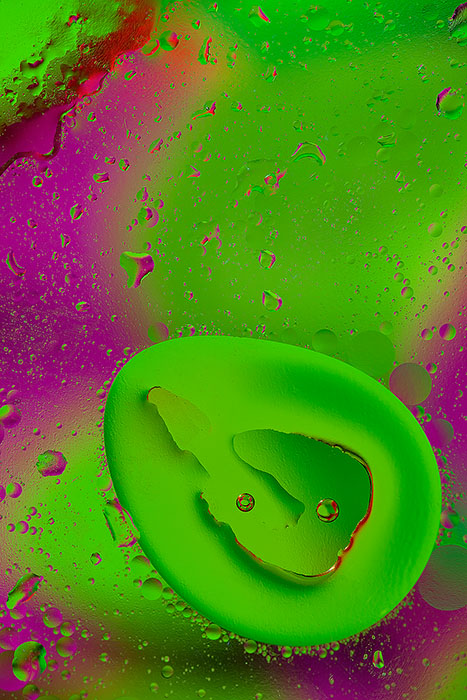
Pink and green oil and water close-up
6. Set your camera to manual. Because this is a macro shot and the bubbles have shape to them, you will want some depth of field. Something in the range of f11-f16 should work fine. As for the speed, you will want it slower than your camera’s maximum flash sync speed.
7. It probably makes sense to set your flash to manual. Using your camera and flash triggering device, take some test shots and make adjustments to the flash power until you get the level of brightness you’d like.
8. Now, add just a little of the cooking oil and you should get some bubbles floating around. You can move them around as you like.
9. Take a lot of shots, while checking the results in the monitor. Move the bubbles around and recompose. In my opinion, you are best off shooting a pretty small section so that just a few larger bubbles are in your composition, such as with the above examples.
10. In Photoshop, you may want to clone out a few bubbles in post-processing if it helps simplify and improve the image.
Have fun!